Setup TagSpaces Enterprise
⚒ This tutorial is work in progress
Introduction
Overview
-
User management - Cognito
-
File hosting - S3
-
Configuration data for the location and tag libraries - DynamoDB
-
Access to DynamoDB - GraphQL
-
Amplify, Cloudformation
Initial setup of the amplify project
Before you start it's need to install amplify CLI:
npm install -g @aws-amplify/cli
Clone the tagspaces amplify repository git clone https://github.com/tagspaces/tagspaces-amplify.git
GitHub username and access key will be provided by the TagSpaces team
- Clone TagSpaces Repository
yarn ts-clone. - Init amplify project in a cloud
amplify init.- Environment name - this could be something like this: your-project-prod or your-company-name-dev
- Group name - e.g.: project-name-group1, this is the id and the tenant used in the configuration of the dynamoDB bellow.
- Publish it
yarn amppublish- this will makeamplify pushcreate storage and functions &&lify publishZipping artifacts and deploy it to the cloud.
Amplify cli will create user files S3 bucket and you can find the bucket name in generated tagspaces/app/aws-exports.js -> "aws_user_files_s3_bucket": "tsdatastorage165054-dev" To create user to access your bucket created from amplify: https://docs.tagspaces.org/tutorials/s3-bucket-locations#step-3---create-user-for-accessing-the-bucket
Create IAM user for accessing the buckets
With custom policy allowing access only to the needed buckets
Don't forget to replace the bucket name in User Policy json.
Configuring the default locations and tag library
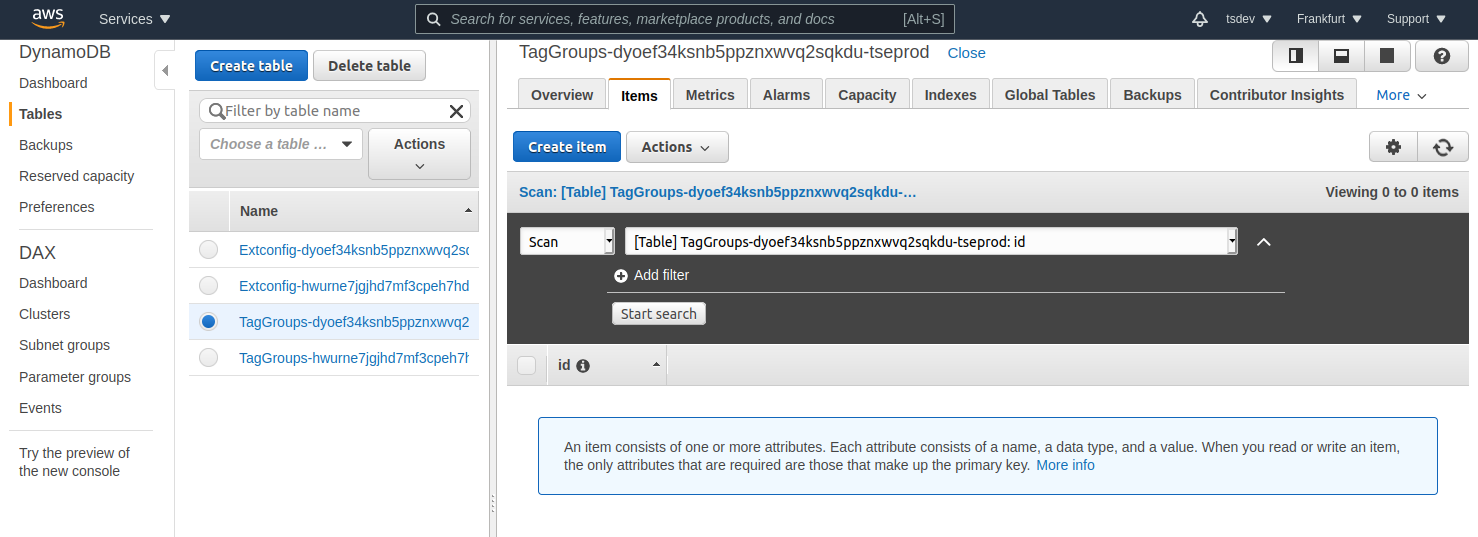
Open DynamoDB and insert records in Extconfig... and TagGroups... tables.
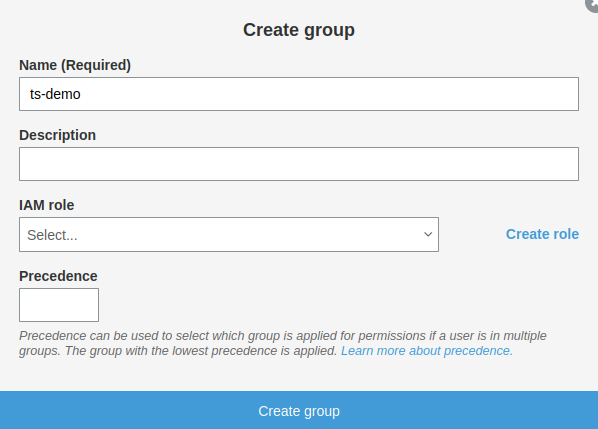
Important entries in both tables are id and tenant (ts-demo in the following example), which is actually a Cognito group. Using the groups you can have separate configuration for different group of users. So users assigned in Cognito to a given group will see the locations and tag groups configured with the group name as id and tenant.
Create group
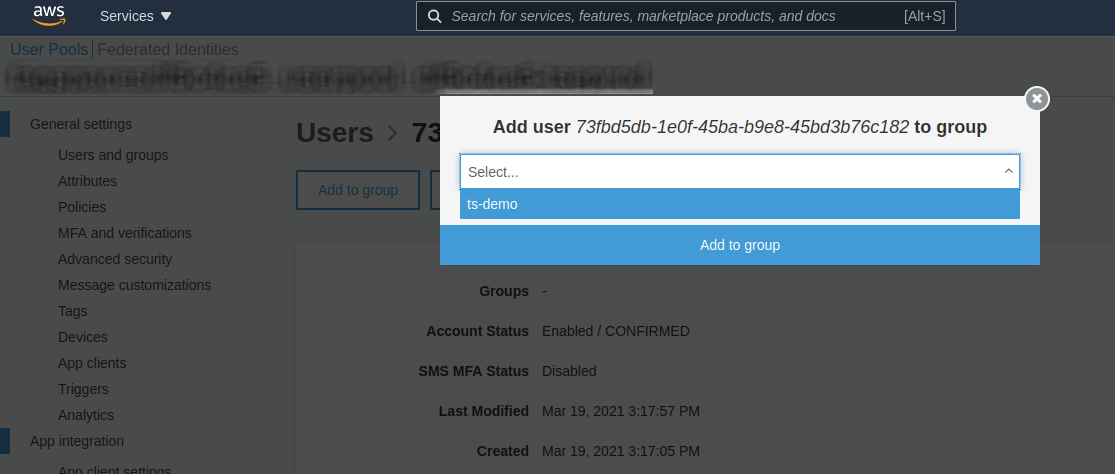
Assign group to user
Create entries in the dynamoDB tables:
Locations
{
   "id":"ts-demo",
   "tenant":"ts-demo",
   "createdAt":"2021-01-28T20:04:50.849Z",
   "IsFirstRun":false,
   "Locations": [
      {
         "name":"Your first AWS S3 location",
         "uuid":"uuid",
         "accessKeyId":"XXXXXXXXXXX",
         "secretAccessKey":"YYYYYYYYYYYYYYYYYY",
         "bucketName":"tsdatastorageXXXX-dev",
         "watchForChanges":false,
         "disableIndexing":false,
         "fullTextIndex":false,
         "type":"1",
         "path":"",
         "isDefault":false,
         "isReadOnly":false,
         "region":"eu-central-1"
      },
      {
         "name":"Your second AWS S3 location",
         ...
      }
   ],
   "updatedAt":"2021-01-28T20:04:50.849Z"
}
Describe isNotEditable
Tag Library
{
   "id":"ts-demo",
   "tenant":"ts-demo",
   "createdAt":"2021-01-28T20:04:50.849Z",
   "updatedAt":"2021-01-28T20:04:50.849Z",
   "replace":true,
   "tagGroups":[
      {
         "title":"Tag Group #1",
         "textcolor":"#ffffff",
         "color":"#008000",
         "uuid":"159a64bc-15ec-44d0-85ee-1215c157420d",
         "children":[
            {
               "textcolor":"#ffffff",
               "color":"#008000",
               "title":"tag1",
               "type":"plain"
            },
            {
               "textcolor":"#ffffff",
               "color":"#008000",
               "title":"tag2",
               "type":"plain"
            }
         ]
      },
      {
        "title":"Tag Group #1",
        ...
      }
   ]
}
You can find the group which have been configured in the file team-provider-info.json located in the folder ./amplify/backend/
Upgrading to a newer release of the TagSpaces Enterprise
To update execute yarn ts-update. In order to update the tagspaces-pro repository you should use the tagspaces-amp username and the provided personal access token.
TagSpacesDev:~/environment/tagspaces-amplify (eu-west-2) $ yarn ts-update
yarn run v1.22.10
$ cd tagspaces && git pull && cd extensions/tagspacespro && git pull && cd ../../..
Already up to date.
Username for 'https://github.com/tagspaces/tagspacespro': tagspaces-amp
Password for 'https://tagspaces-amp@github.com/tagspaces/tagspacespro':
....
Done in 10.71s.
Then you should execute yarn amppublish in order to deploy the changes in the amplify service. This command will call internally amplify publish, which will trigger the build of the TagSpaces Enterprise.
TagSpacesDev:~/environment/tagspaces-amplify (eu-west-2) $ yarn amppublish
yarn run v1.22.10
$ yarn update-graphql-schema && yarn graphql-codegen && amplify publish
$ amplify api gql-compile

GraphQL schema compiled successfully.

Edit your schema at /home/ec2-user/environment/tagspaces-amplify/amplify/backend/api/tagspaces/schema.graphql or place .graphql files in a directory at /home/ec2-user/environment/tagspaces-amplify/amplify/backend/api/tagspaces/schema
$ amplify codegen
✔ Generated GraphQL operations successfully and saved at tagspaces/app/graphql
✔ Code generated successfully and saved in file tagspaces/app/graphql/API.ts
✔ Successfully pulled backend environment dev from the cloud.

Current Environment: dev

| Category | Resource name                     | Operation | Provider plugin   |
| -------- | --------------------------------- | --------- | ----------------- |
| Auth     | tagspacesdf5c4ca5                 | No Change | awscloudformation |
| Hosting  | amplifyhosting                    | No Change | awscloudformation |
| Function | tagspacesdf5c4ca5PostConfirmation | No Change | awscloudformation |
| Function | tsTriggerFunction                 | No Change | awscloudformation |
| Function | tsSheduleFunction                 | No Change | awscloudformation |
| Api      | tagspaces                         | No Change | awscloudformation |
| Storage  | tsDataStorage                     | No Change | awscloudformation |
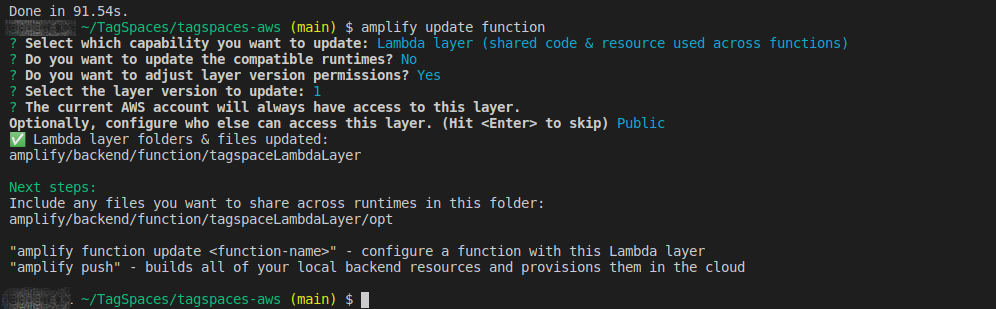
Upgrading the version of the tagspaces-aws layer
The tagspaces-aws layer provides a lambda function for creating and updating the index used for the search and a separate lambda function for creating thumbnails from image files.
amplify function update
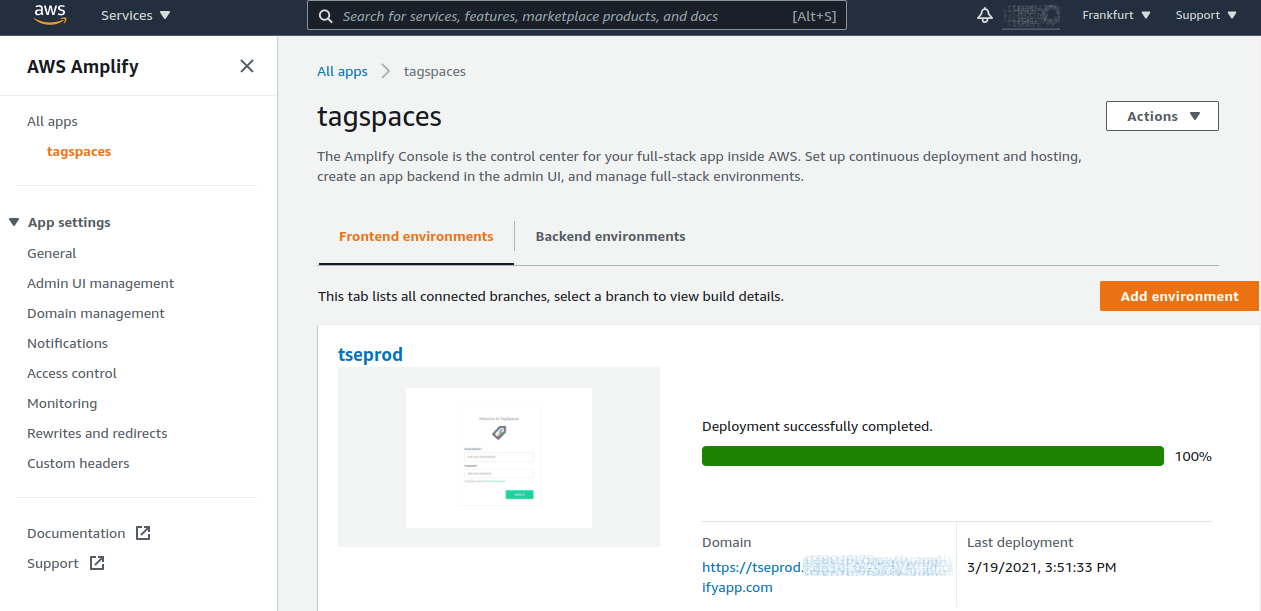
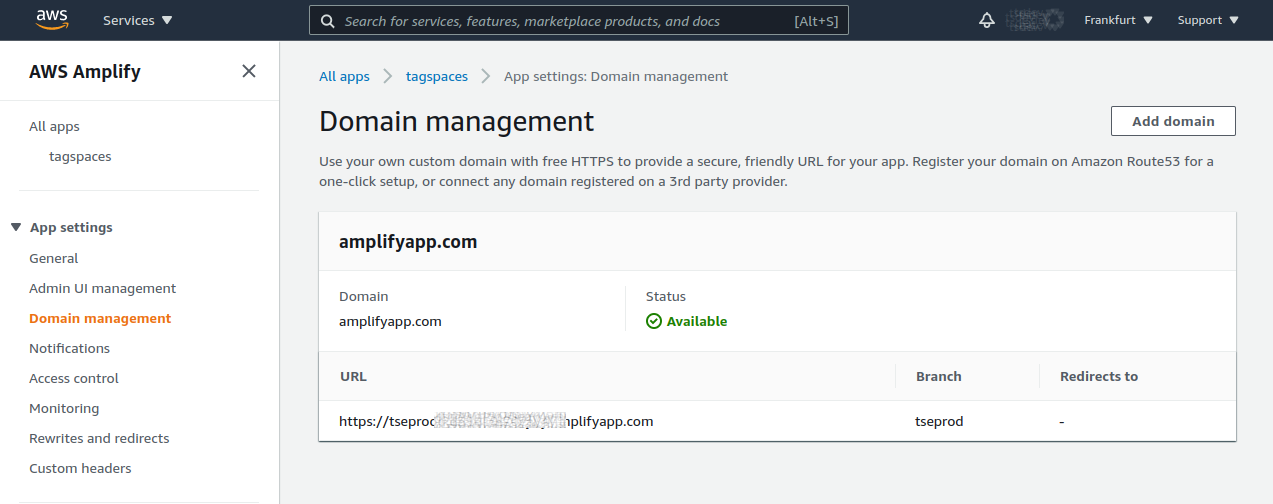
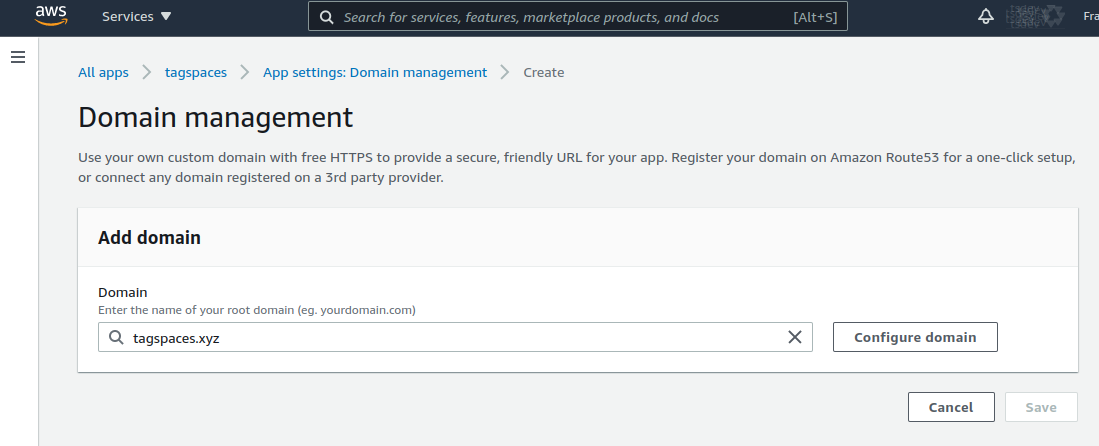
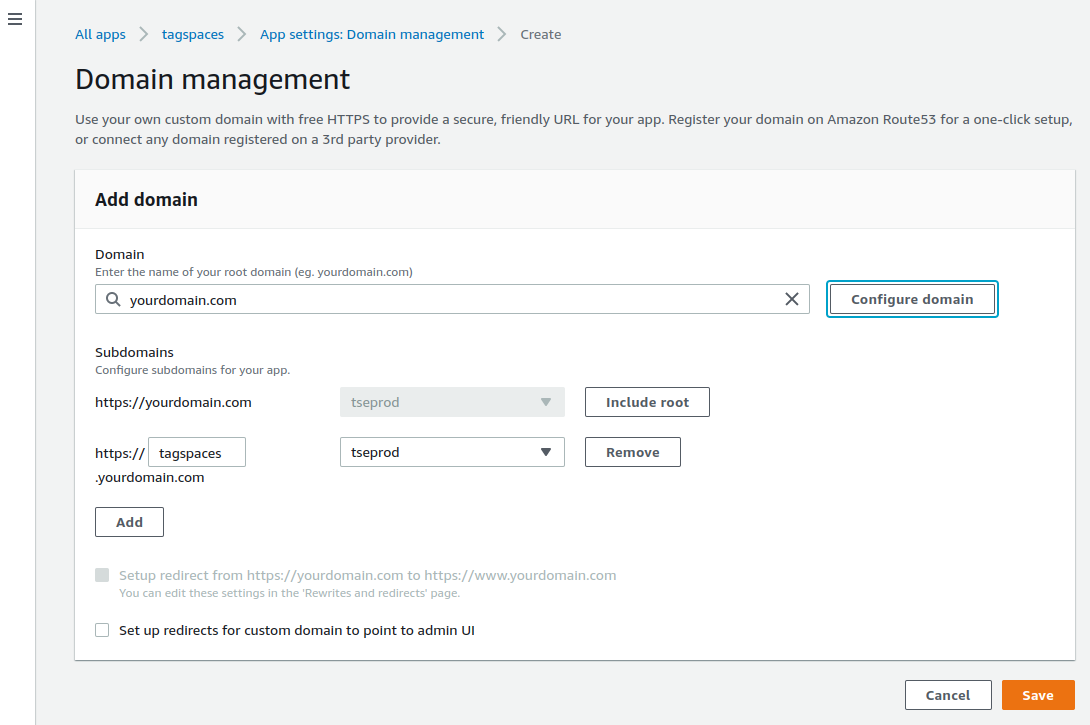
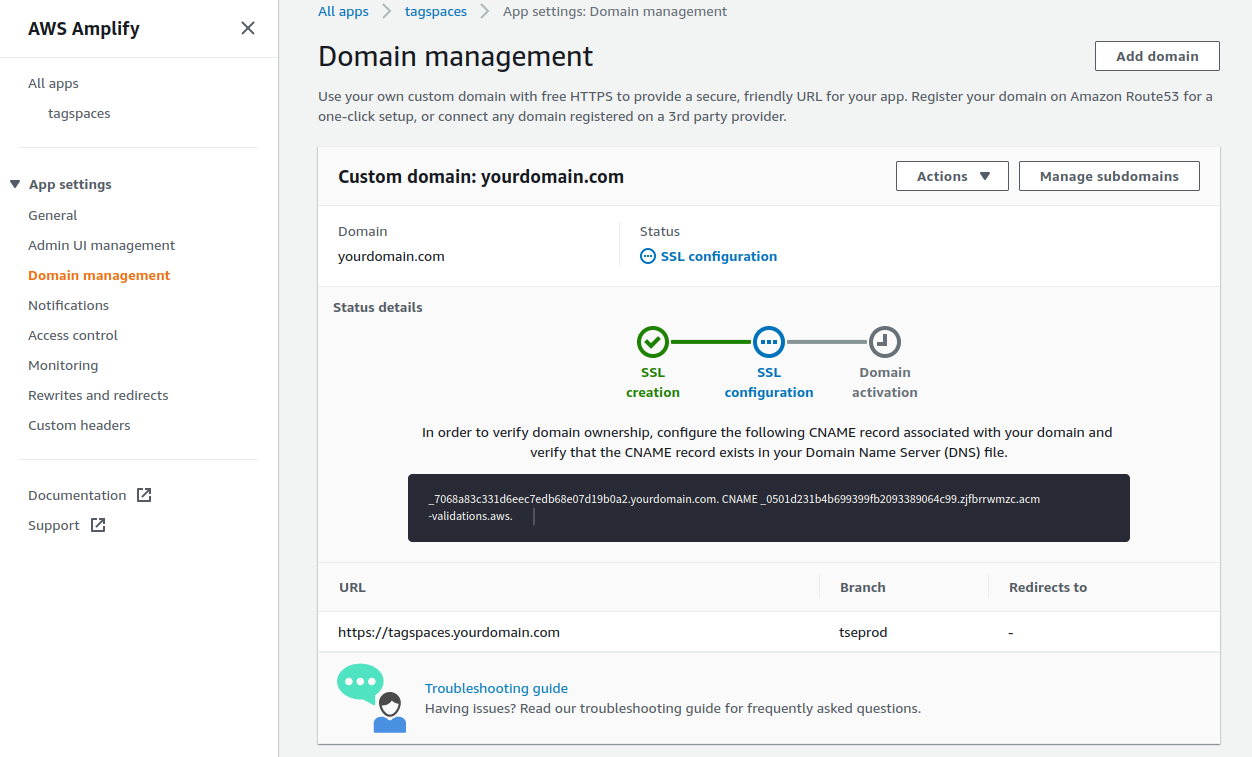
Setup custom domain
Further notes
On a Cloud9/EC2 setup, the regular build requires still electron which do not works OOTB, so the following command should be executed to install chromium package, which enables the electron package.
sudo amazon-linux-extras install epel -y
sudo yum install -y chromium
If you are using Cloud9 for the deployment of the TagSpaces Enterprise the minimal requirements for the EC2 instance is t3.small (2GB RAM 20 GB disk space).
In case of a JavaScript heap out of memory error, you can set the following environmental variable.
export NODE_OPTIONS=--max_old_space_size=1024