How to use Cloudflare R2 buckets as locations
Cloudflare is a globally distributed network platform known for its CDN, DNS, and security services.
Its R2 Object Storage is an affordable, S3-compatible storage solution designed for developers and small teams who want to store data in the cloud without egress fees — a major advantage compared to traditional cloud providers.
R2 integrates easily with many S3-compatible tools, including TagSpaces, allowing you to use it as a remote file location for tagging, browsing, and organizing your content.
Advantages
- No egress bandwidth fees
- S3-compatible API
- Hosted on Cloudflare’s globally distributed infrastructure
- Integrated with Cloudflare Workers and CDN
Limitations
- Limited region choices (as of now)
- Requires Cloudflare account management for API keys and permissions
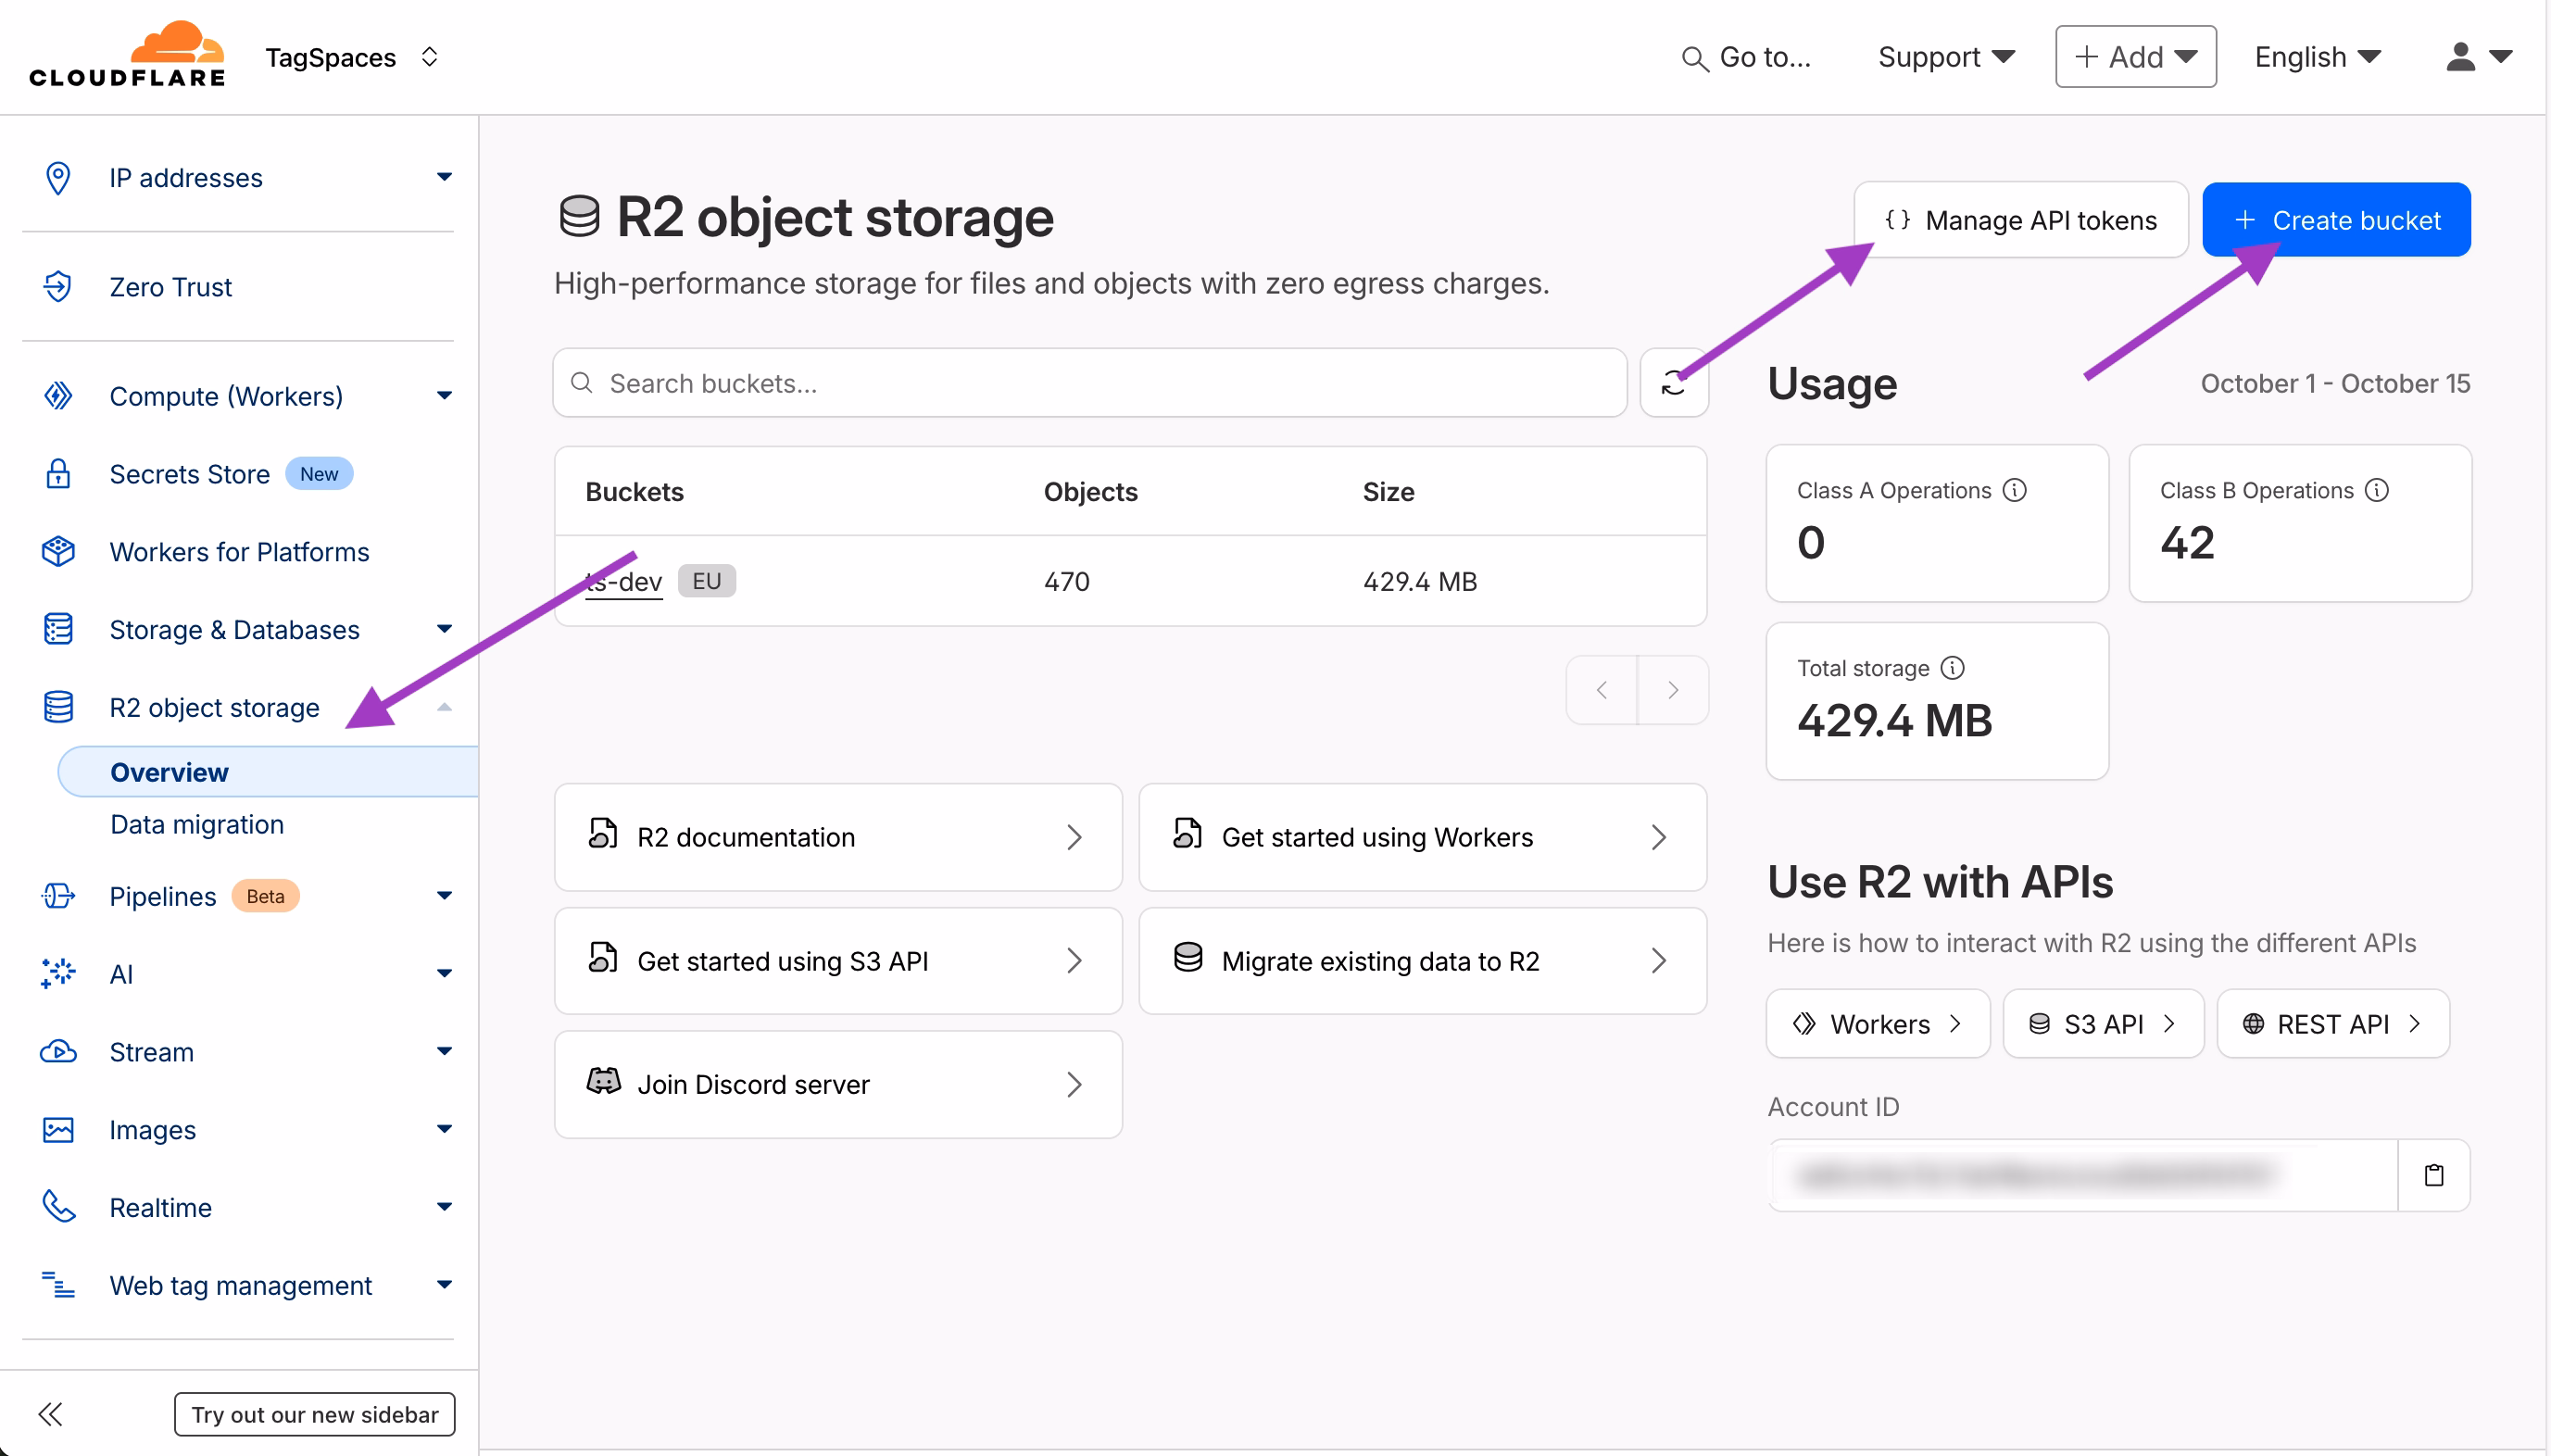
After registration, you’ll see the R2 Object Storage dashboard, which lists your existing buckets.
From this screen, you can create new buckets and manage the API tokens needed to connect with TagSpaces.
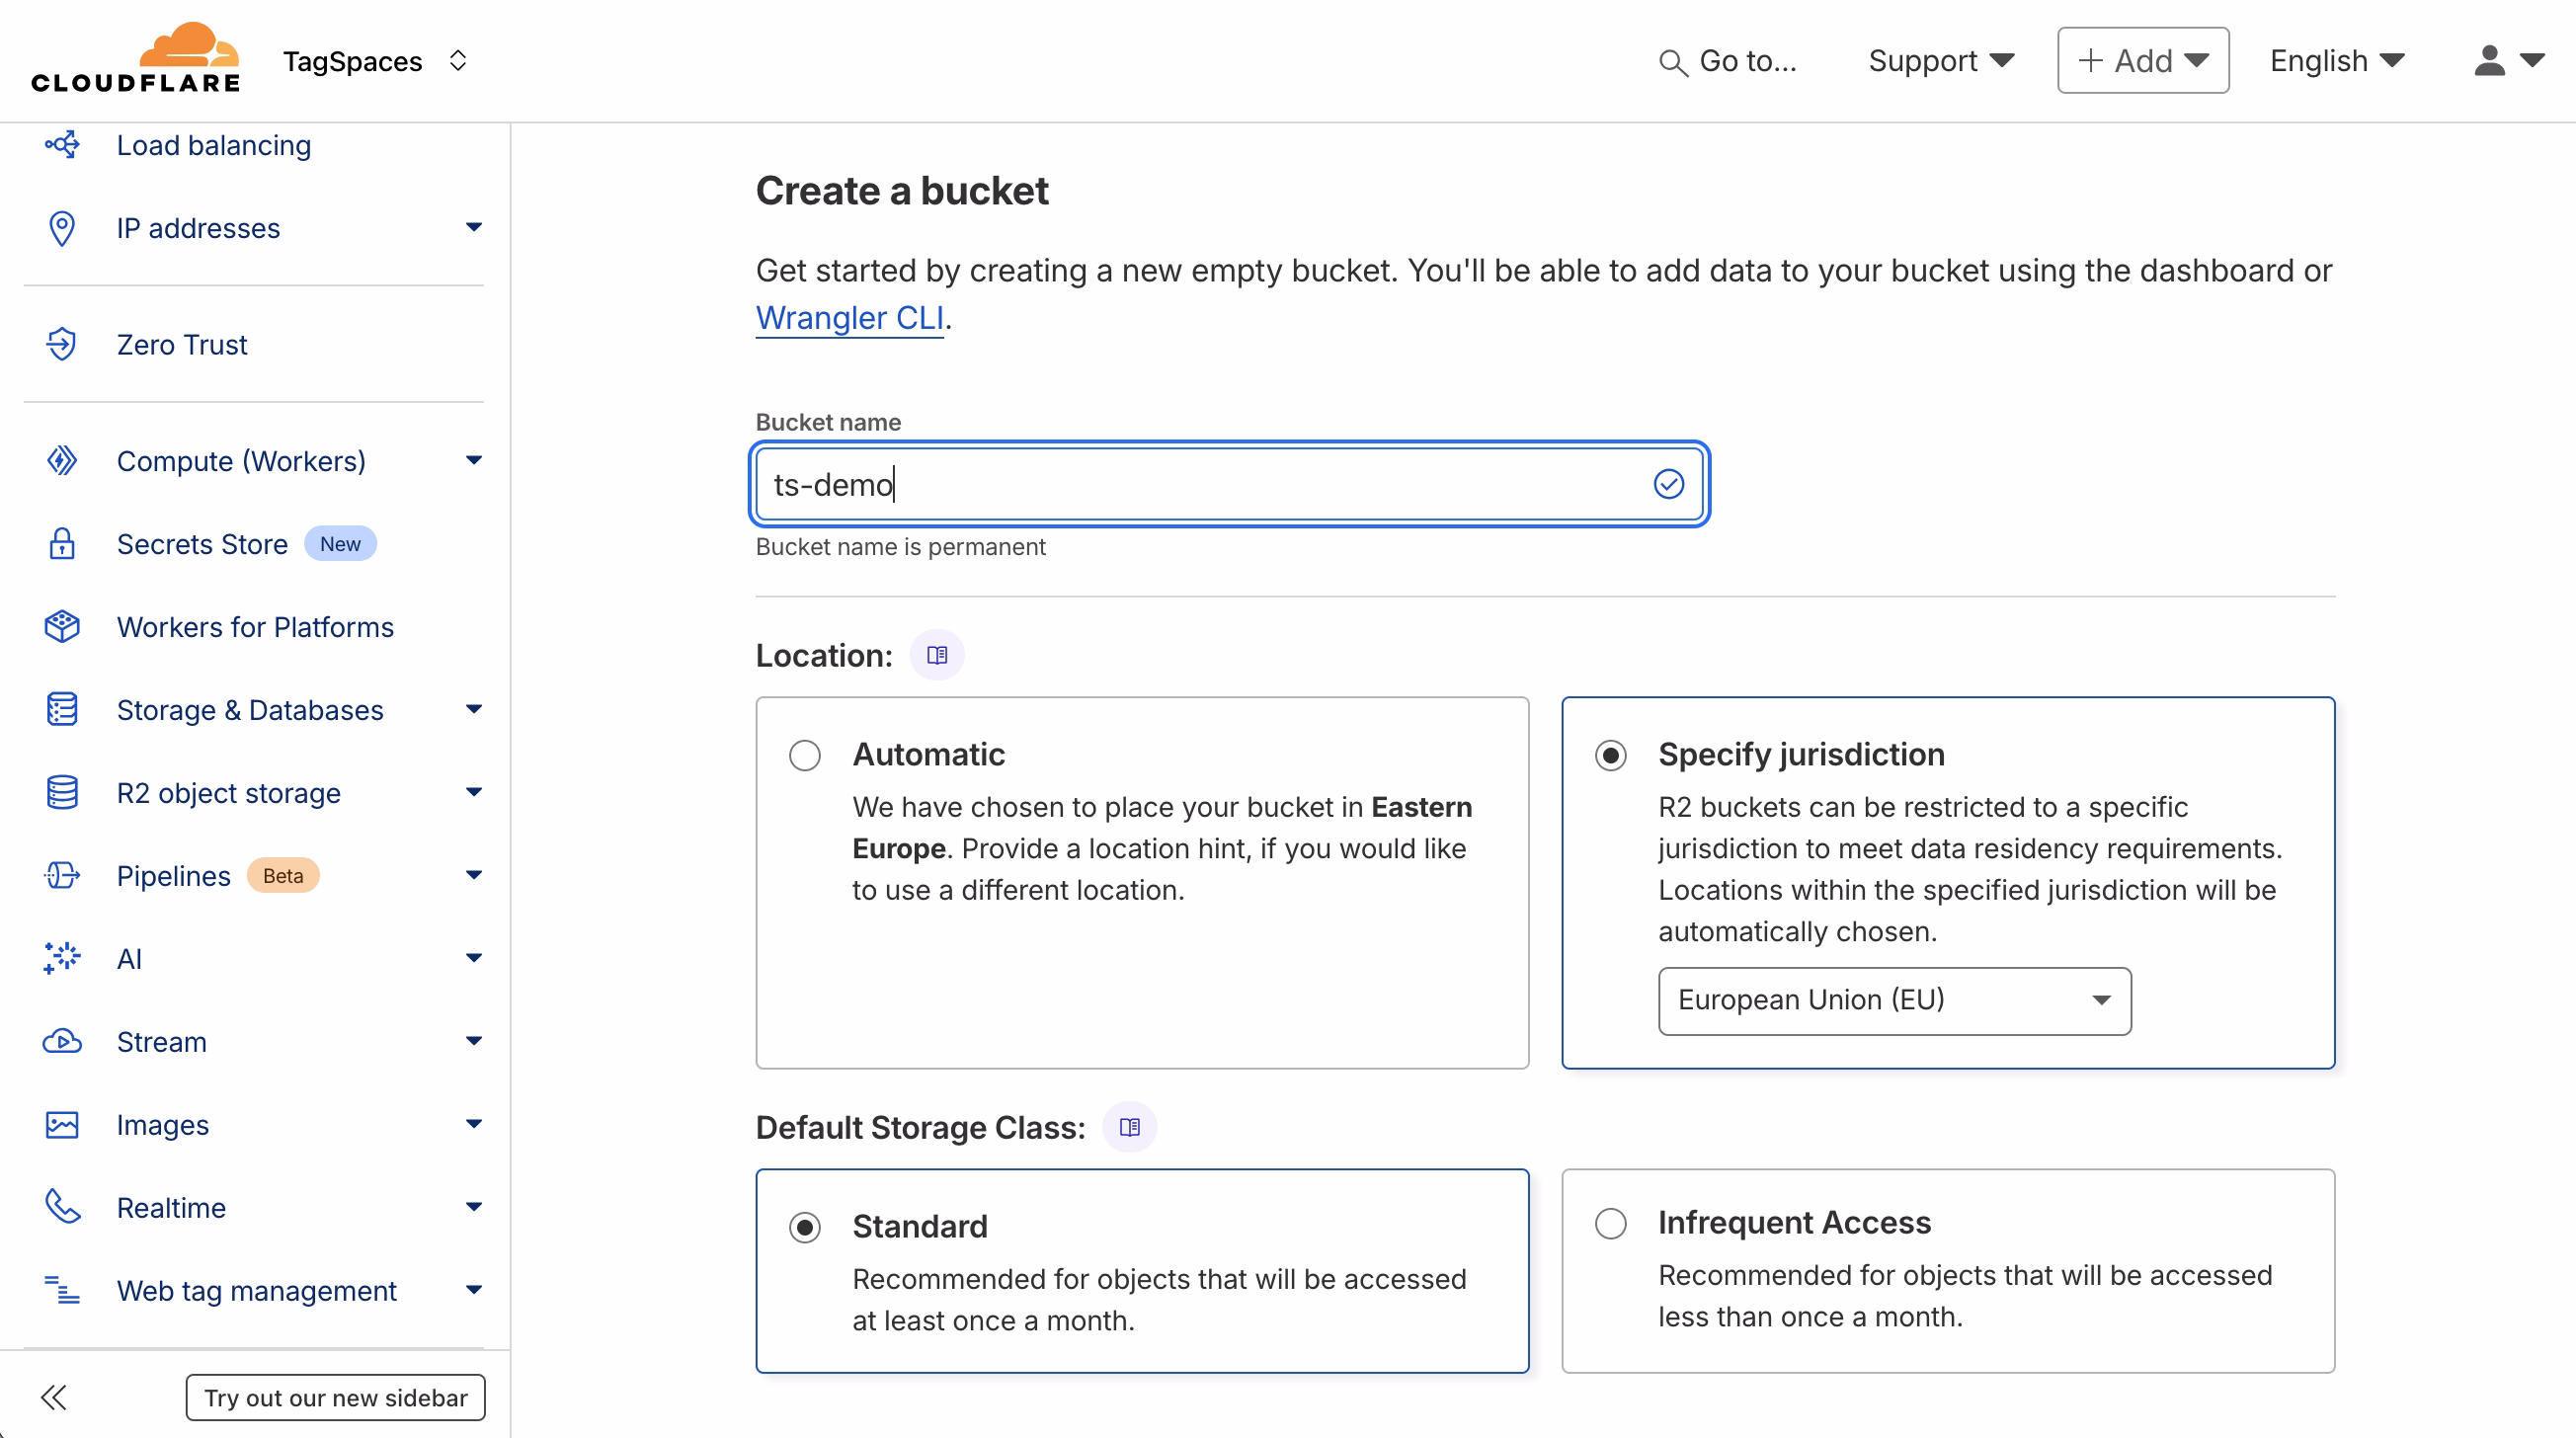
Creating a bucket
In the R2 dashboard, click Create Bucket to open the setup screen.
Here, you can choose:
- Bucket name – this will be required later in TagSpaces
- Storage location – choose your preferred data region and jurisdiction
- Storage class – standard or low-frequency, depending on your usage
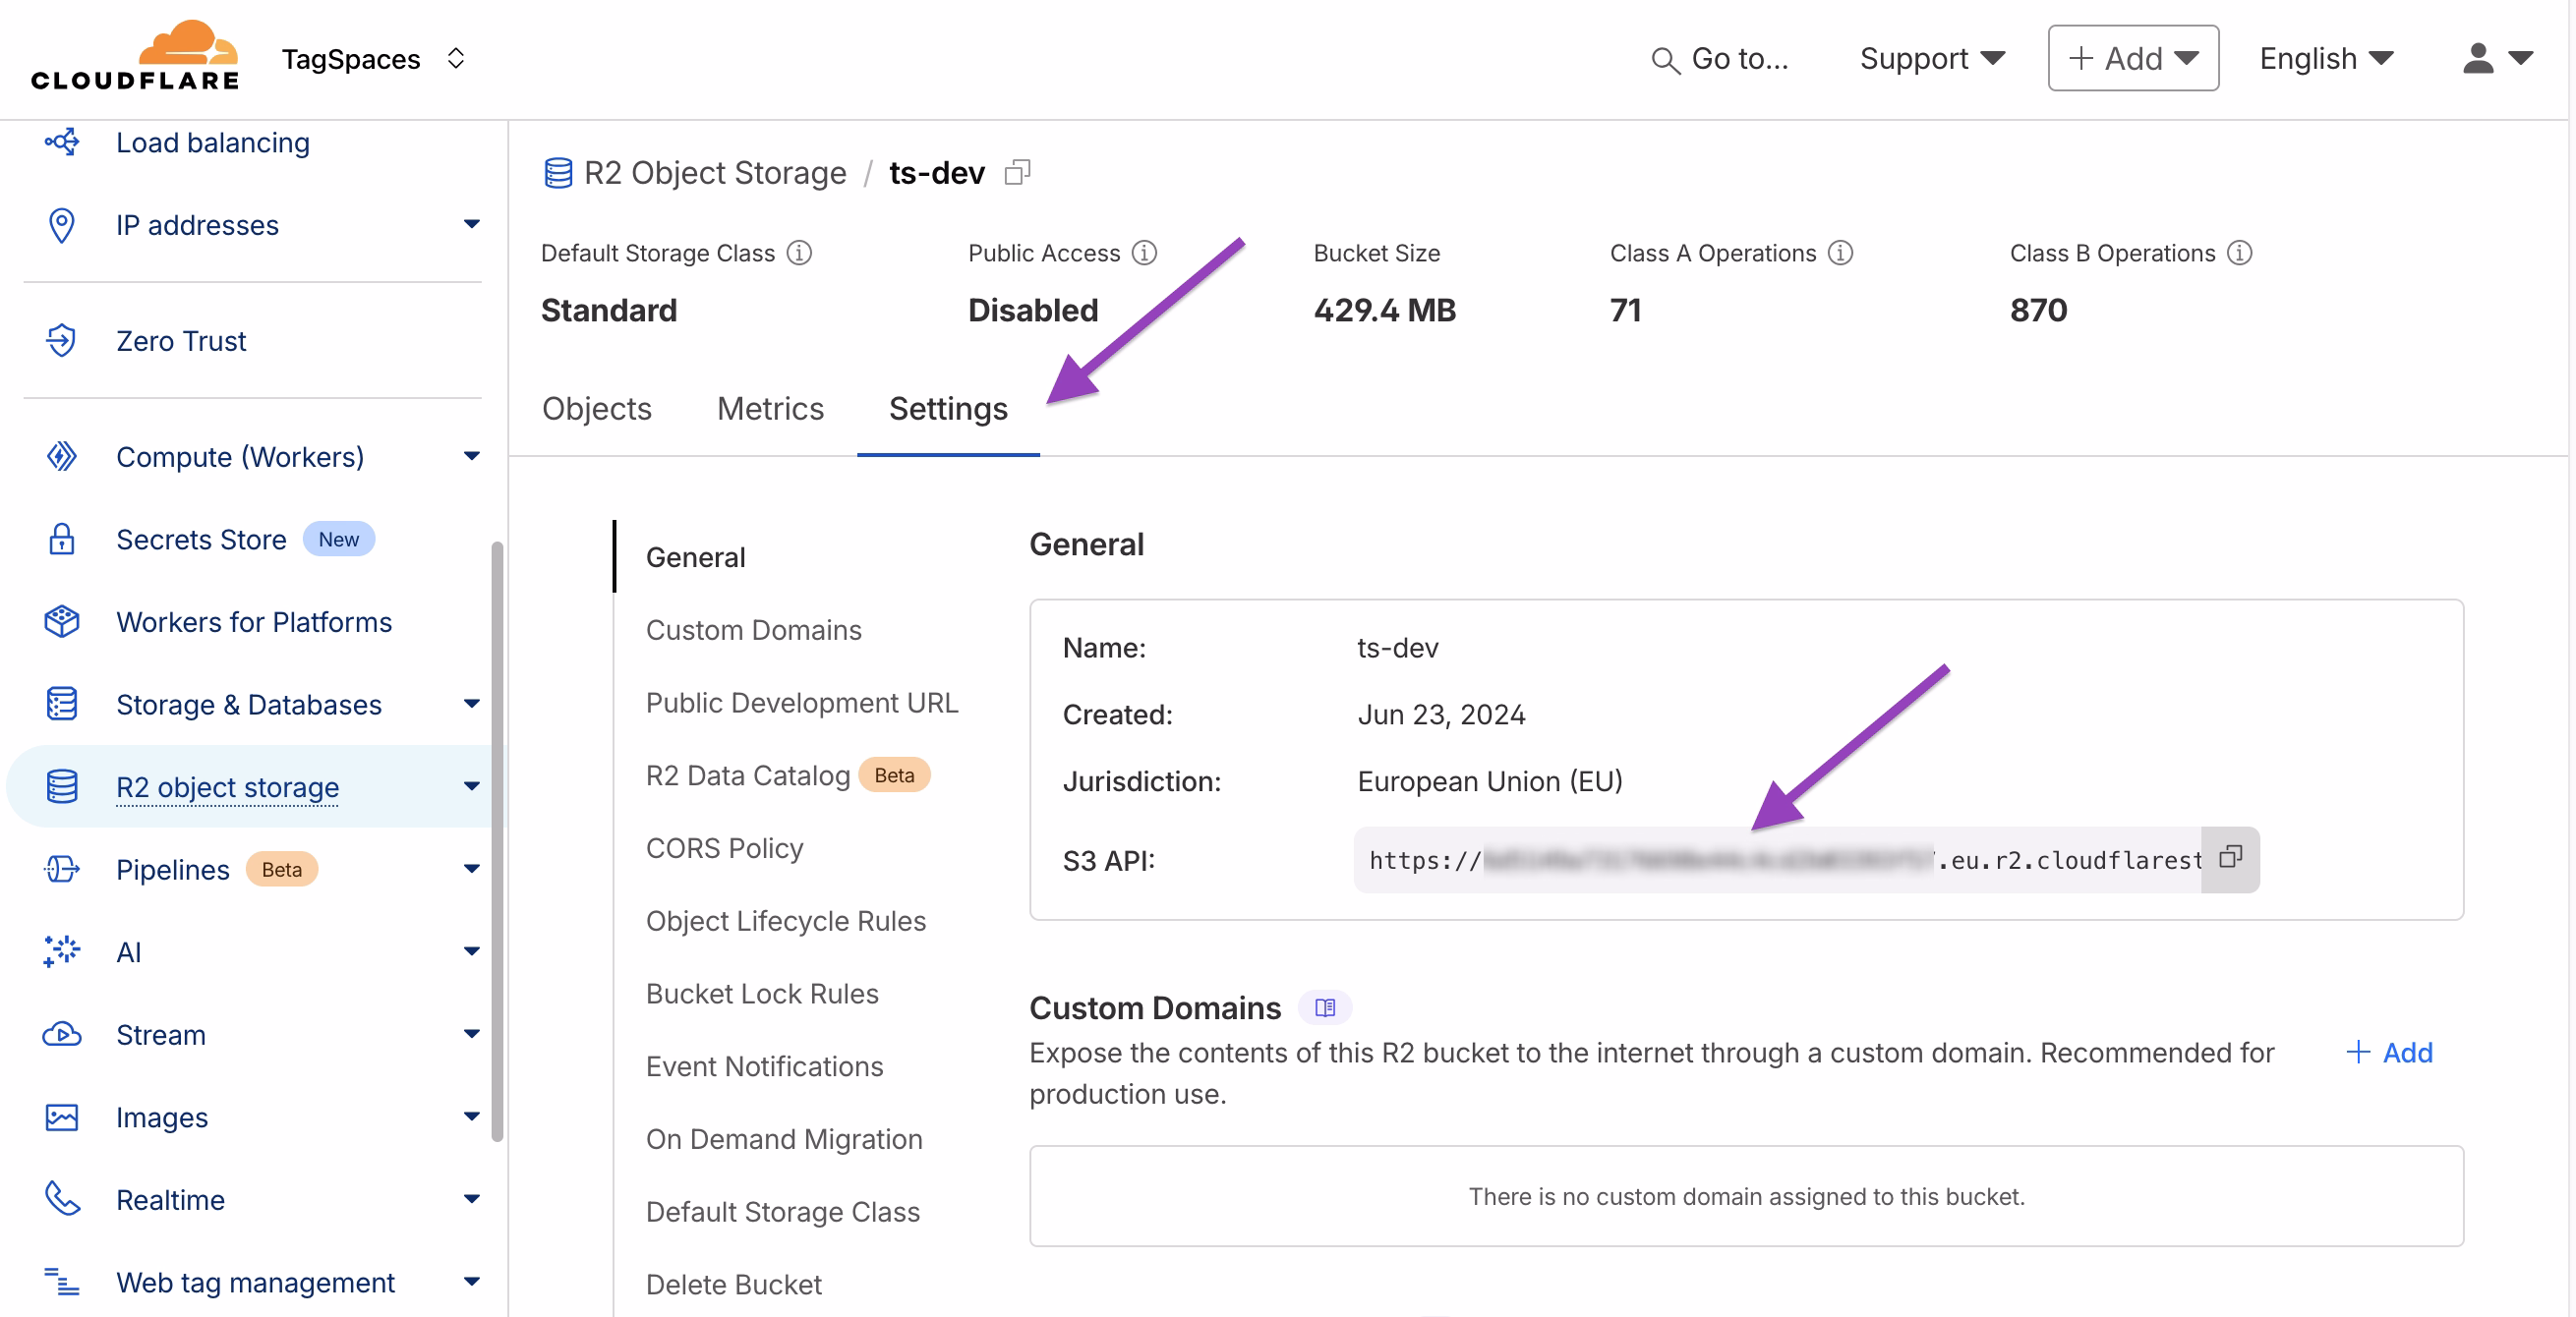
Once created, go to the bucket settings page.
Here you’ll find the S3 API endpoint URL, which will be required when setting up the connection in TagSpaces.
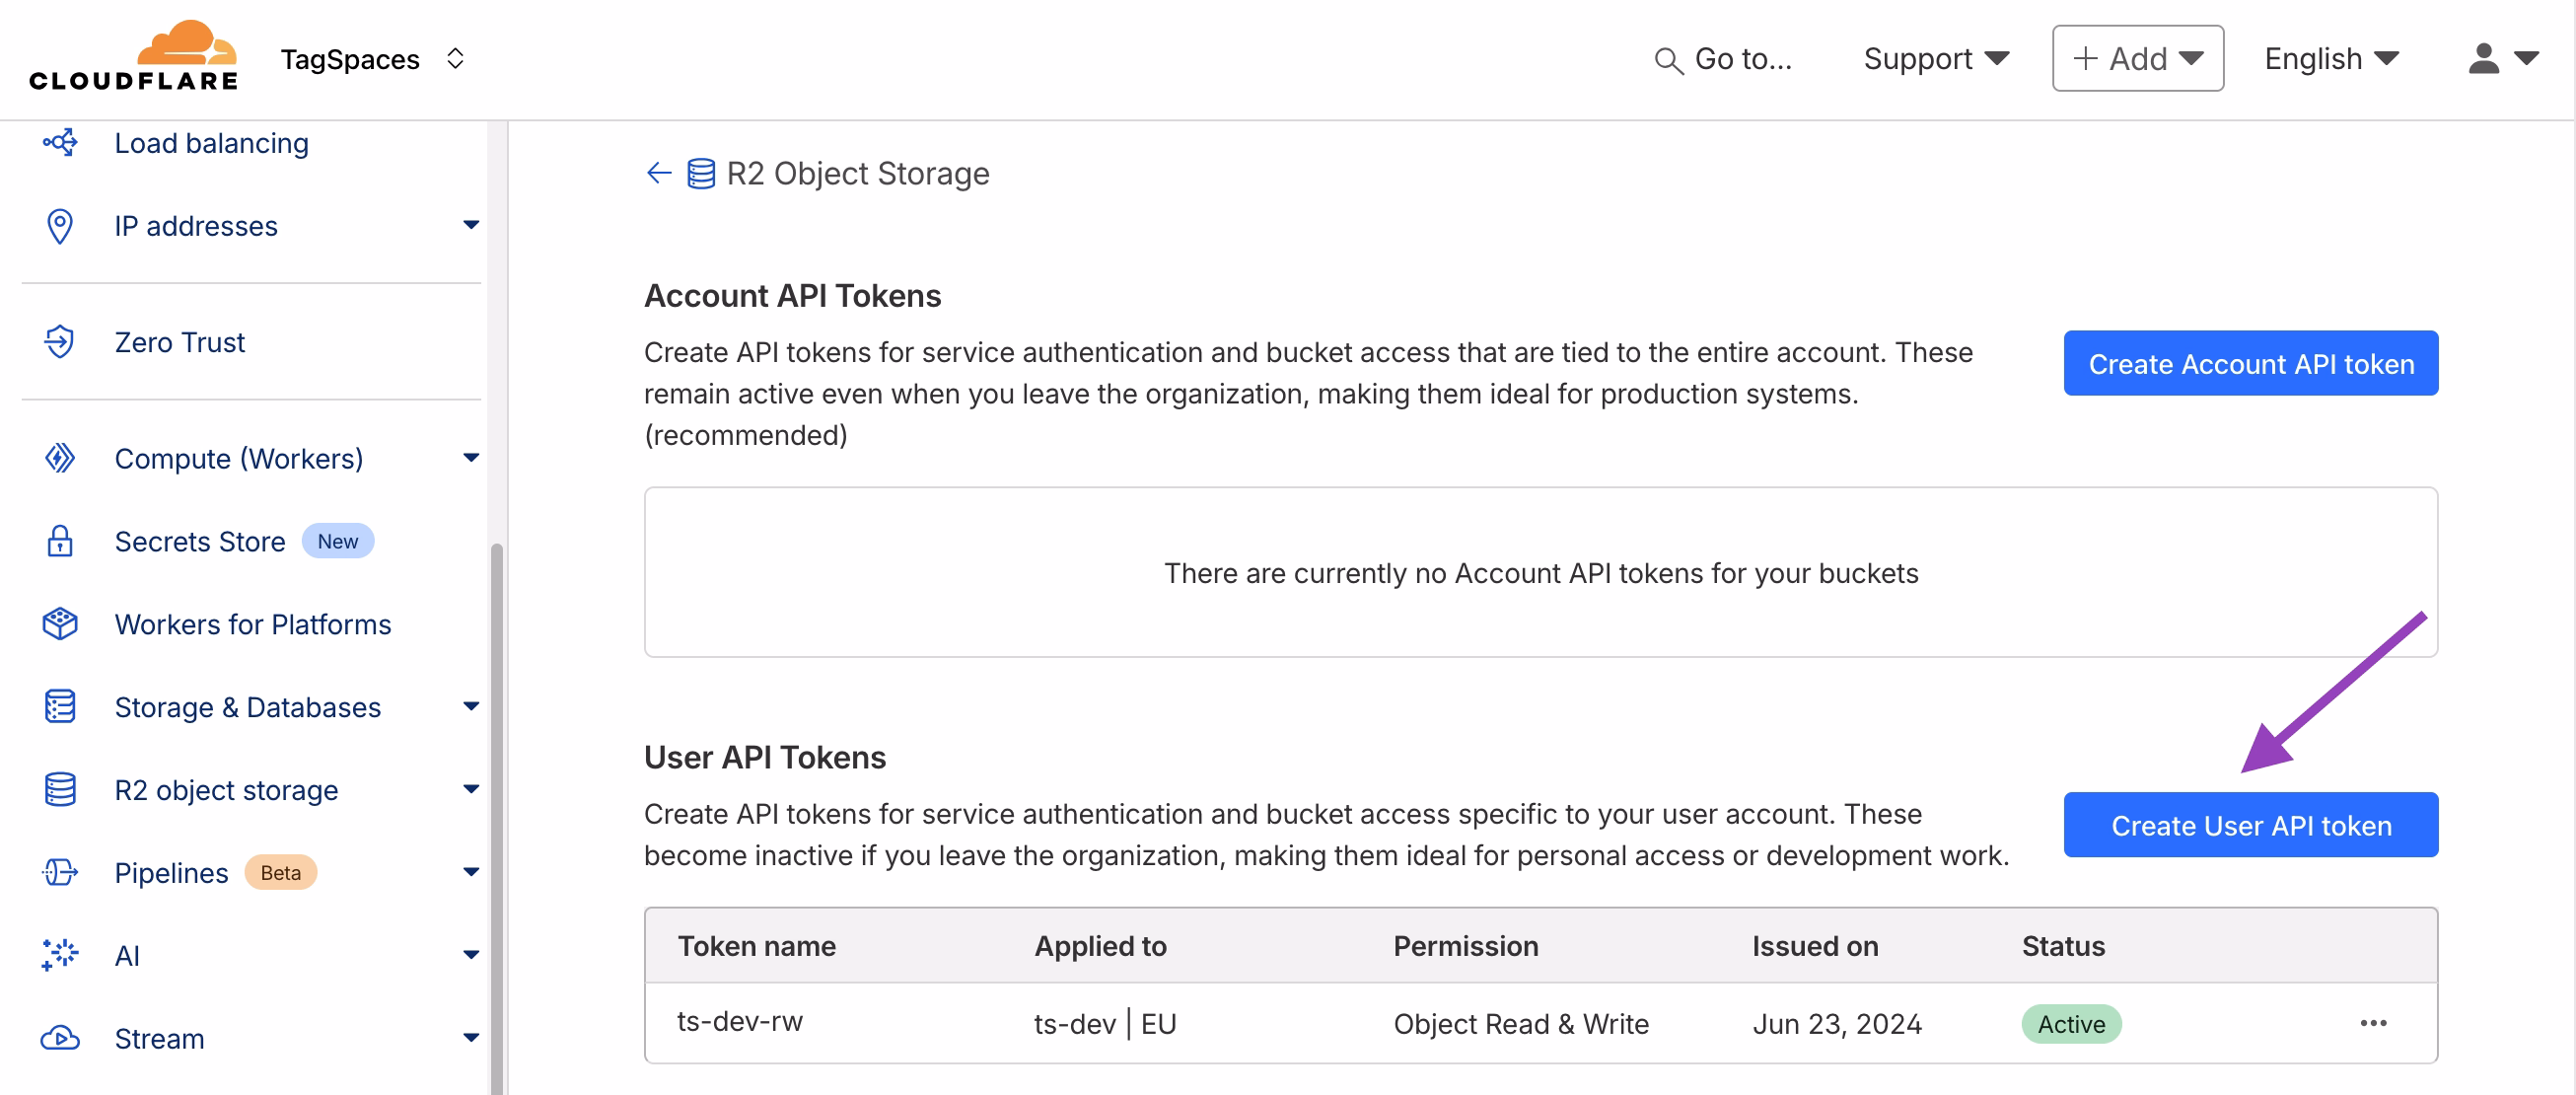
Creating access tokens
Access tokens are required to connect your Cloudflare R2 bucket to TagSpaces.
They can be created directly from the R2 overview screen.
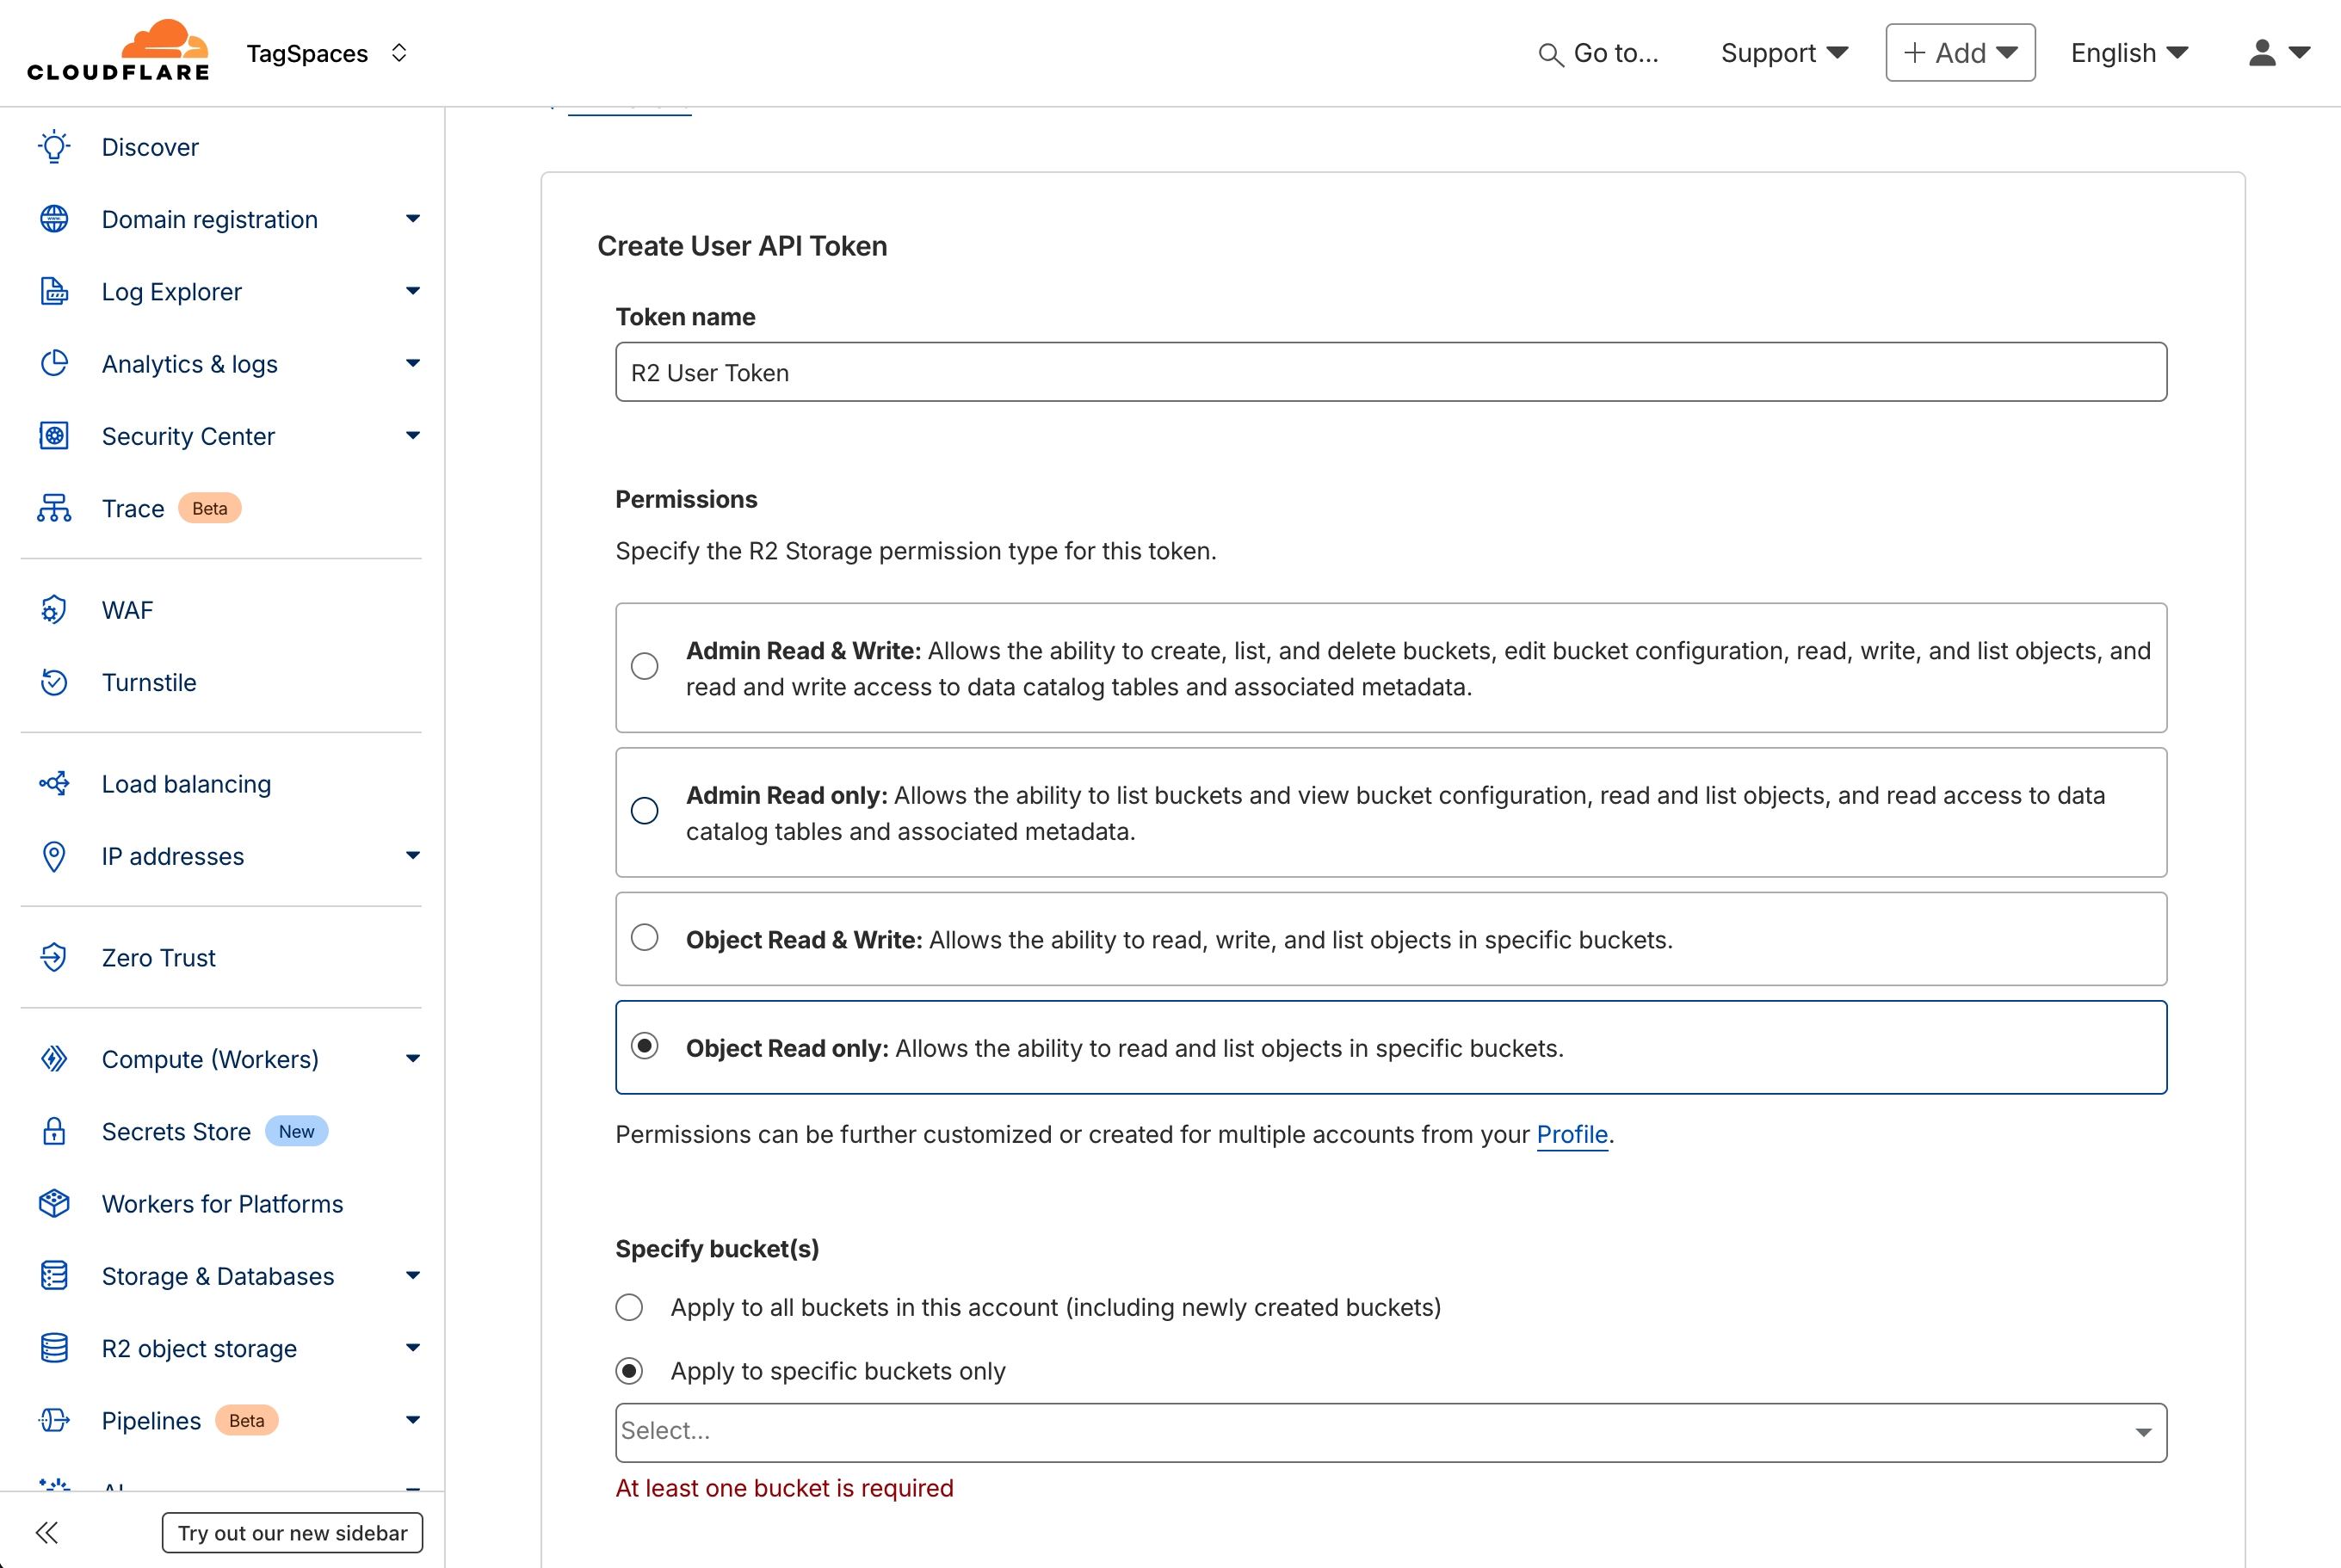
Go to Manage API Tokens and from the next screen choose Create User API token:
Here you specify the following settings:
- Permissions – choose Read, Write, or Admin
- Bucket access – specify which buckets the token can access
Once created, you’ll receive your Access Key ID and Secret Access Key — store them securely, as they are only shown once.
Connecting the bucket to TagSpaces
Now it’s time to connect your Cloudflare R2 bucket to TagSpaces.
- Open TagSpaces.
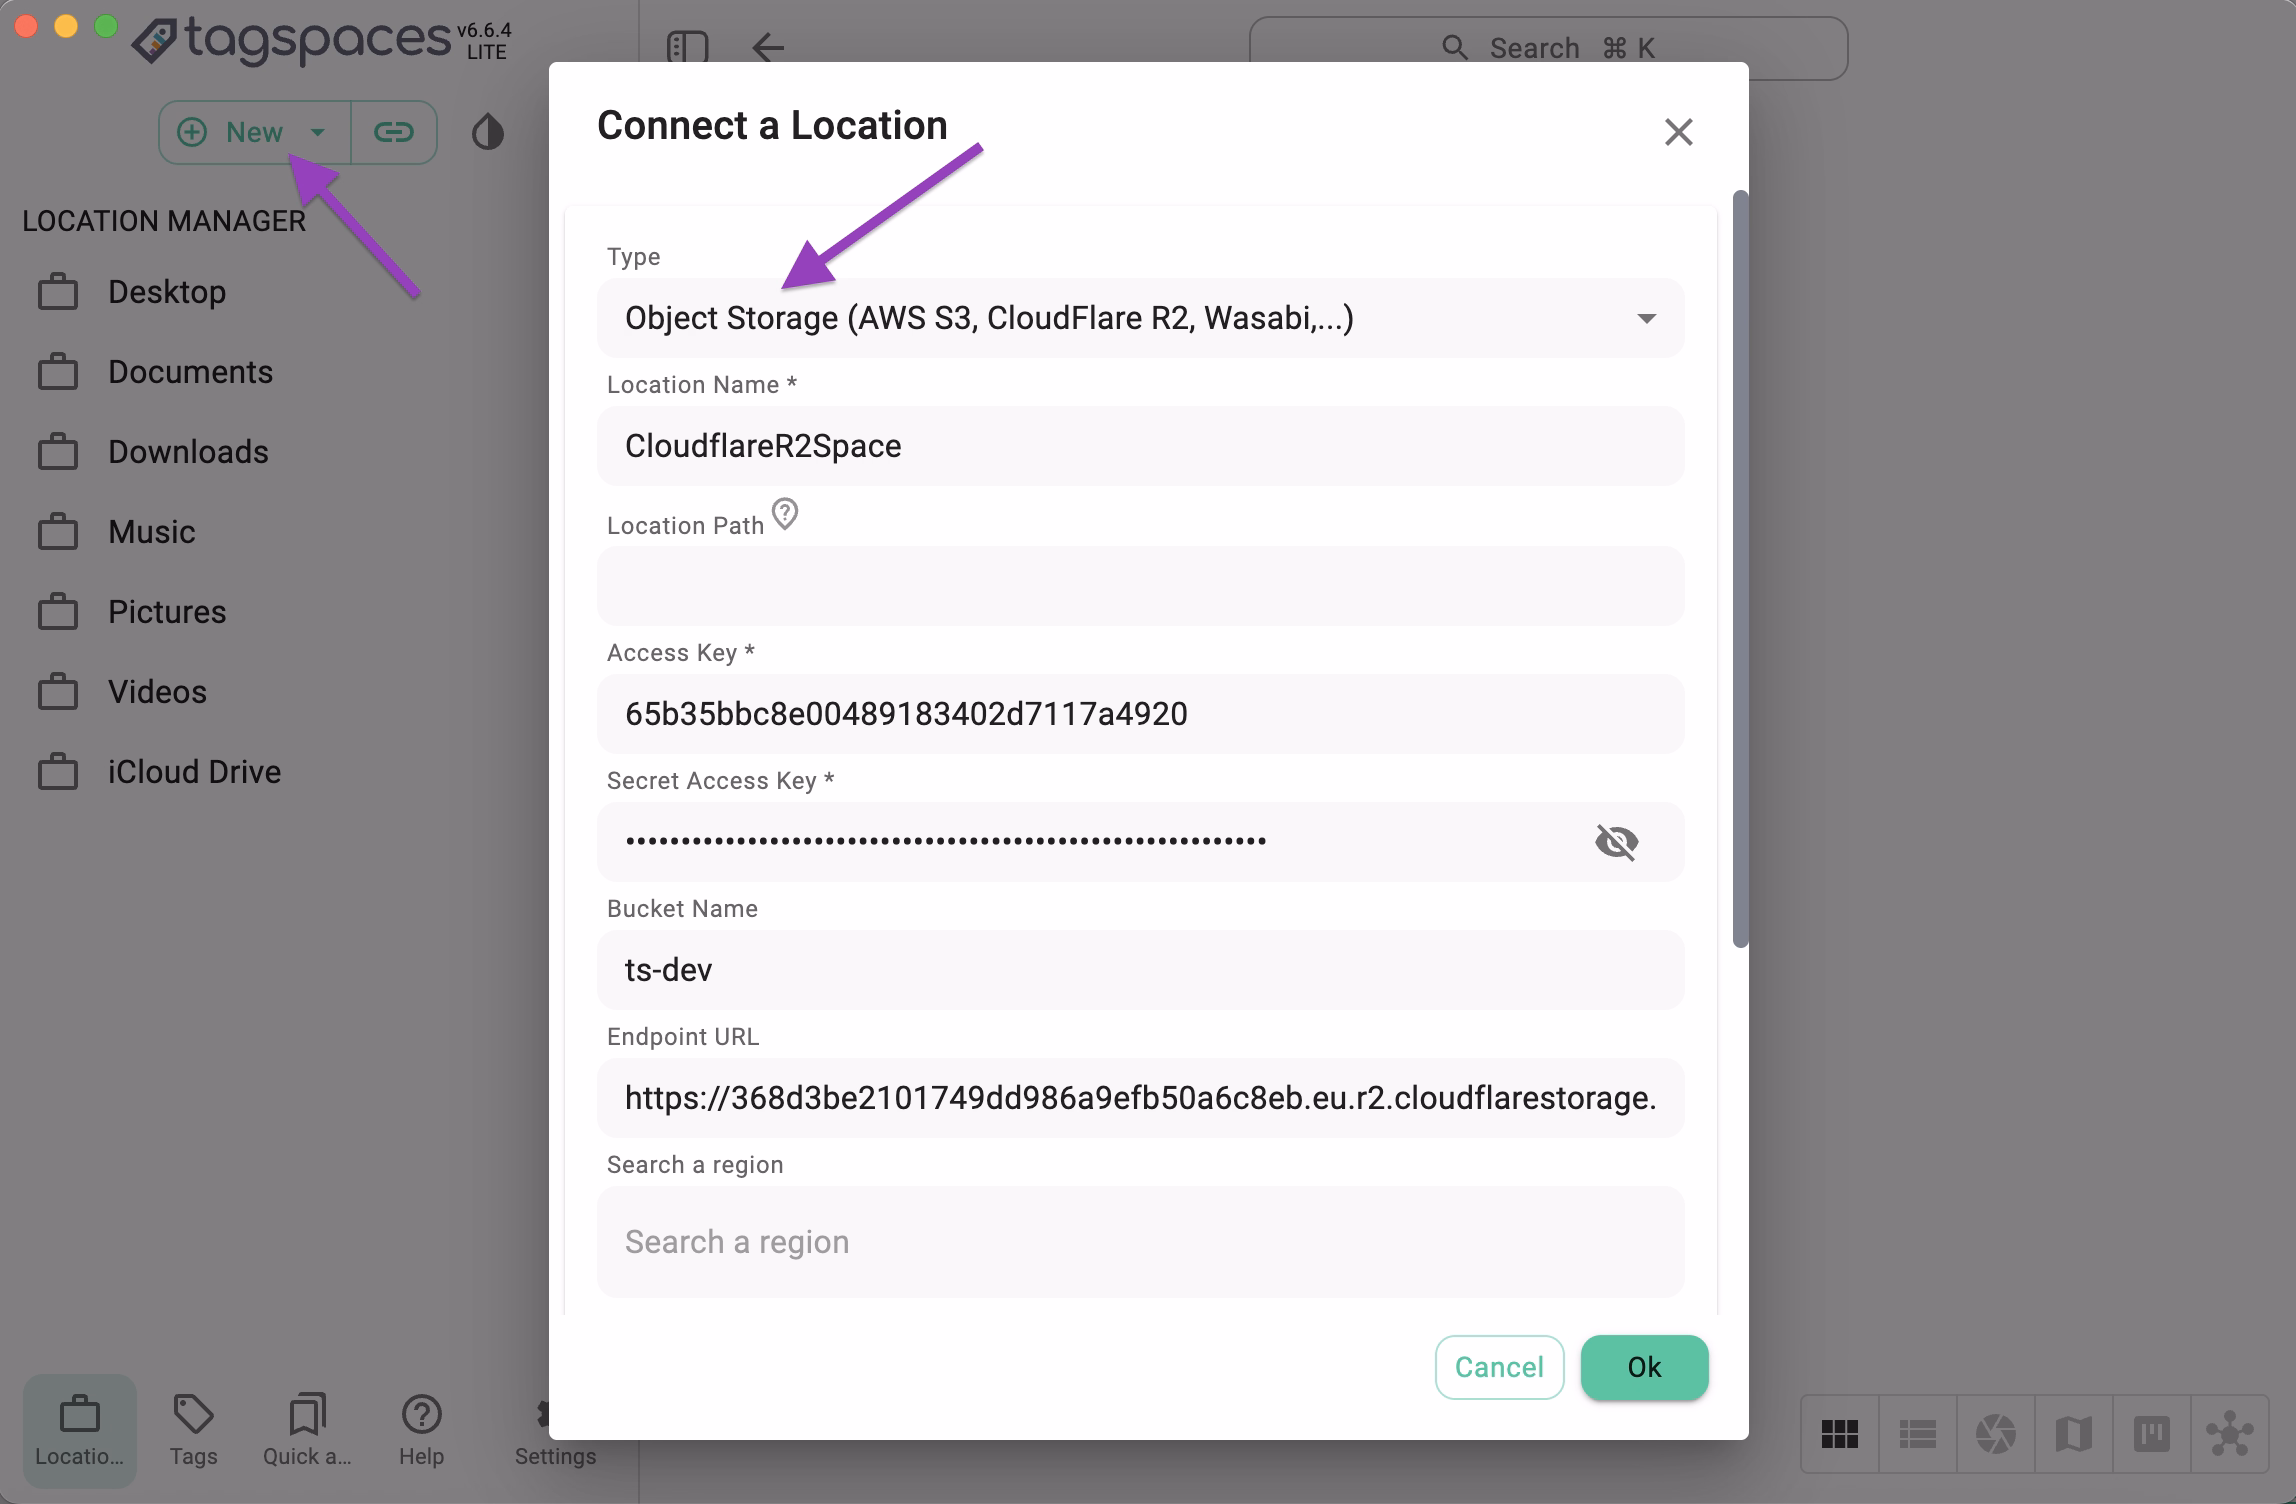
- Click the New button and select New Location.
- In the dialog, set the Location Type to Object Storage.
- Fill in the following fields:
- Location name – any name you prefer
- Bucket name – your R2 bucket name (e.g.
ts-dev) - Access key and Secret key – your R2 API credentials
- Endpoint URL – your R2 S3 API endpoint, e.g.
https://<accountid>.r2.cloudflarestorage.com
Once all fields are filled, click OK to create the location.
You can now browse, tag, and organize files stored in your Cloudflare R2 bucket directly from TagSpaces.
Conclusion
By connecting Cloudflare R2 to TagSpaces, you can manage your files in a fast, global, and cost-efficient way — ideal for users who want the scalability of the cloud combined with TagSpaces’ tagging and organization features.
R2’s S3 compatibility means you retain flexibility: you can move your data between services or self-hosted alternatives without vendor lock-in, keeping your files accessible and under your control.
TagSpaces + Cloudflare R2 = simple, flexible, cloud storage on your terms ☁️🔐