MinIO Buckets Hosted on NAS Server
This tutorial will guide you through setting up a self-hosted object storage using MinIO on a QNAP NAS system. We will show how to set up TagSpaces Pro Web on a web server and connect it to your MinIO server. Docker container apps will be used for installation, which are available on NAS server operating systems. For QNAP NAS, the app is called ContainerStation. Please install it before proceeding if it's not already installed.
Installing the MinIO Docker Application
Starting from October 2022, MinIO no longer supports the gateway mode, which exposed existing file and folder structures as S3 object storage. For more information, refer to their documentation.
To install the current Docker image for MinIO, go to the "Create" section of ContainerStation and search for minio in the Docker Hub tab.
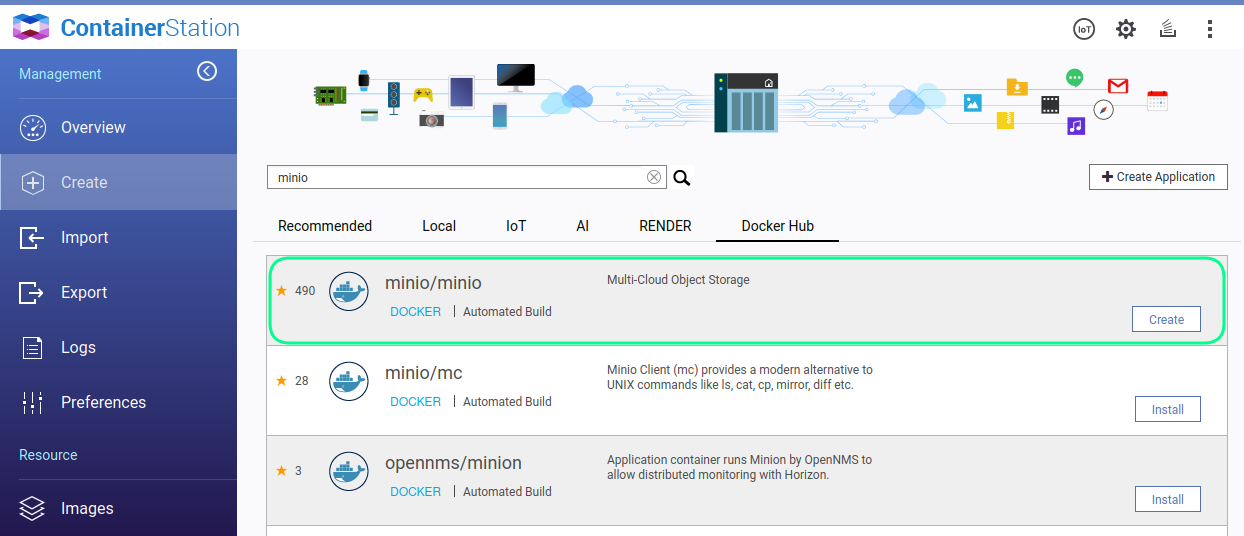
Click the install button, which will be labeled create if the image is already installed.
You can find the official MinIO Docker image at: https://hub.docker.com/r/minio/minio.
Setting Up MinIO on NAS with Docker
You can easily run MinIO using the container app that runs Docker in the background. Open an SSH connection to your NAS and execute the following command:
sudo docker run -d \
    --restart=always \
    -p 9000:9000 \
    -p 9001:9001 \
    --name minio-container-name \
    -e MINIO_ROOT_USER=username \
    -e MINIO_ROOT_PASSWORD=password \
    -v /share/DataS3:/data \
    minio/minio server /data \
    --console-address :9001
Explanation of the Parameters
--restart=always- Ensures the MinIO Docker image starts automatically after your NAS system restarts.-p 9000:9000- Exposes the MinIO server on both network interfaces (port 9000).-p 9001:9001- Opens another port for the MinIO console.--name minio-container-name- Sets the name of the Docker container; this name will appear later in the Docker management interface on your NAS.MINIO_ROOT_USERandMINIO_ROOT_PASSWORD- Define the username and password for the MinIO admin user; these should be changed to secure credentials for your production system./share/DataS3- Represents the local directory on the NAS./data- The folder mapped to/share/DataS3that is exposed by MinIO.minio/minio- The official Docker image provided by MinIO, available on Docker Hub.--console-address :9001- Specifies the network interface where the MinIO service dashboard is exposed.
Testing If MinIO is Running
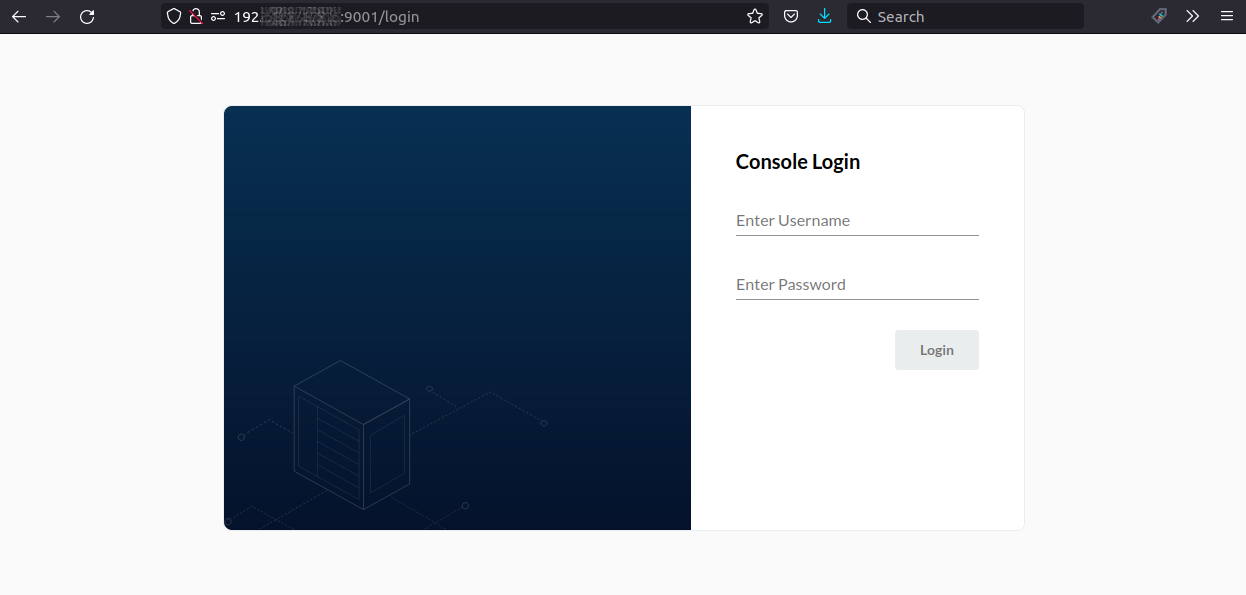
You can now open your browser and enter the IP address of your NAS, appending port 9001 at the end. This will direct you to the login screen for the MinIO Console, which serves as the administration panel for monitoring your installation and managing buckets, users, groups, and policies.
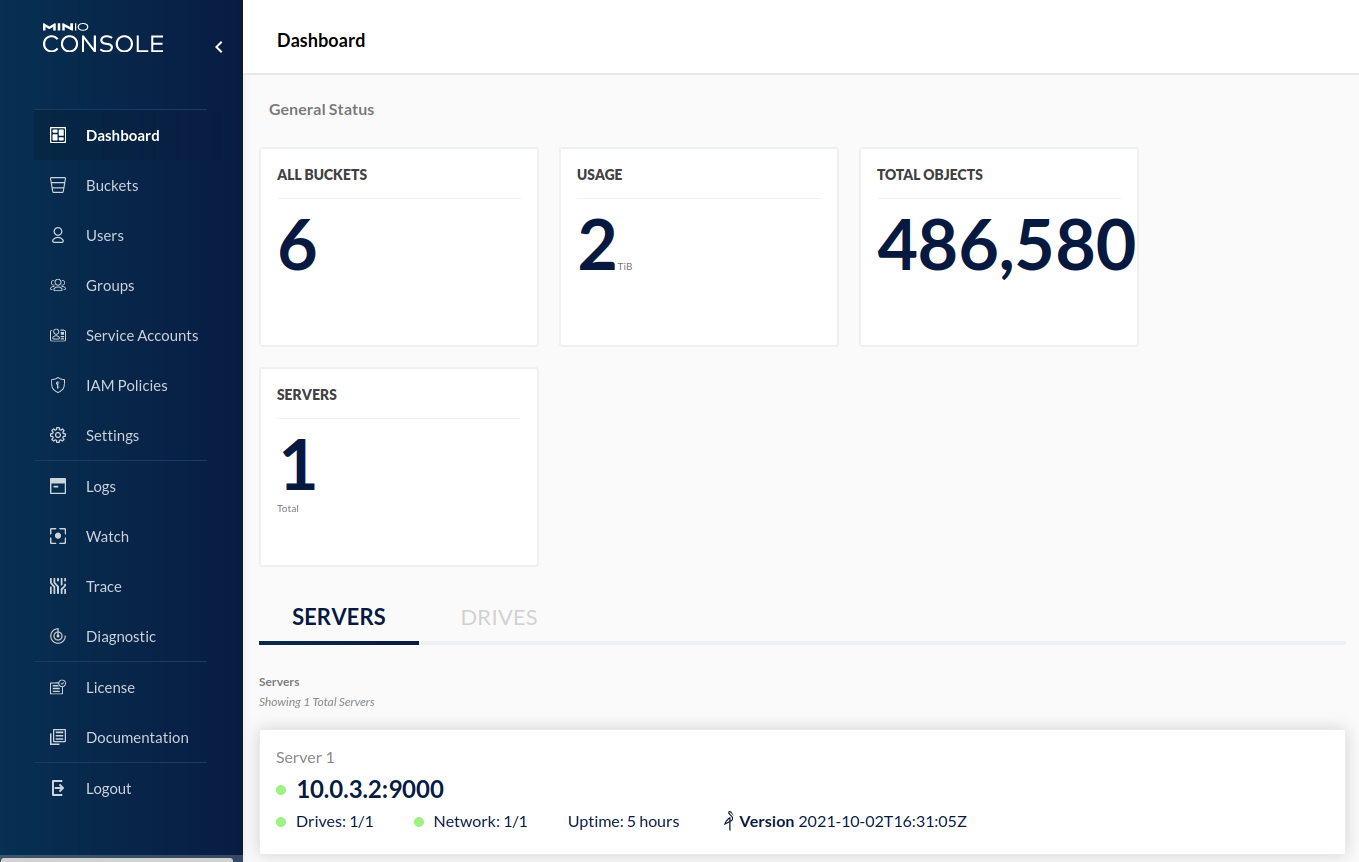
After logging in, you should see the MinIO dashboard, displaying basic information about your installation.
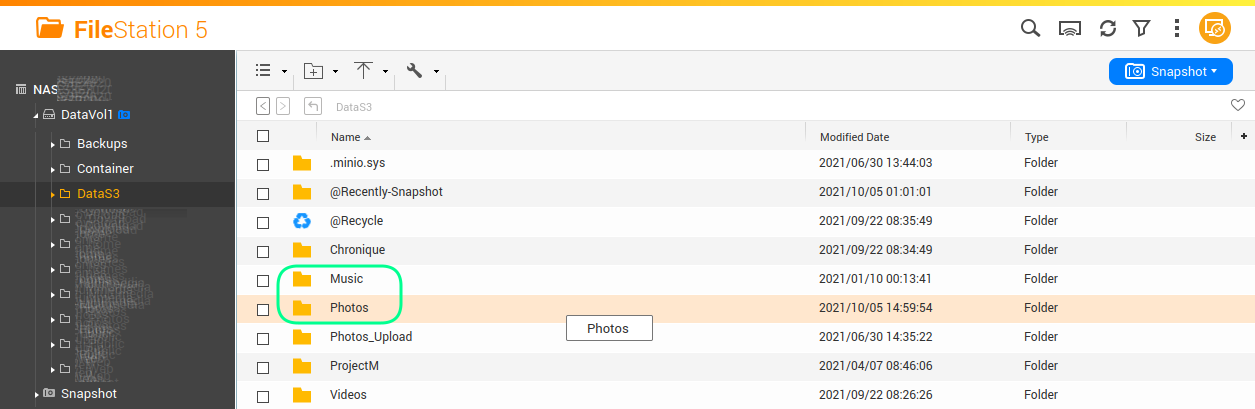
Navigating to the Buckets section will show a list of all buckets, which are actually subfolders within the exposed NAS directory.

In my case, /share/DataS3 is the exposed folder in the Docker script, with Photos and Music being subfolders, as shown in the buckets section.
Managing Your MinIO Docker Instance on QNAP NAS
To manage your Docker container, use the ContainerStation app in the QNAP management console.
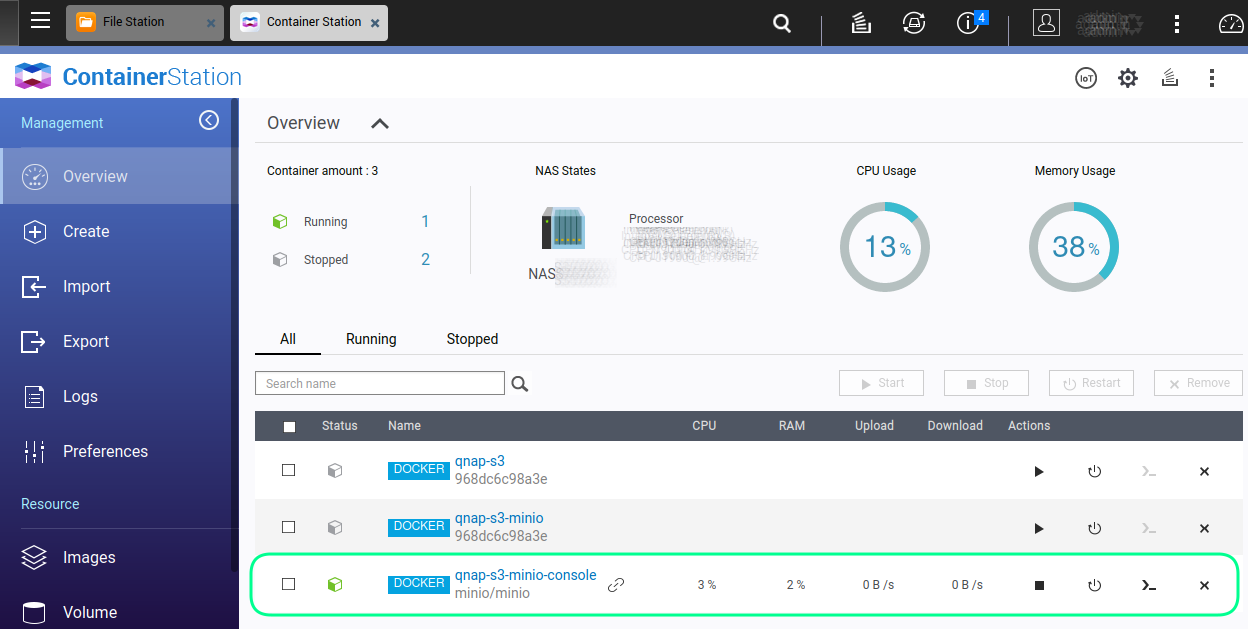
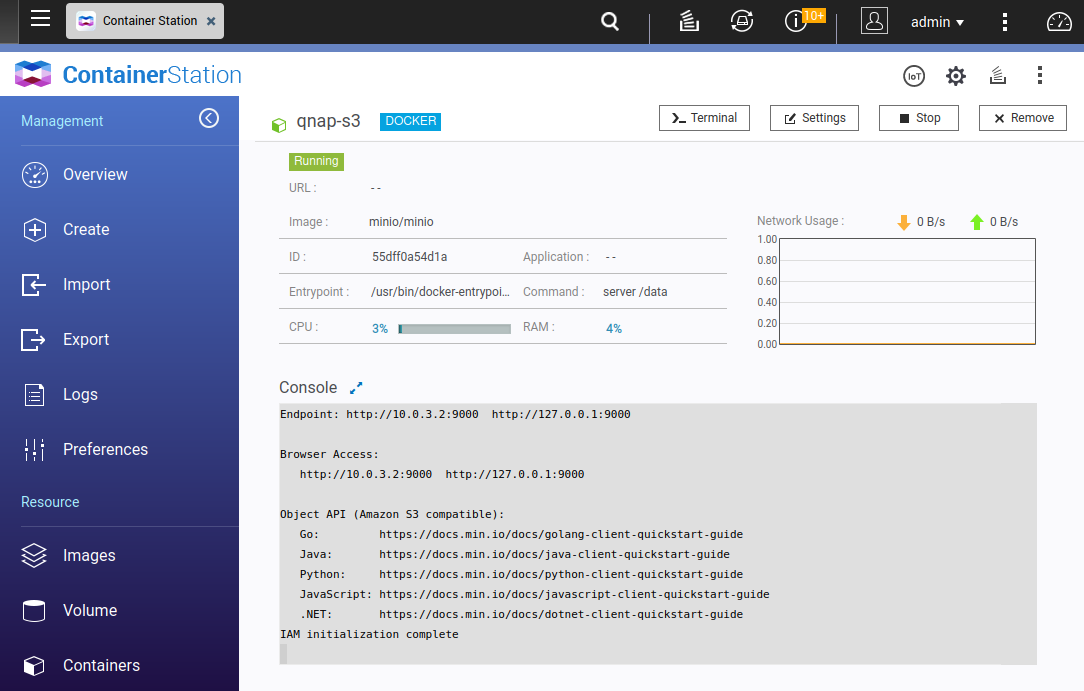
By navigating to the container, you can view further details, including a console log showing messages from the MinIO server.
Creating a User for Accessing MinIO
It is not recommended to use the MinIO admin user for accessing the bucket. Below are steps to create users with restricted permissions.
First, navigate to the IAM Policies section and create a new read-only policy for the Photos bucket.
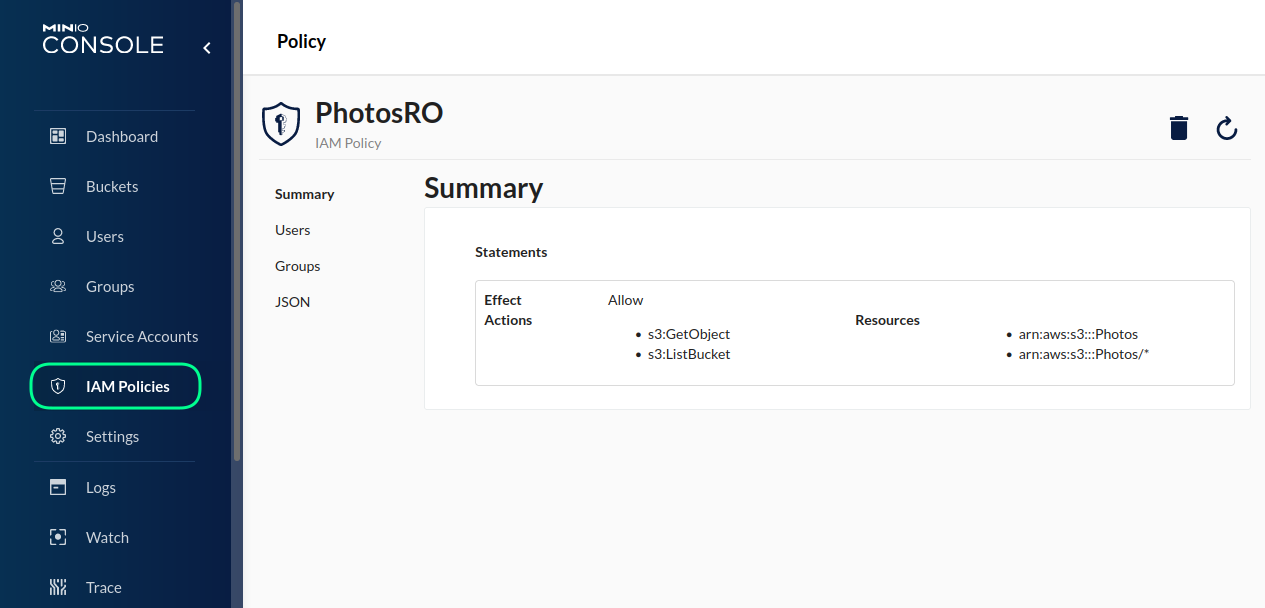
To define this policy, you can paste the following code into the JSON editor of the policy. Both elements in the Resource section of the JSON below are necessary. This policy is named PhotosRO.
{
  "Version": "2012-10-17",
  "Statement": [
    {
      "Effect": "Allow",
      "Action": ["s3:ListBucket", "s3:GetObject"],
      "Resource": ["arn:aws:s3:::Photos", "arn:aws:s3:::Photos/*"]
    }
  ]
}
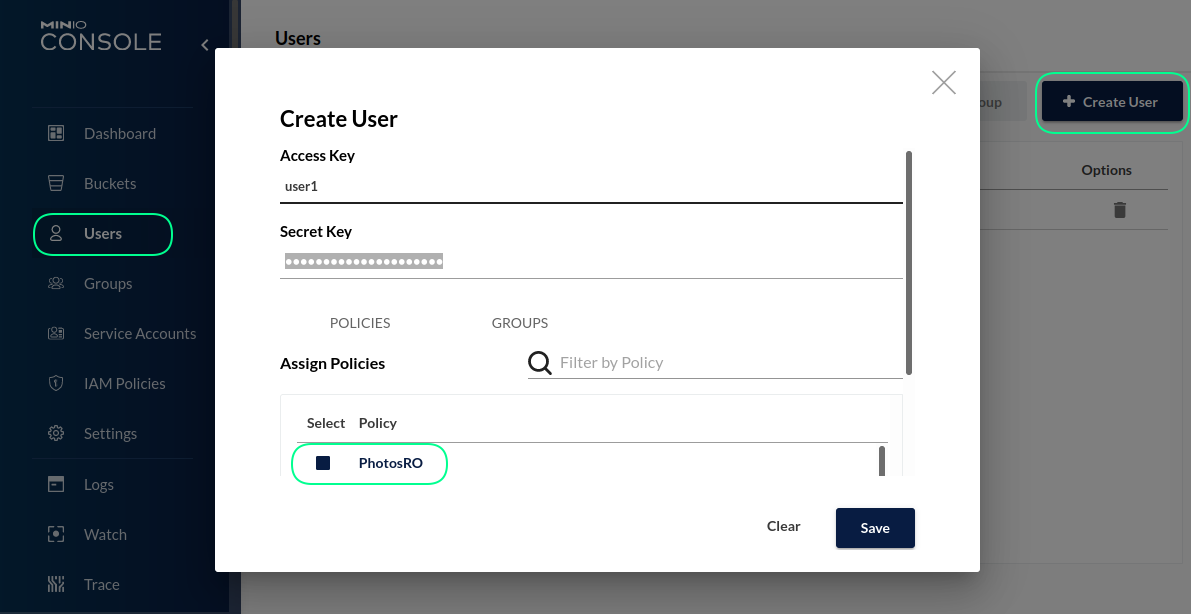
Now it's time to create a new user. Navigate to the Users section and click on the Create User button. Here, you will enter an Access Key (which acts like a username) and a Secret Key (essentially the password). Also, in the Assign Policies section, select the PhotosRO policy you previously created.
Configuring TagSpaces Pro and TagSpaces Pro Web
Once the user has been created, you can configure TagSpaces Pro to connect with the MinIO server.
-
Open TagSpaces Pro and create a new cloud location by clicking Create New and then click on the New Location menu item.
-
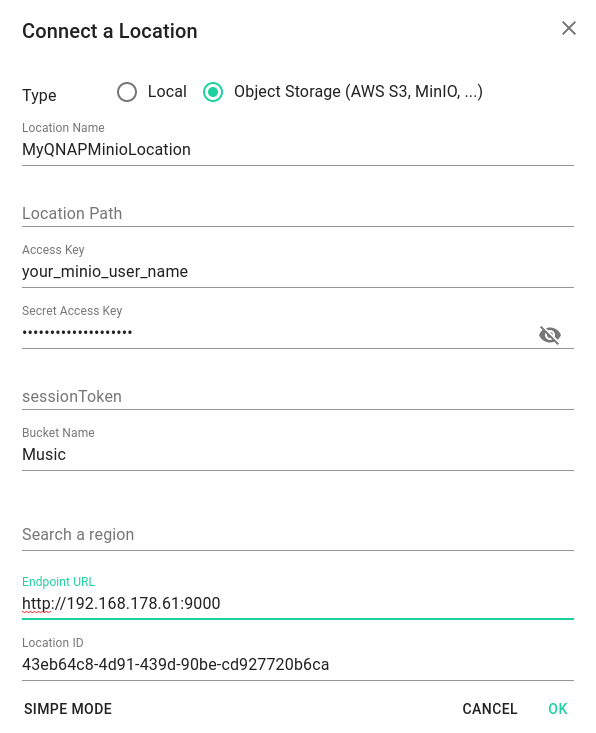
In the dialog, select the Object Storage option and click the Advanced Mode button at the bottom of the dialog.
-
Fill in the following details:
- Location Name: A custom name that helps you identify this location later in the location manager.
- Location Path: Leave this empty as it is not currently supported by TagSpaces for MinIO connections.
- Access Key: Enter the access key of the MinIO user.
- Secret Access Key: Enter the secret access key for the user.
- Bucket Name: Enter the name of one of the subfolders within the main folder hosted by MinIO (as seen in the previous screenshot).
- Endpoint URL: Specify the URL and port where your MinIO instance is running.
- Location ID: This is automatically generated but can be changed if needed. It must not be left empty.
Once configured and saved, TagSpaces should connect to the MinIO instance and list the files within it.
Common Pitfalls
Connection Issues
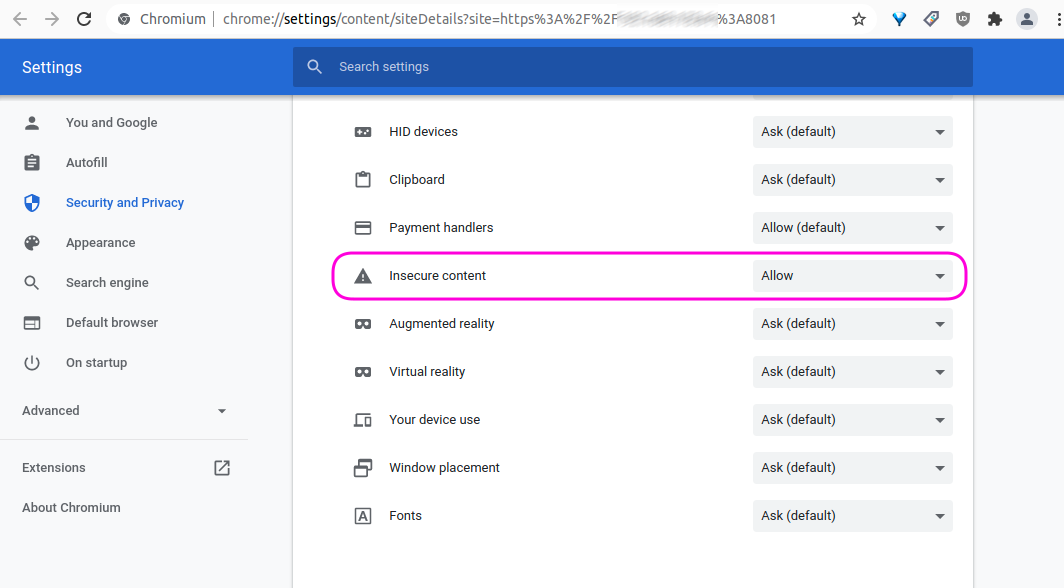
If you are running your MinIO server over HTTP, you will need to allow insecure content in the settings for the TagSpaces Pro Web page in the Chrome/Chromium browser.
If you are using Firefox, this relaxing of settings is not possible, so you need to ensure both TagSpaces Pro Web and MinIO are either using HTTPS or both are on HTTP.
Running TagSpaces Pro Web over HTTP is not recommended!
- It is strongly recommended to set up an SSL certificate for your MinIO server to ensure secure HTTPS connections.
- It is also highly recommended to set up an SSL certificate for the web server hosting the TagSpaces Web App so that connections are secured over HTTPS.
CORS Issues
Some users have reported CORS-related issues with MinIO servers installed on Synology NAS systems. For more details, please refer to this GitHub issue.
Feel free to contact us if you have any questions or suggestions!