User Interface Introduction
TagSpaces opens as a single-window application designed to maximize space usage, whether on large screens or small mobile displays. Its user interface follows Google's Material Design guidelines, making it adaptable and consistent across operating systems and platforms.
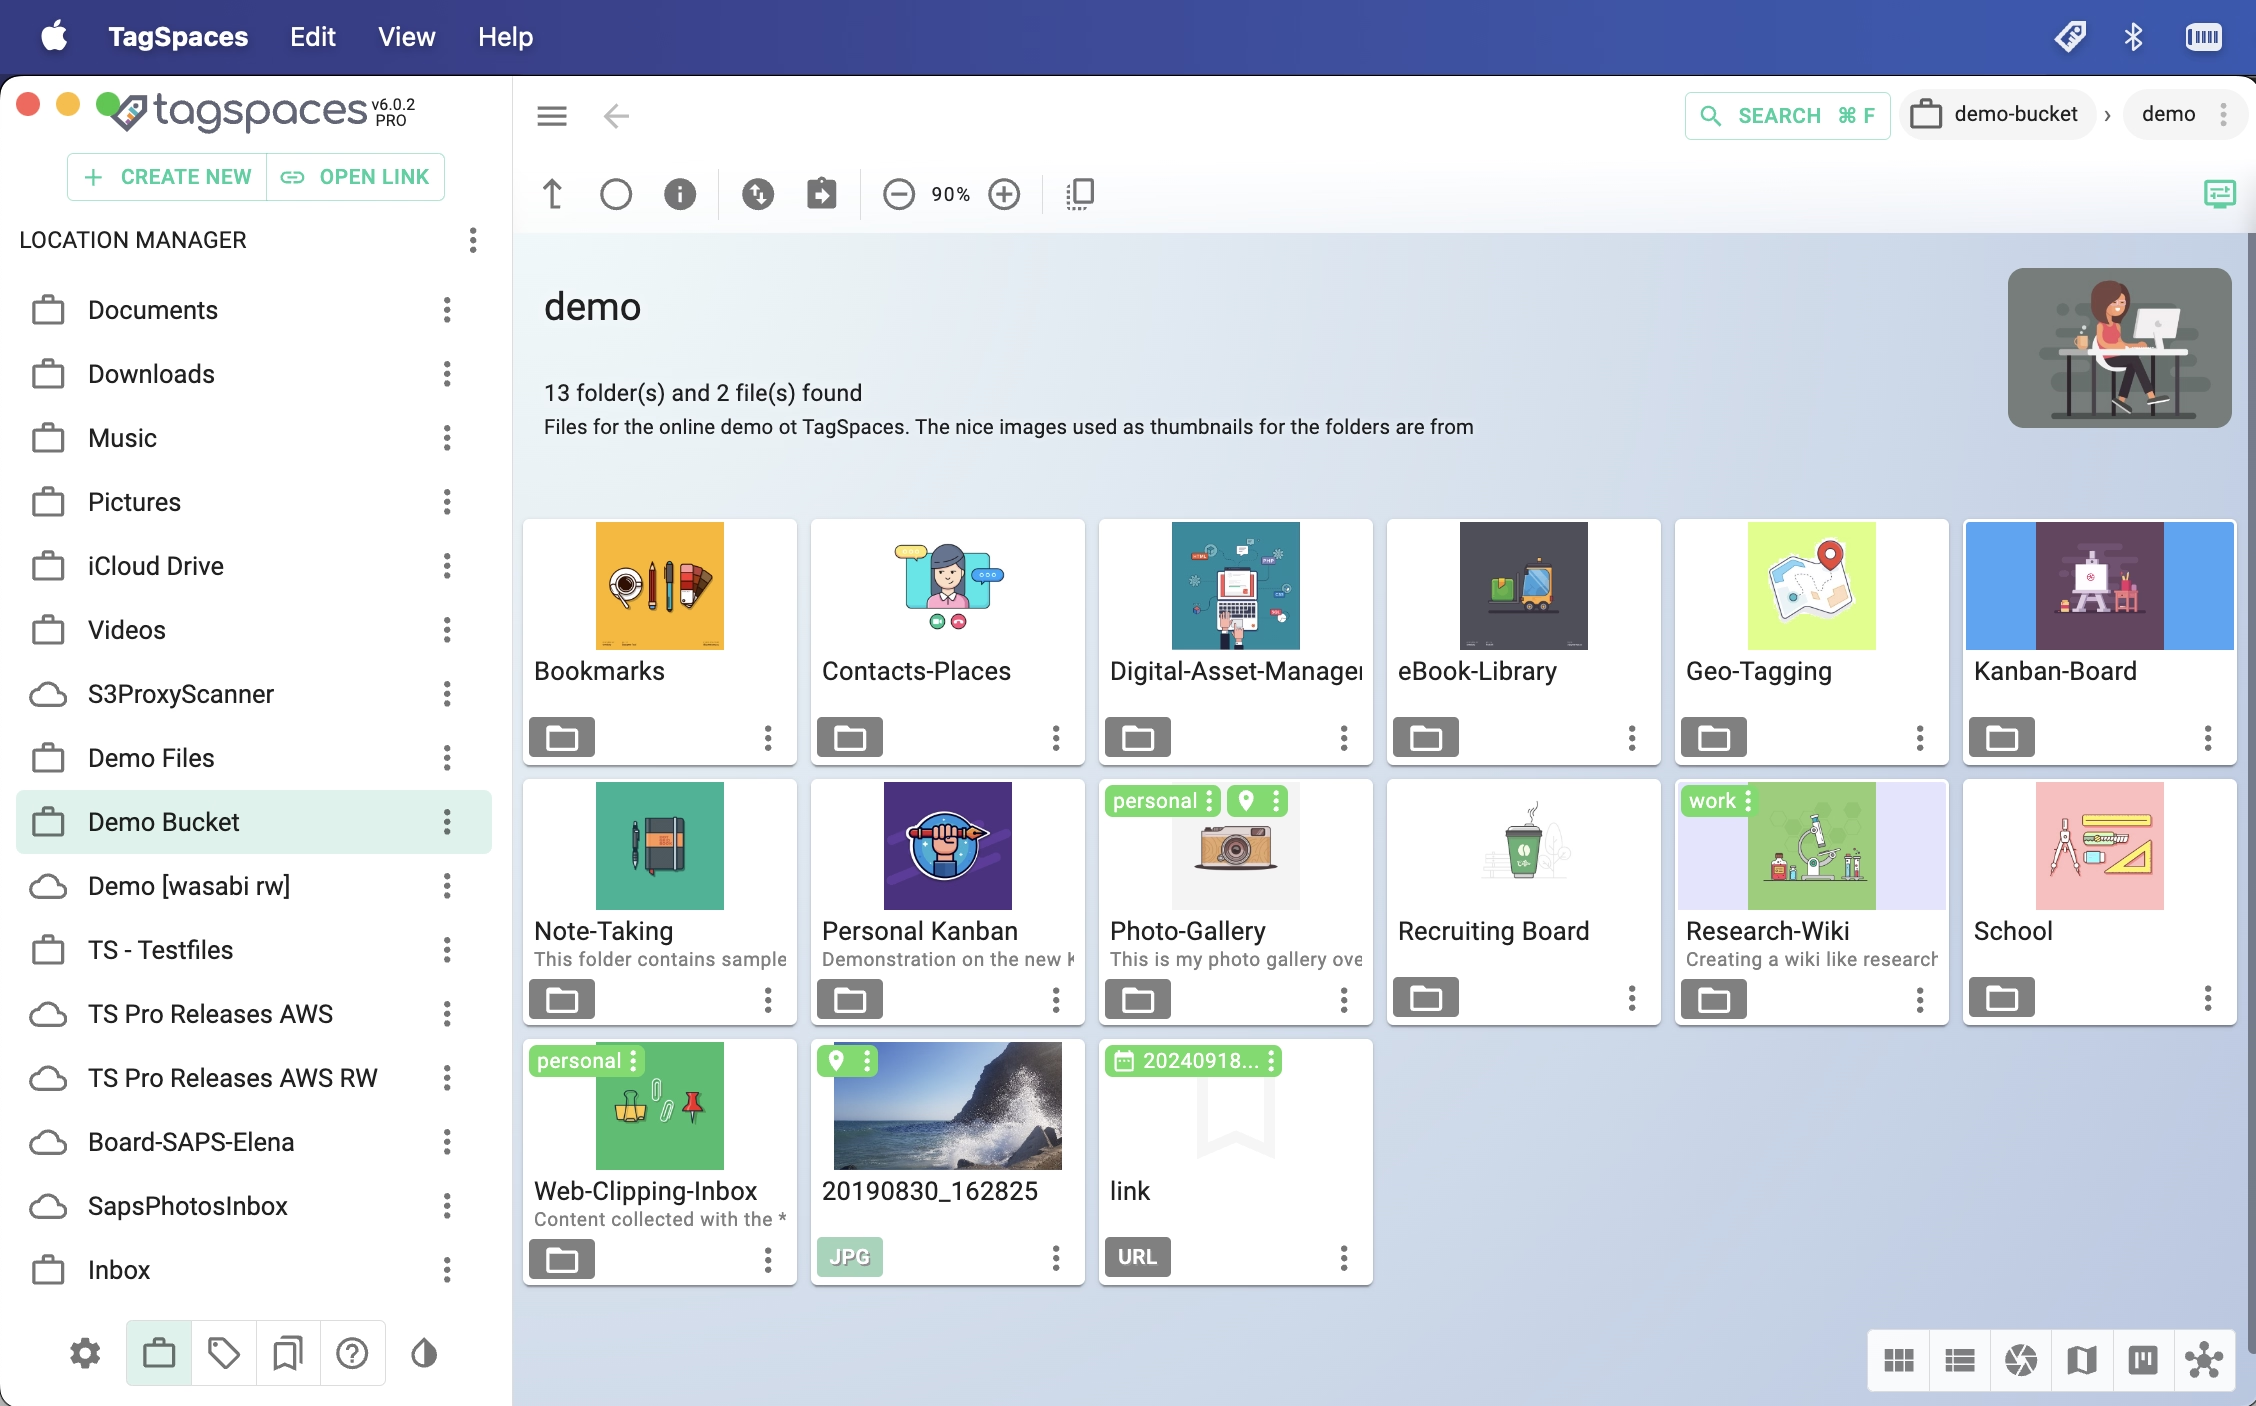
This streamlined experience ensures ease of use across platforms, so once you're familiar with the features, you can use them anywhere. The image below shows a typical start screen, with a list of available locations on the left and the content of the currently opened folder in the center, using the default perspective.
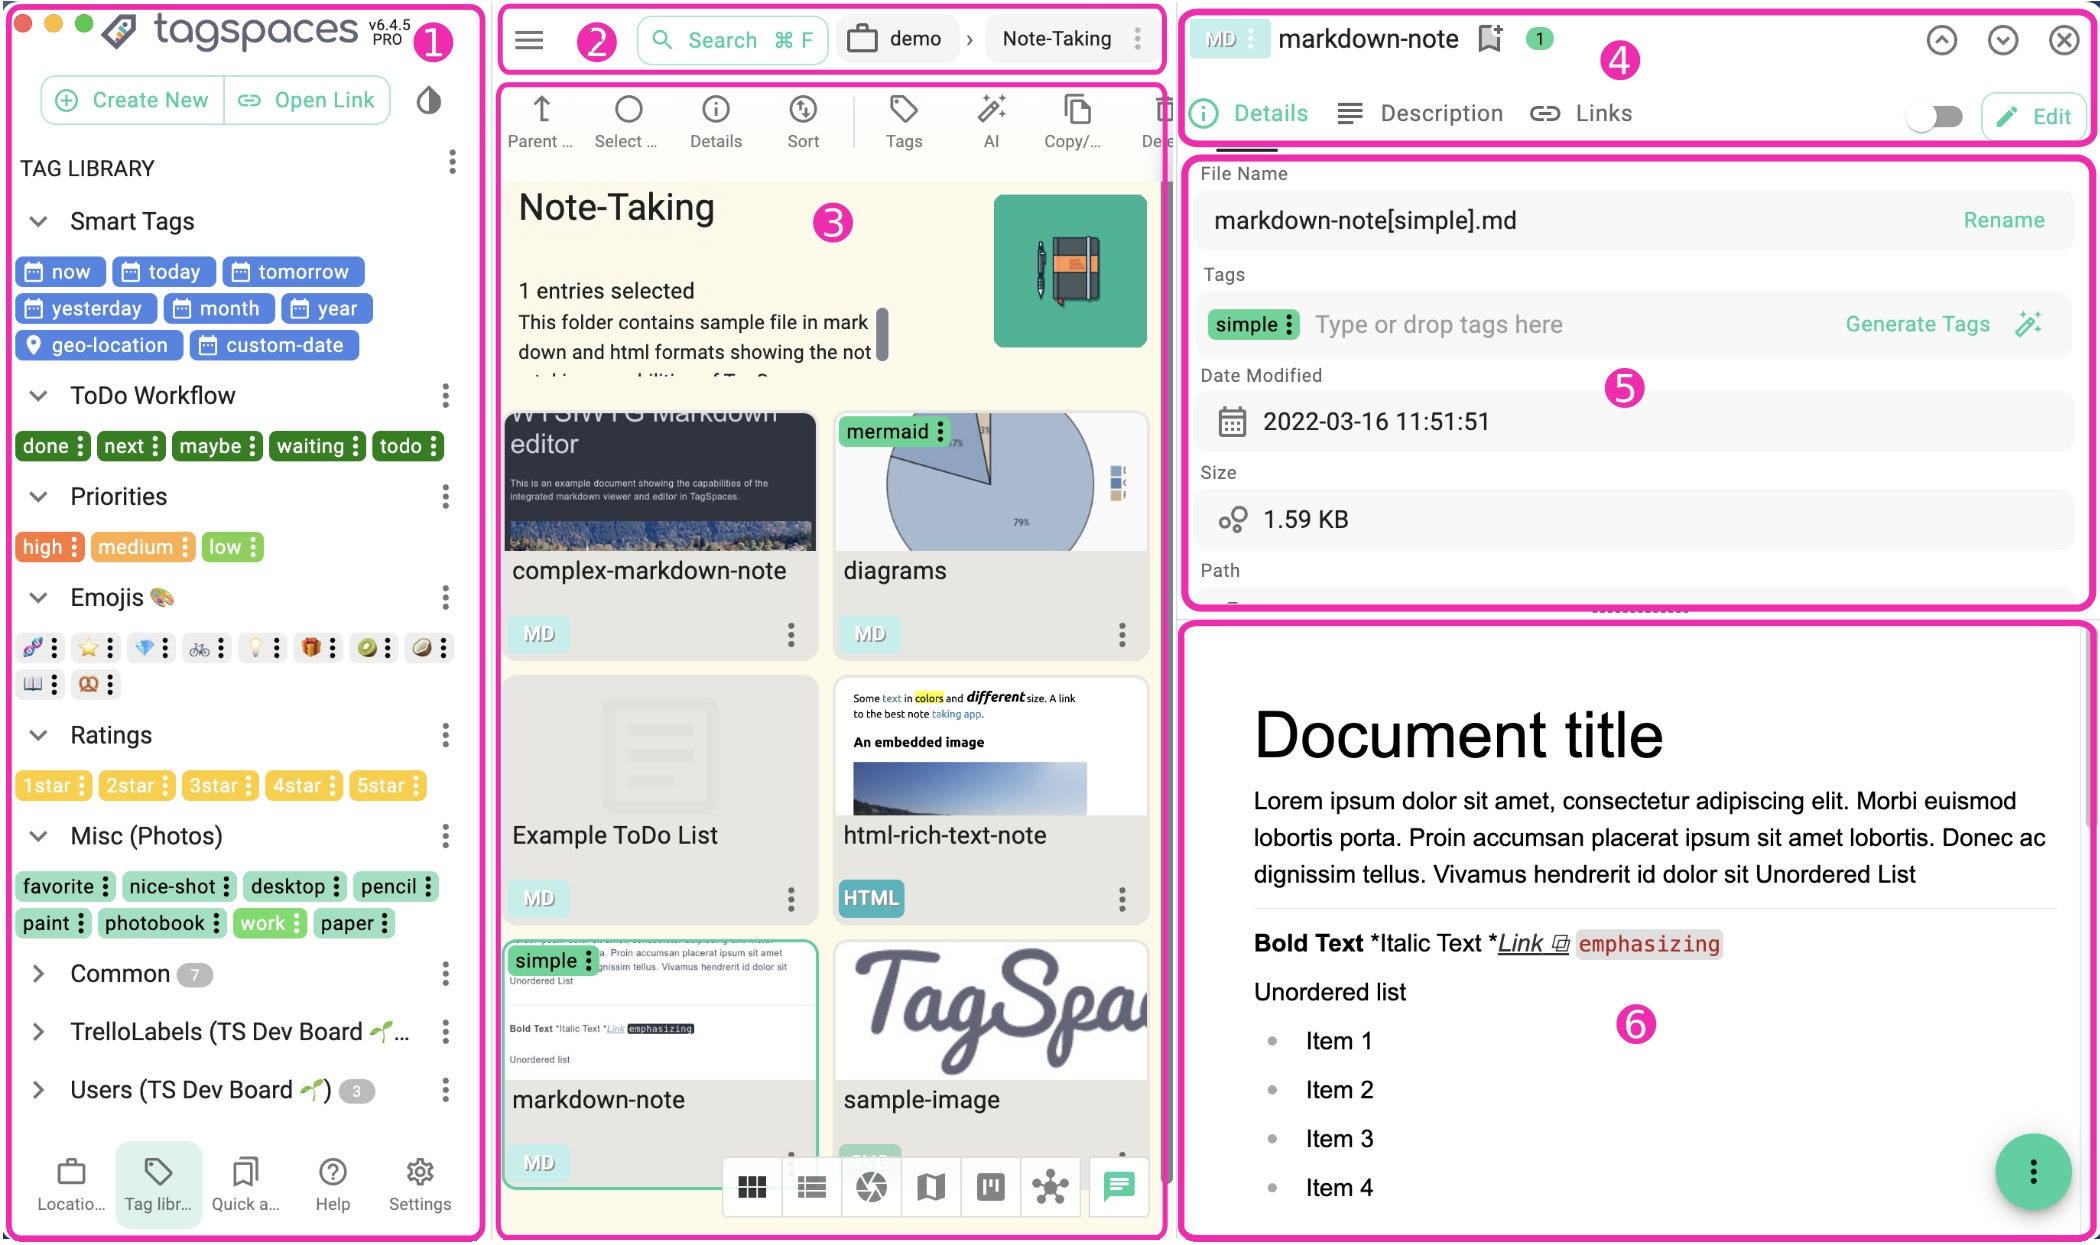
The application's user interface consists of the following main areas:
- Left Drawer - Open the location manager or tag library and access other important app functionalities like settings.
- Navigation and Search - Use this area to search, switch locations, or navigate to parent folders.
- Browsing Area - The central section for browsing files and folders using various perspectives.
- Common Actions Area - Access actions for the currently opened file or folder.
- File / Folder Properties - View the properties of the opened file or folder.
- File Preview - Preview and/or edit the current file here.
Left Area
The main user interface area is divided into three sub-areas:
Top Area: Displays the app's logo and application version. Clicking the logo opens the About dialog, where you can check licensing details and new versions. Below the logo, the Create New (1) button opens a dialog to create files, and the Open Link (2) button open new internal or external link. The rightmost button (3) toggles between light and dark themes. In the TagSpaces Custom version, this button can open the logged user's properties.

Bottom toolbar: You can access here the following areas
- (4) Location Manager - Manage your locations here.
- (5) Tag Library - Organize tags into groups.
- (6) Quick Access - Access stored searches, bookmarks, and recently used files and folders.
- (7) Help - Access area where you can get help, suggest features, give us feedback or contact support.
- (8) Settings - Access the settings dialog of the application.
Navigation and Search
The file browsing area displays files from the active folder in various views (list, grid, or kanban), depending on the active perspective. Learn more in the perspective section.
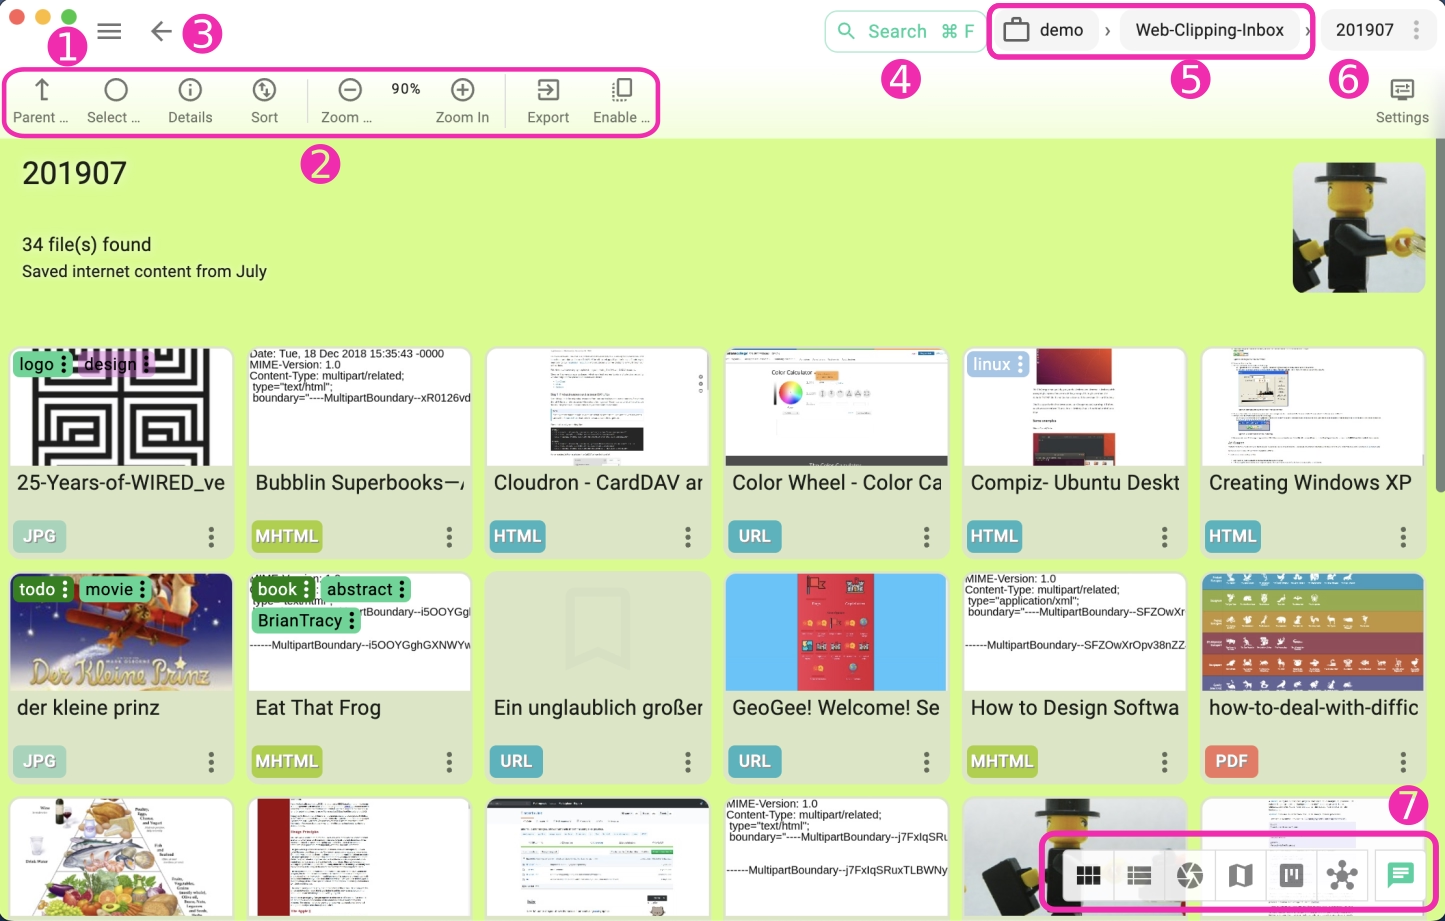
- (1) - Toggles the left drawer.
- (2) - The toolbar of the current perspective.
- (3) - Navigate to the previous file or folder.
- (4) - Opens search.
- (5) - Displays parent folders as buttons, enabling navigation.
- (6) - Displays the current folder's name, which opens the folder menu.
- (7) - Switch between different perspectives: Grid, List, Gallery, Mapique, Kanban, FolderViz and Calendar.
Folder Menu
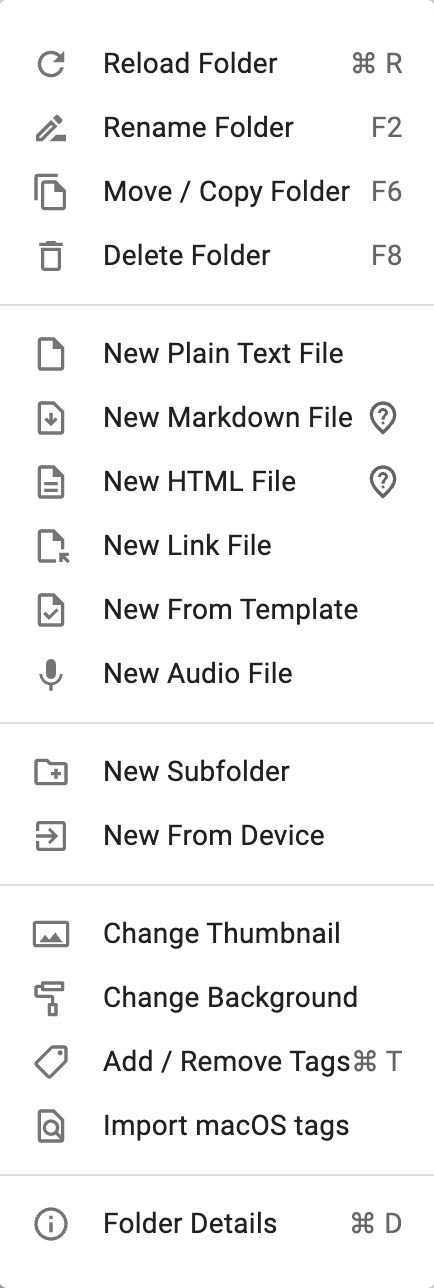
This menu includes options such as:
- Reload, rename, or delete the folder.
- Open the folder in the operating system's file manager.
- Create new files, subfolders, or add files.
- Import macOS tags (only on macOS desktop app).
- Add and remove tags
- Access folder details.
Preview Area
When a file is opened, the main UI splits into two areas, with the right side becoming the Preview Area. TagSpaces supports displaying various file types, from markdown to PDFs and images. For more details, see Previewing Files and Editing Files.
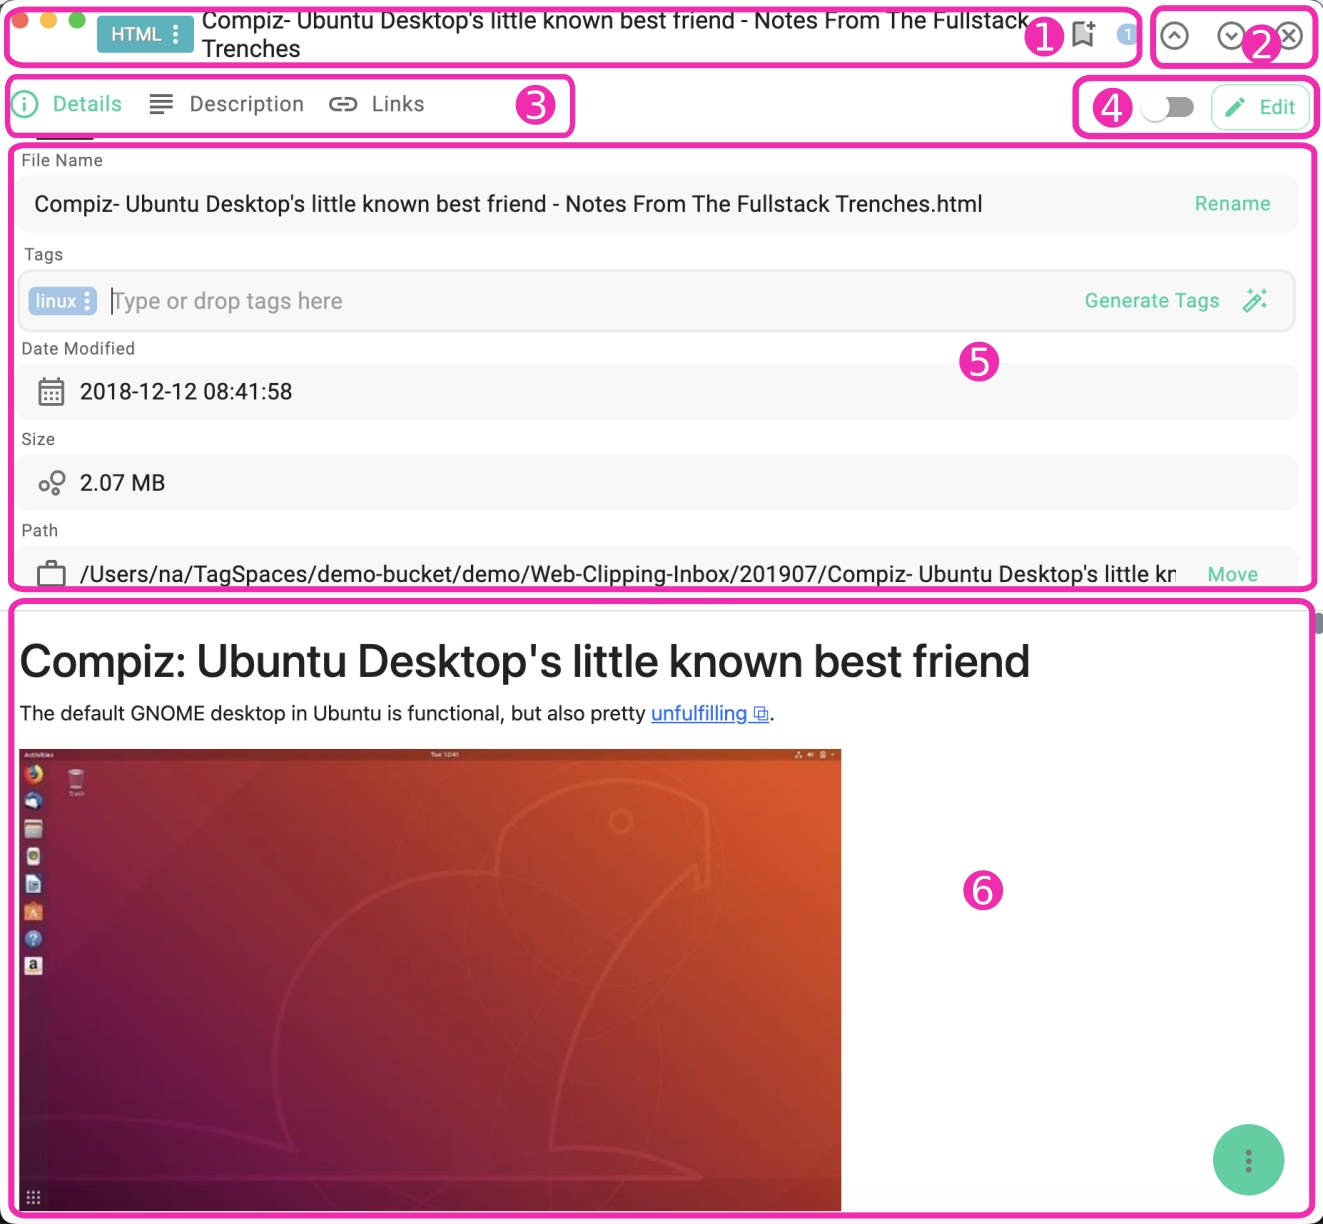
- (1) Title Area - displays the file's name, tags and extension, with options to bookmark it.
- (2) Navigate & Close - navigate between files in the current folder or search results, close the current file or folder.
- (3) Tab Switch - between entry properties, entry description, file revisions, ai chat and links. A click on the tab title of the current tab will close it, providing more space for the file preview.
- (4) Editing options - the edit mode for certain file type can be enabled here. A toggle for auto-saving changes in the currently edited file is located also in this area.
- (5) Entry Properties - if opened it displays the properties of the currently opened file or folder.
- (6) Preview & Edit Area - displays a preview of the current file. Some text based files like TXT, Markdown or HTML can be edited here.
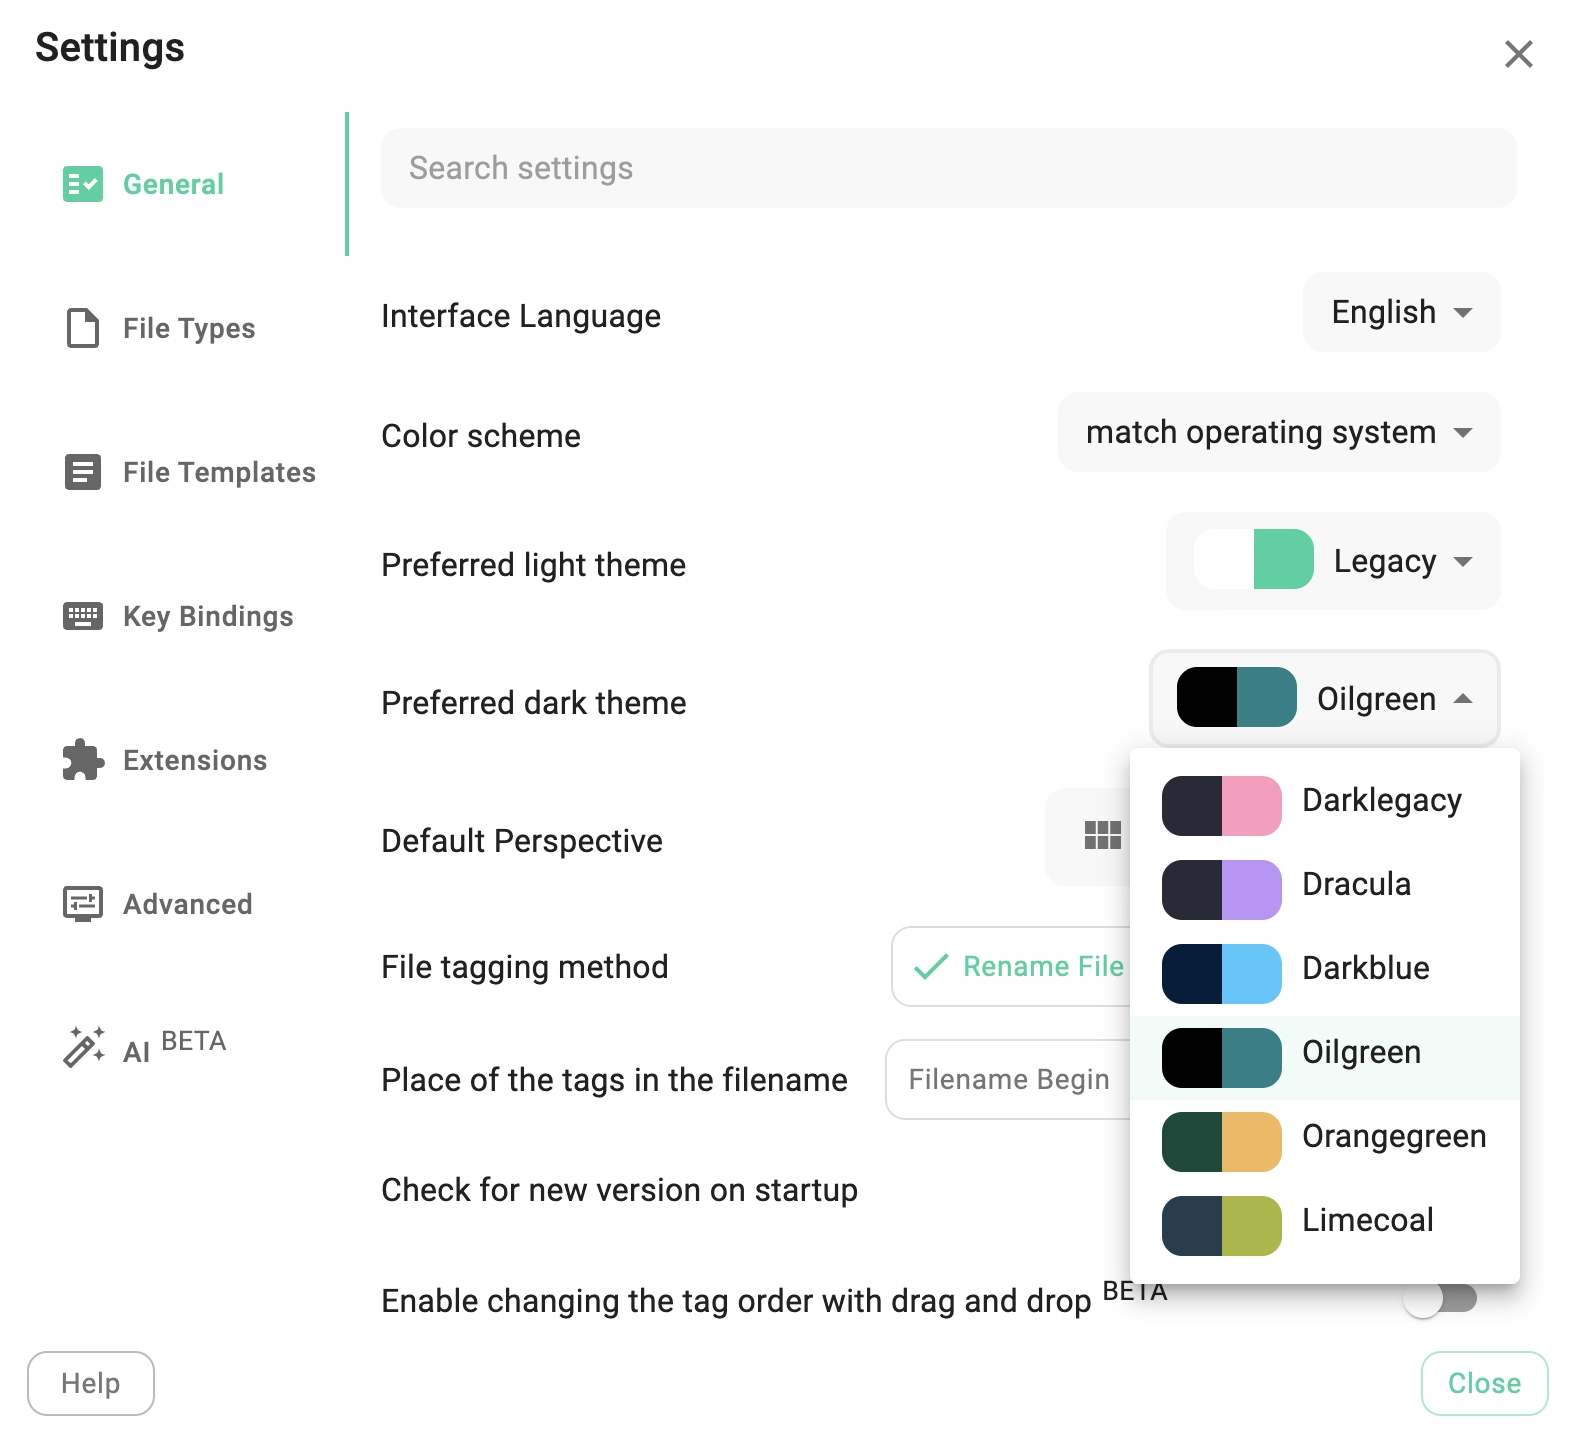
Dark Mode and Themes
TagSpaces currently supports 6 light and 6 dark themes. These themes can be switched automatically when the operating systems toggles the dark mode or manually in the tab general of the settings.
Multiple Windows and Tabs
TagSpaces supports multiple windows or tabs in the web versions. You can open locations, folders, or files in new windows/tabs, or start a new instance of the application.

Scalable User Interface
TagSpaces' UI is scalable, allowing you to adjust the zoom factor according to your screen. Access the zoom options from the View menu. Options include zoom in, zoom out, and resetting the zoom to its default.

- Zoomed In Interface:
In a browser, use the built-in zoom functionality.
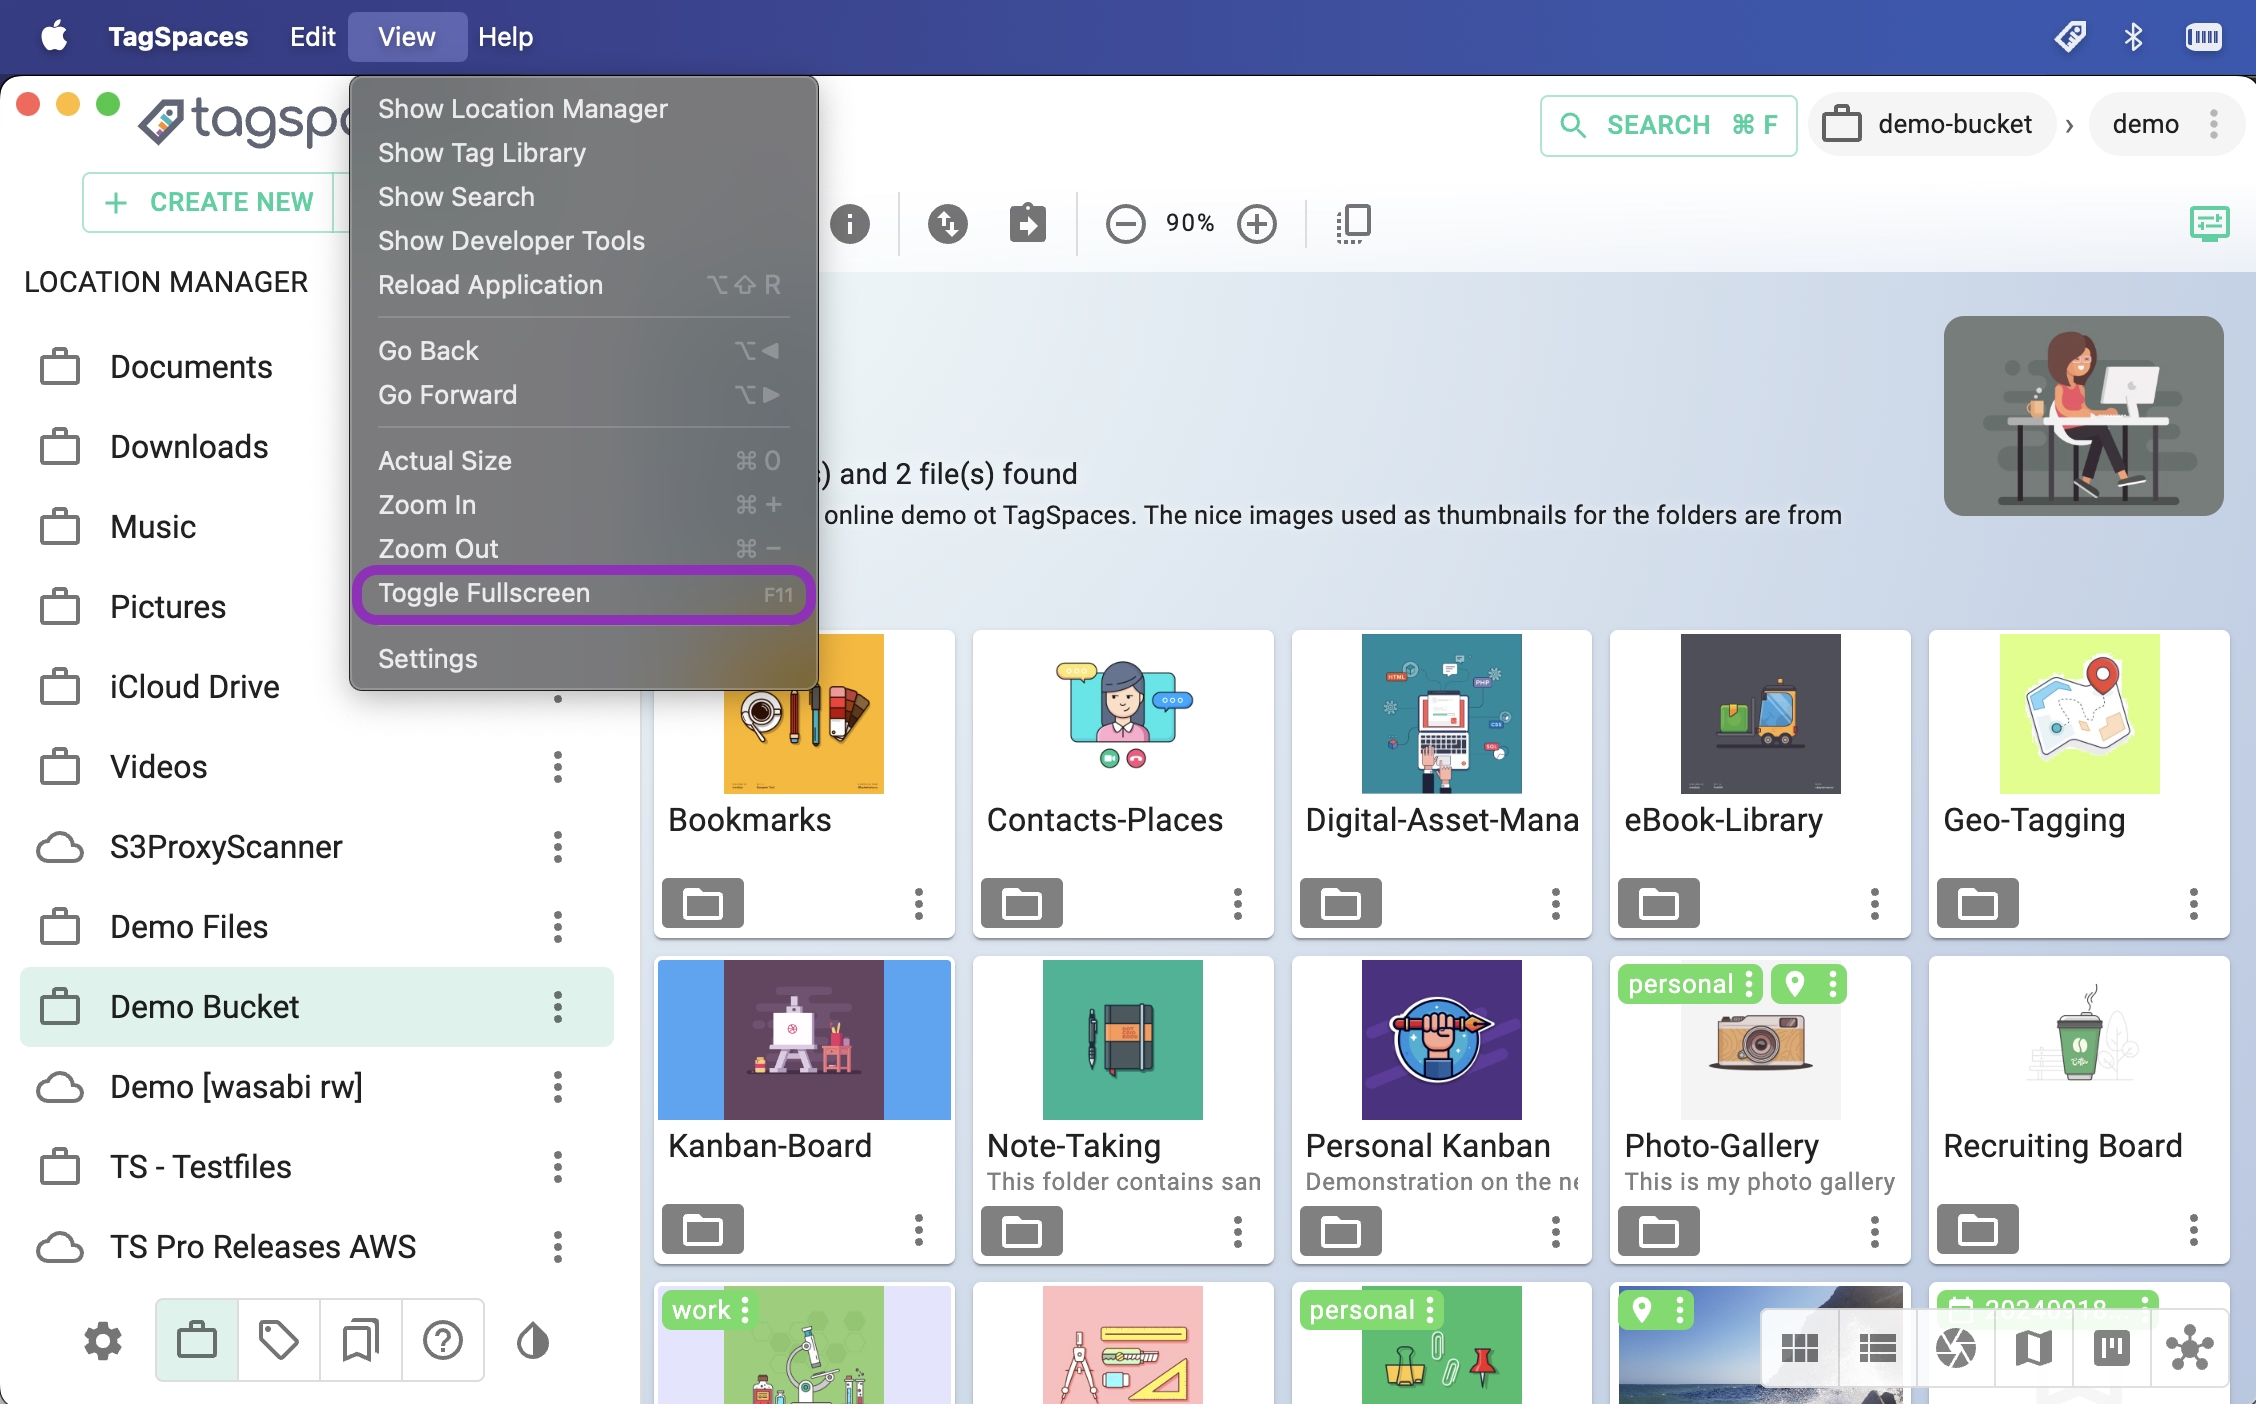
Full Screen Mode
The desktop app supports full screen mode, which can be toggled by pressing F11 or selecting View -> Toggle Fullscreen from the Main Menu.
In a browser, use the browser's full screen capabilities.
Tray Menu
On Windows, macOS, and Linux, starting the desktop app loads a tray menu integrated into the operating system.
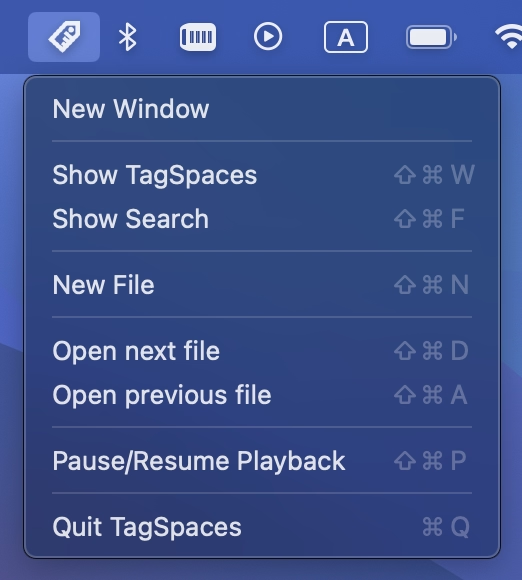
The tray menu offers the following functionalities:
- Show TagSpaces -
Ctrl+Shift+W/Cmd+Shift+W - Show Search -
Ctrl+Shift+F/Cmd+Shift+F - New File / Note -
Ctrl+Shift+N/Cmd+Shift+N - Open Next File -
Ctrl+Shift+D/Cmd+Shift+D - Open Previous File -
Ctrl+Shift+P/Cmd+Shift+P - Pause/Resume Playback -
Ctrl+Shift+P/Cmd+Shift+P - Quit TagSpaces -
Ctrl+Q/Cmd+Q
These key combinations are available globally and can be used even if TagSpaces is not in focus. They can be disabled in the settings.