Using TagSpaces with Docker
This guide provides instructions for using TagSpaces Lite Web and TagSpaces Pro Web as Docker containers. The Docker container is based on Alpine Linux and uses nginx as the web server.
Get Docker
Install Docker for your operating system from https://docs.docker.com/get-docker/.
Using TagSpaces Lite Web with Docker
Get the TagSpaces Lite Docker image
You can download the latest TagSpaces Docker image from hub.docker.com or directly from the Docker Desktop app:
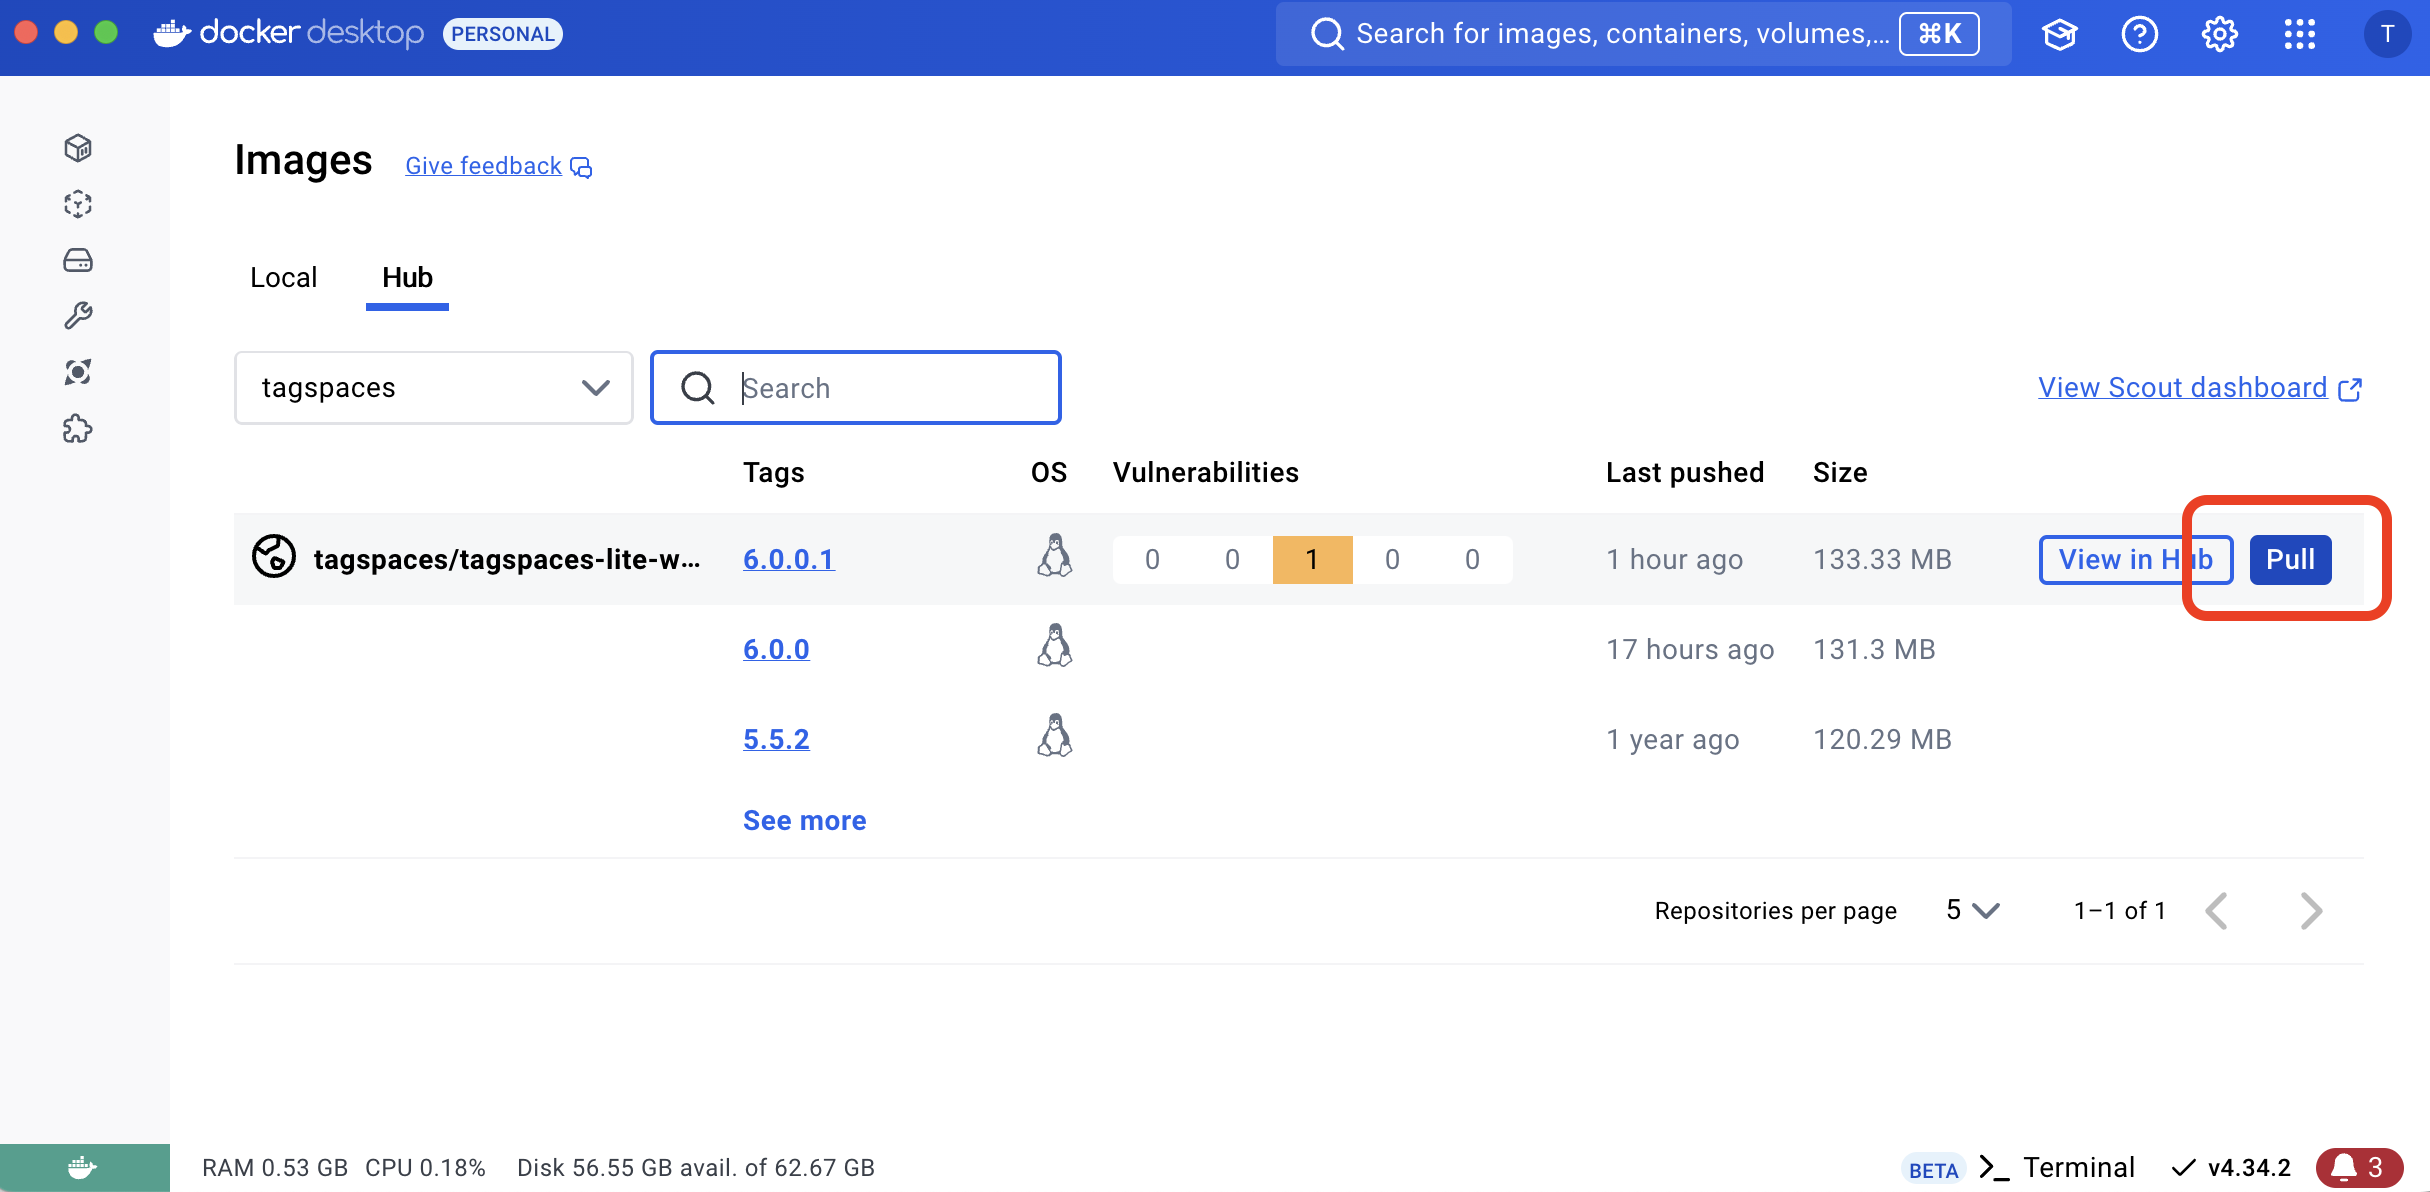
Click the Pull button to download the image locally.
Alternatively, you can use the following command in your terminal:
docker pull tagspaces/tagspaces-lite-web
Run the image
Once the image is downloaded, you can run it in the Docker Desktop app:
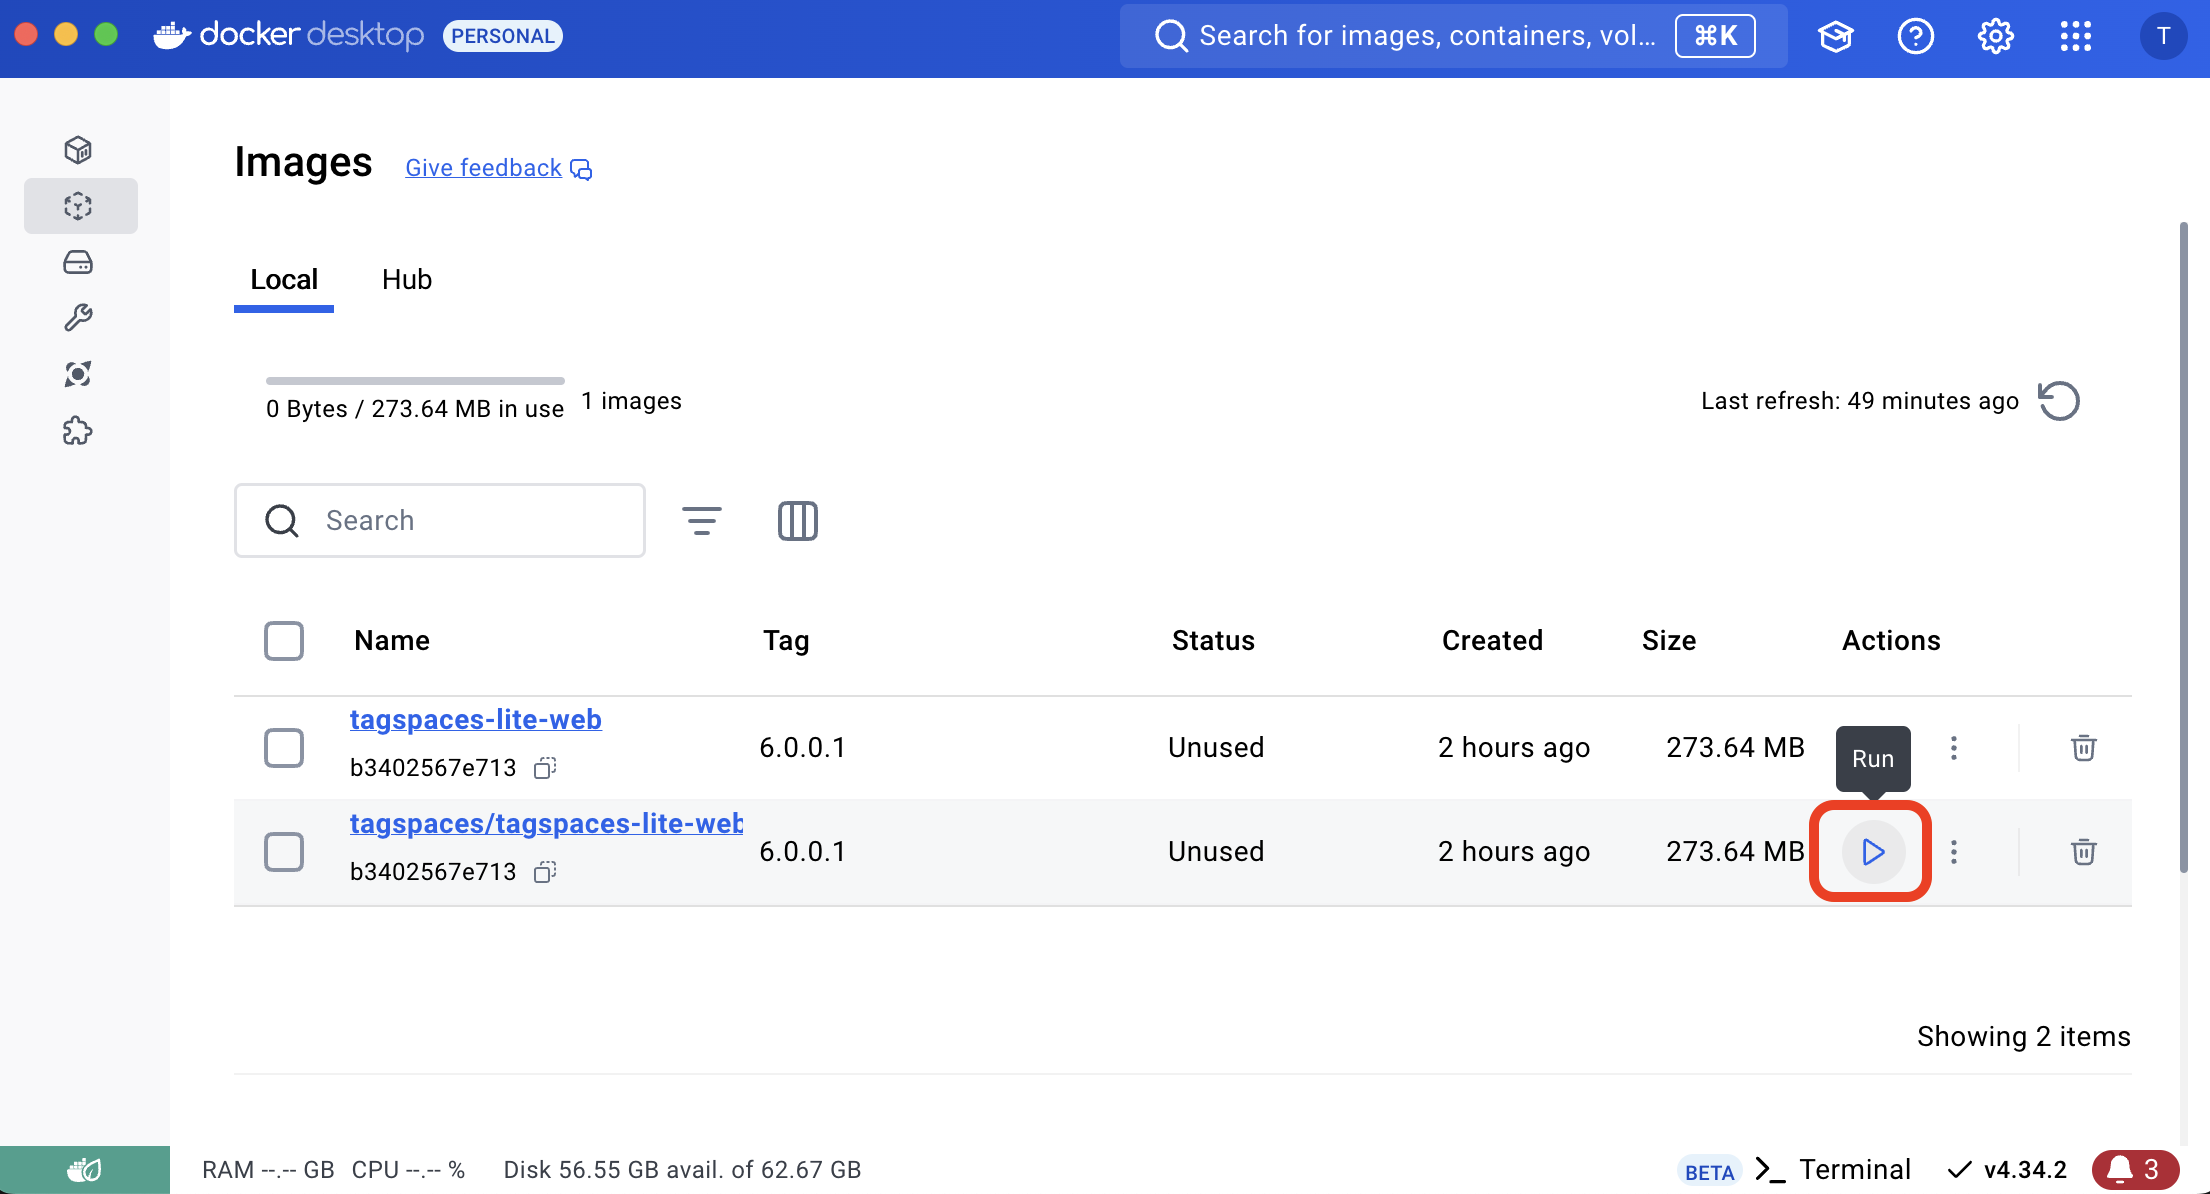
These steps will create a TagSpaces container in your local Docker repository.
Alternatively, you can run the following command in your terminal:
docker run -dp 127.0.0.1:9000:80 tagspaces-lite-web:6.0.0
9000 is the port on your local machine where the TagSpaces Web app will be accessible.
Testing in the browser
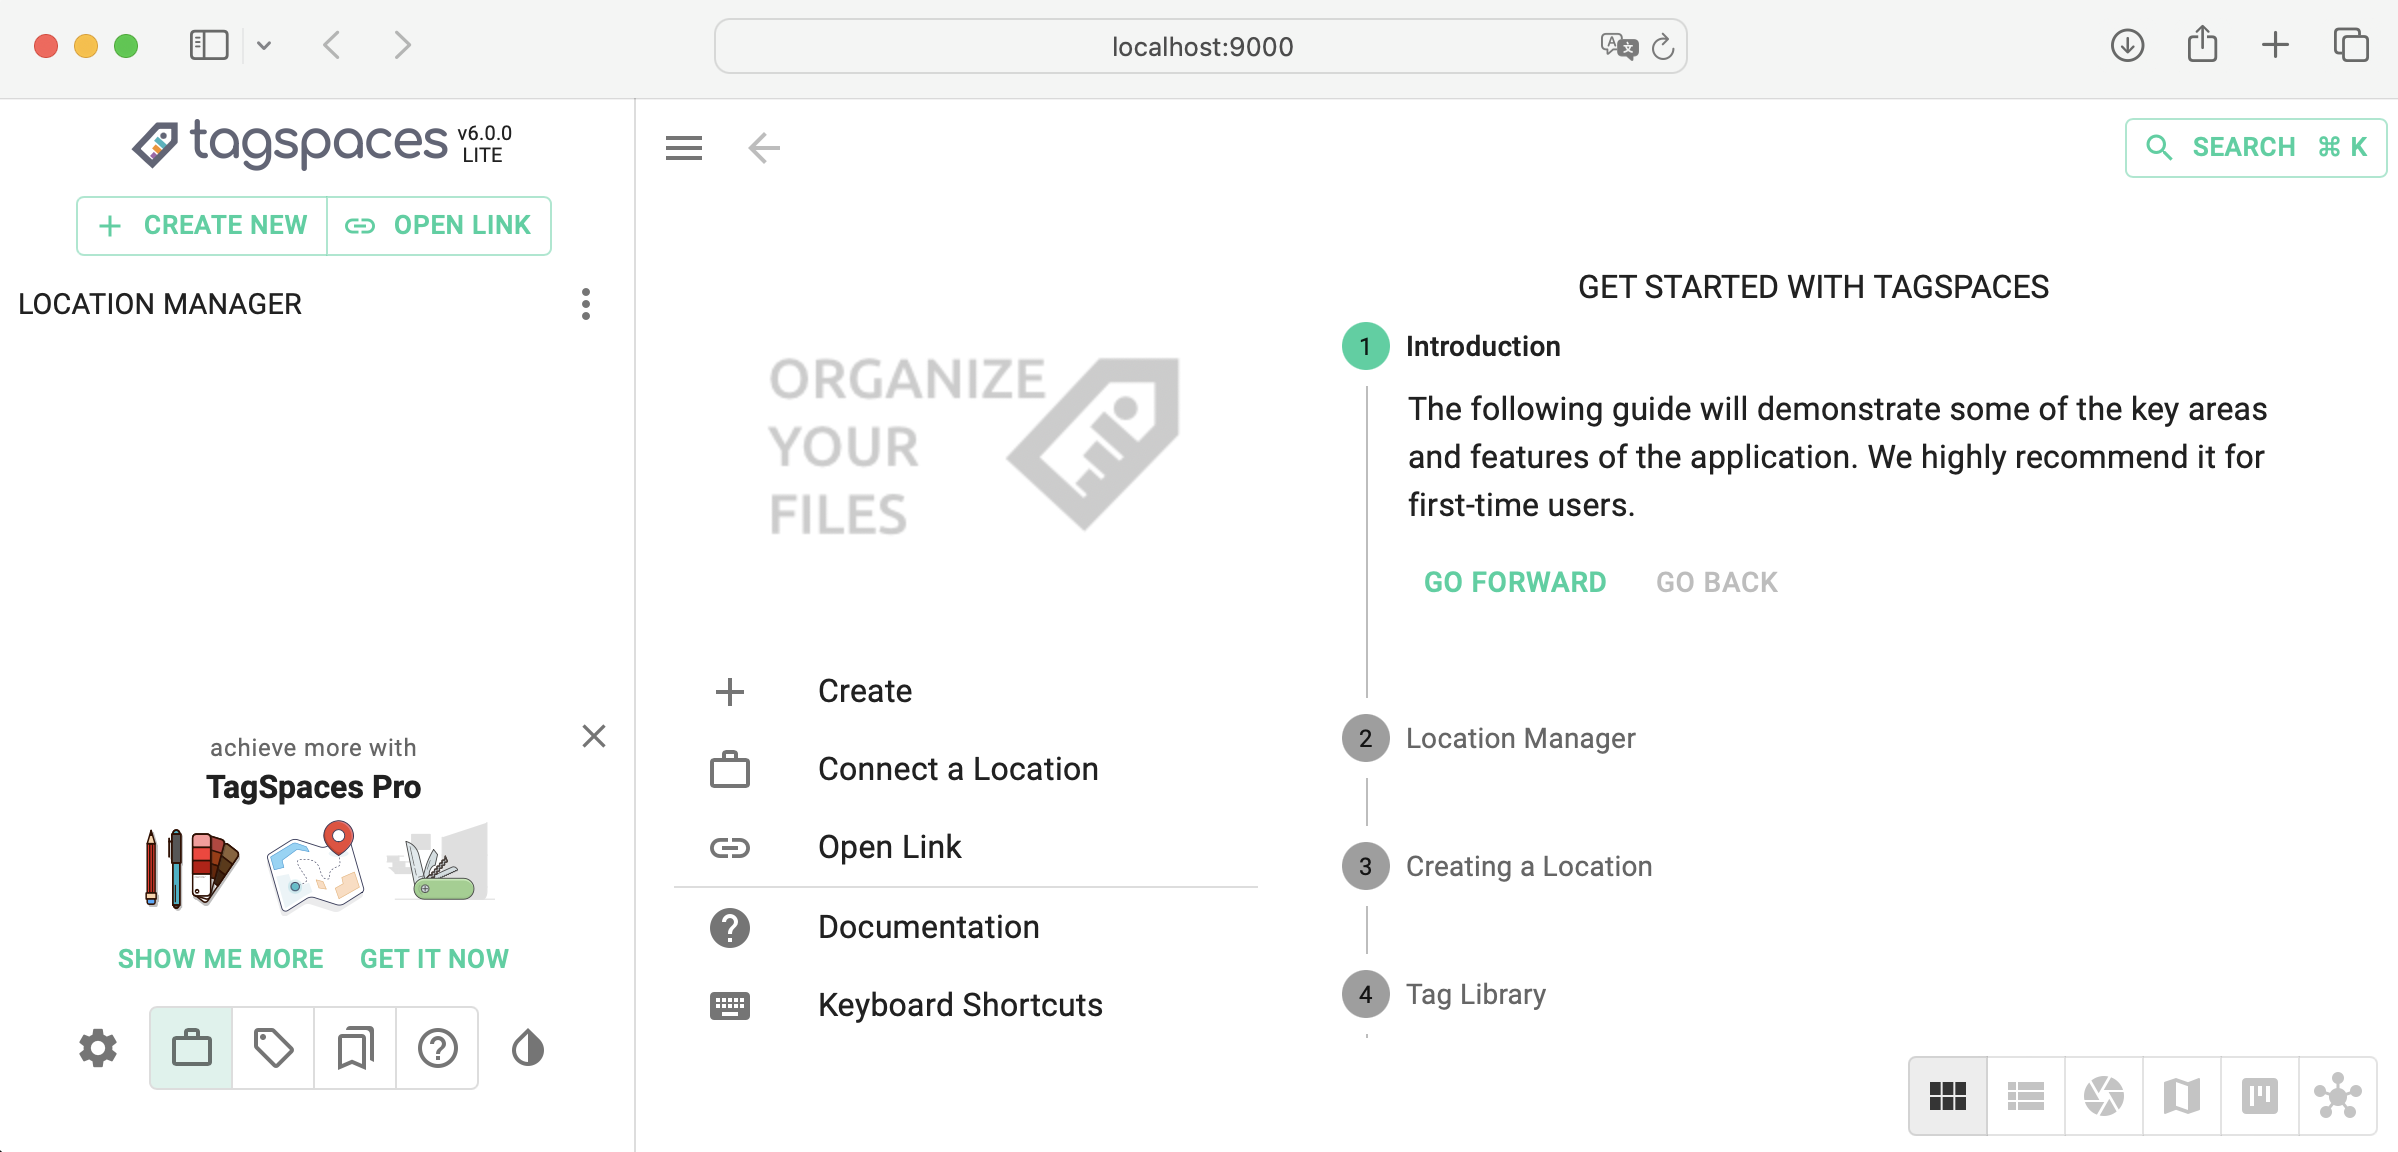
If everything is set up correctly, open your browser and navigate to http://localhost:9000 or http://127.0.0.1:9000. You should see TagSpaces Web.
Using TagSpaces Pro Web with Docker
Download TagSpaces Pro Web package
Customers who have purchased TagSpaces Pro Web can download the package from the links provided in the purchase confirmation email.
Unzip the package
Use your preferred tool to unzip the package. On macOS and Linux, you can run the following command in your terminal:
unzip tagspaces-web-pro.zip
This will create a folder called web in your current directory (e.g. /Users/username/Downloads).
Creating the container
Get the tagspaces-lite-web Docker image as described here.
Next, use the Docker Desktop app to create a new container from the tagspaces-lite-web image by clicking "Run" in the image area.

Configuring the container
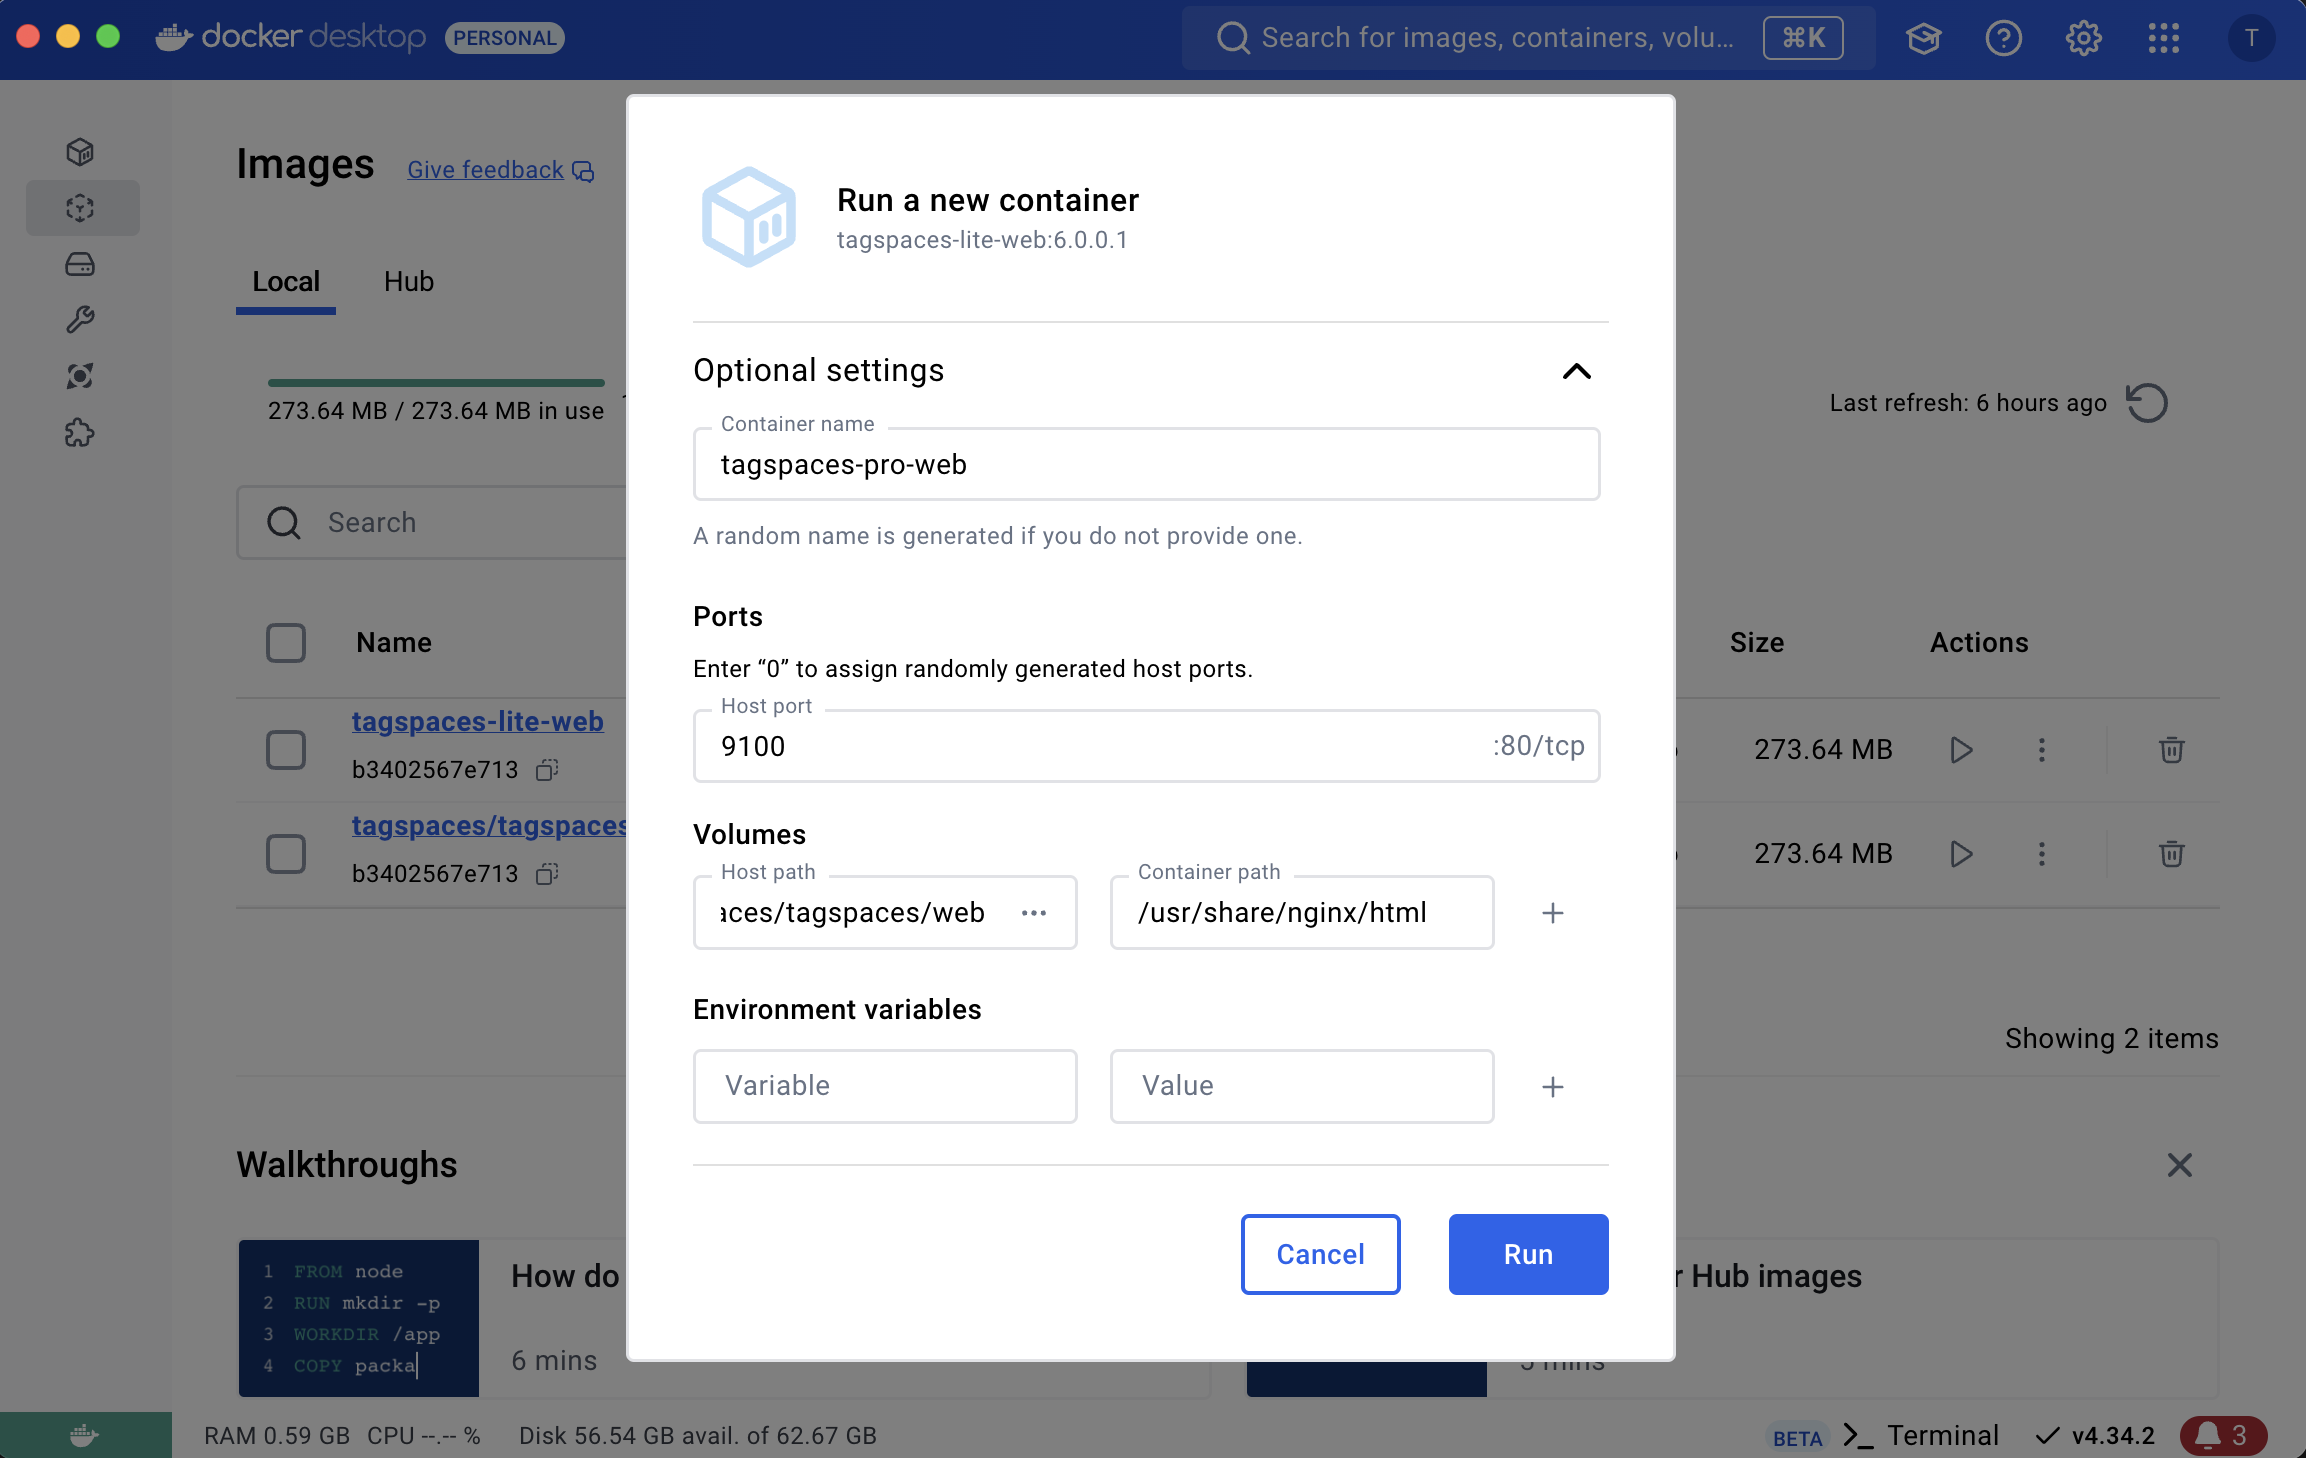
In the "Run a new container" dialog, open the optional settings and configure the following options:
- Container name - Something like "tagspaces-pro-web".
- Port - A different port than the one used for the Lite version.
- Volumes
- Host path - The path where you unzipped the Pro Web package (e.g.
/Users/username/Downloads/web). - Container path - Set to
/usr/share/nginx/html.
- Host path - The path where you unzipped the Pro Web package (e.g.
Testing in the browser
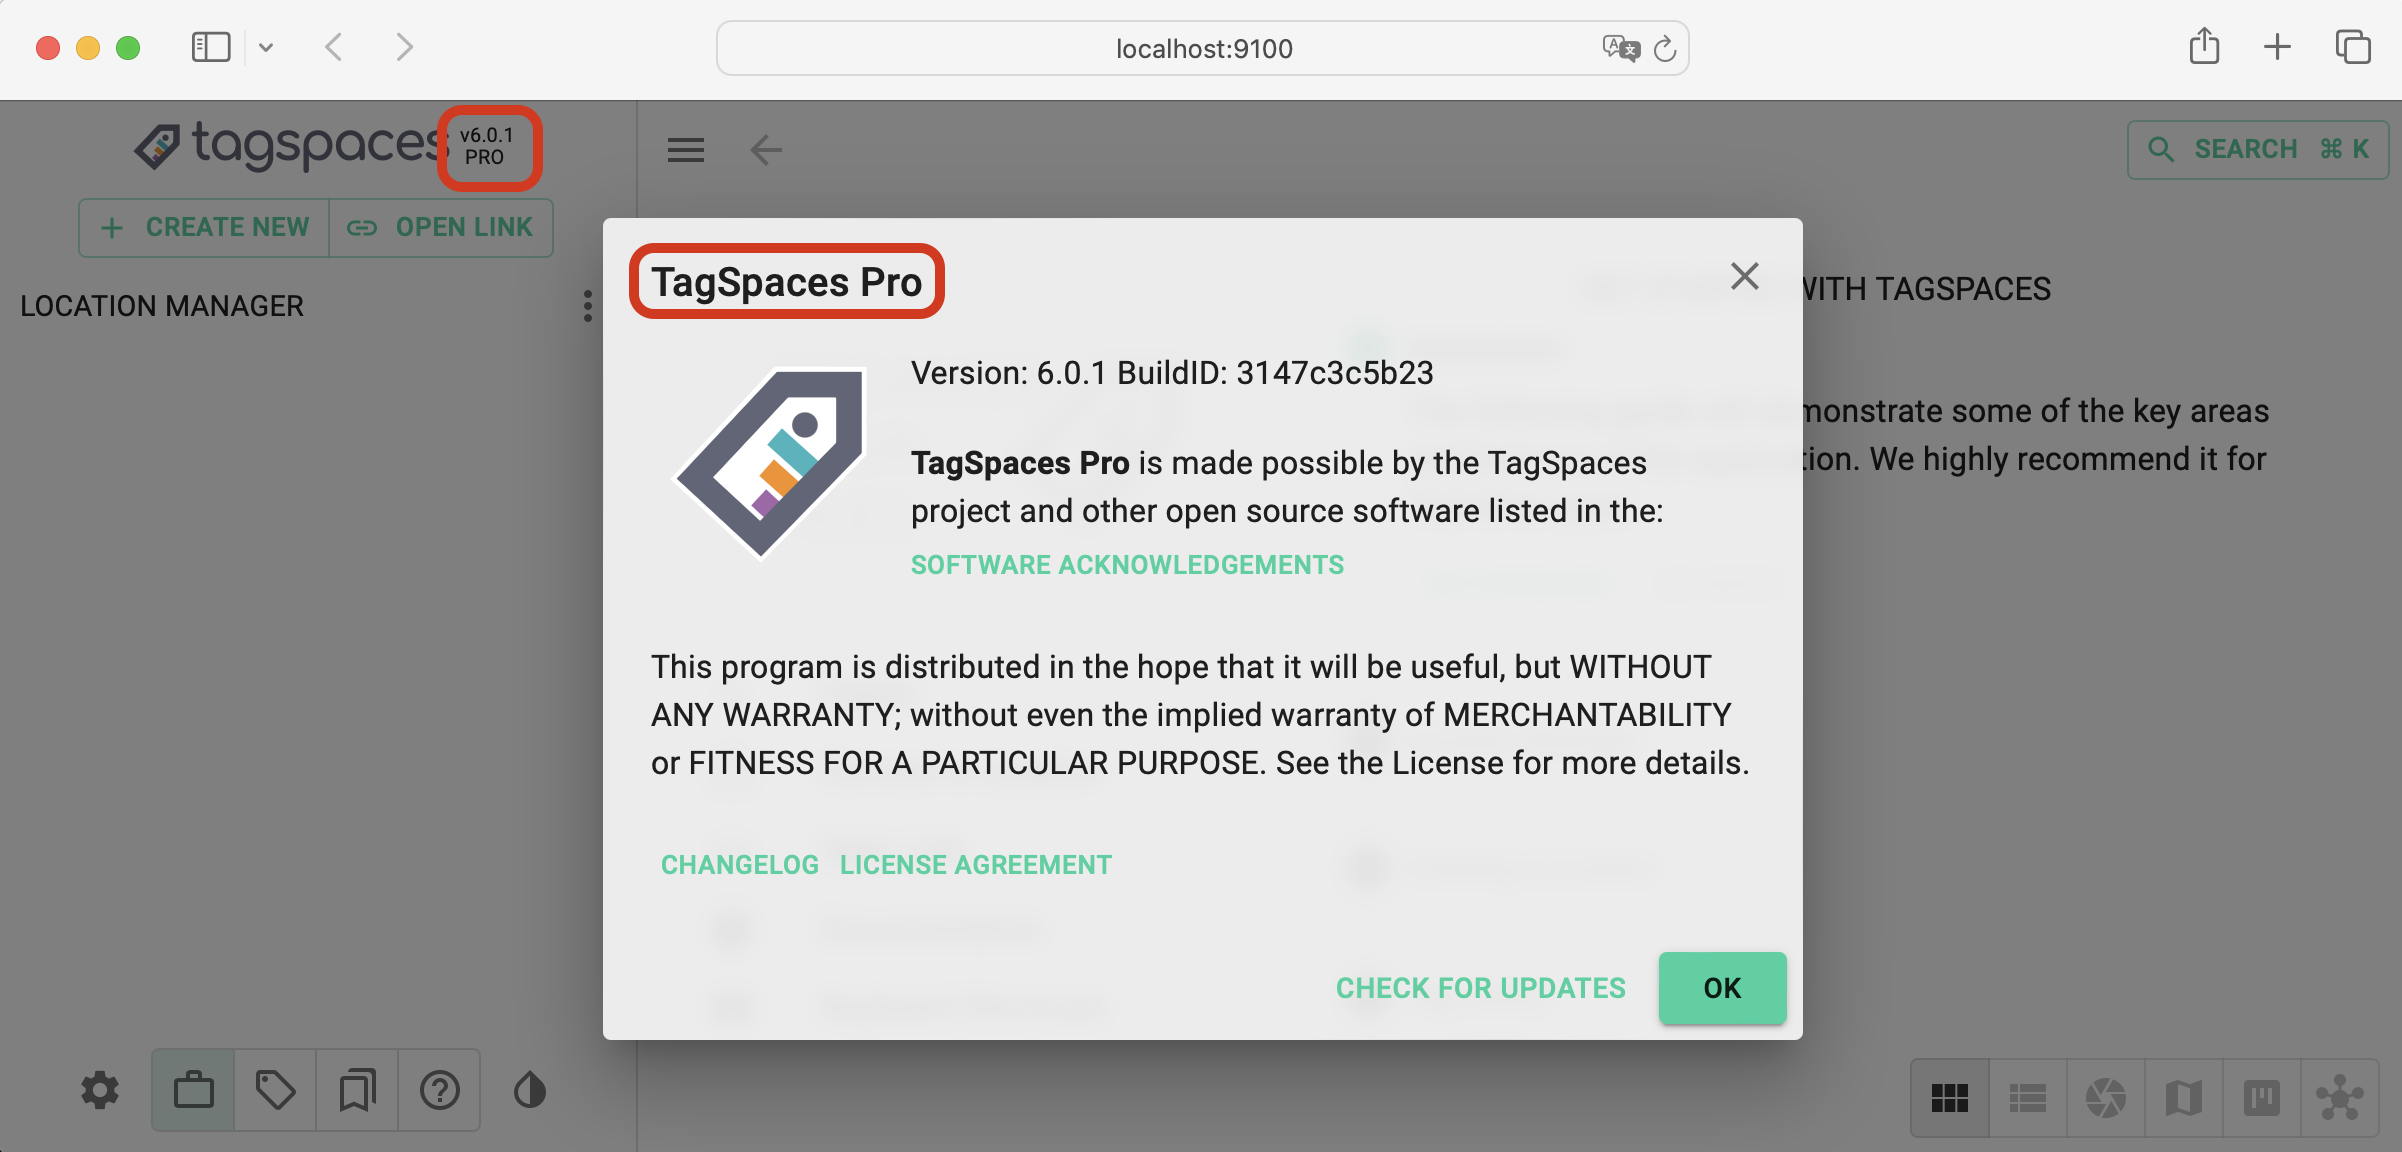
After running the container, open localhost:9100 in your browser. TagSpaces Pro Web should now be loaded.
Enable location configuration data to be stored in the browser
By default, TagSpaces Web does not store location information in the browser to avoid leaving sensitive data in external browsers.
In order to enable storing the location data in the browser, you have to edit the extconfig.js which is located in /usr/share/nginx/html and uncomment the line shown in the next screenshot.
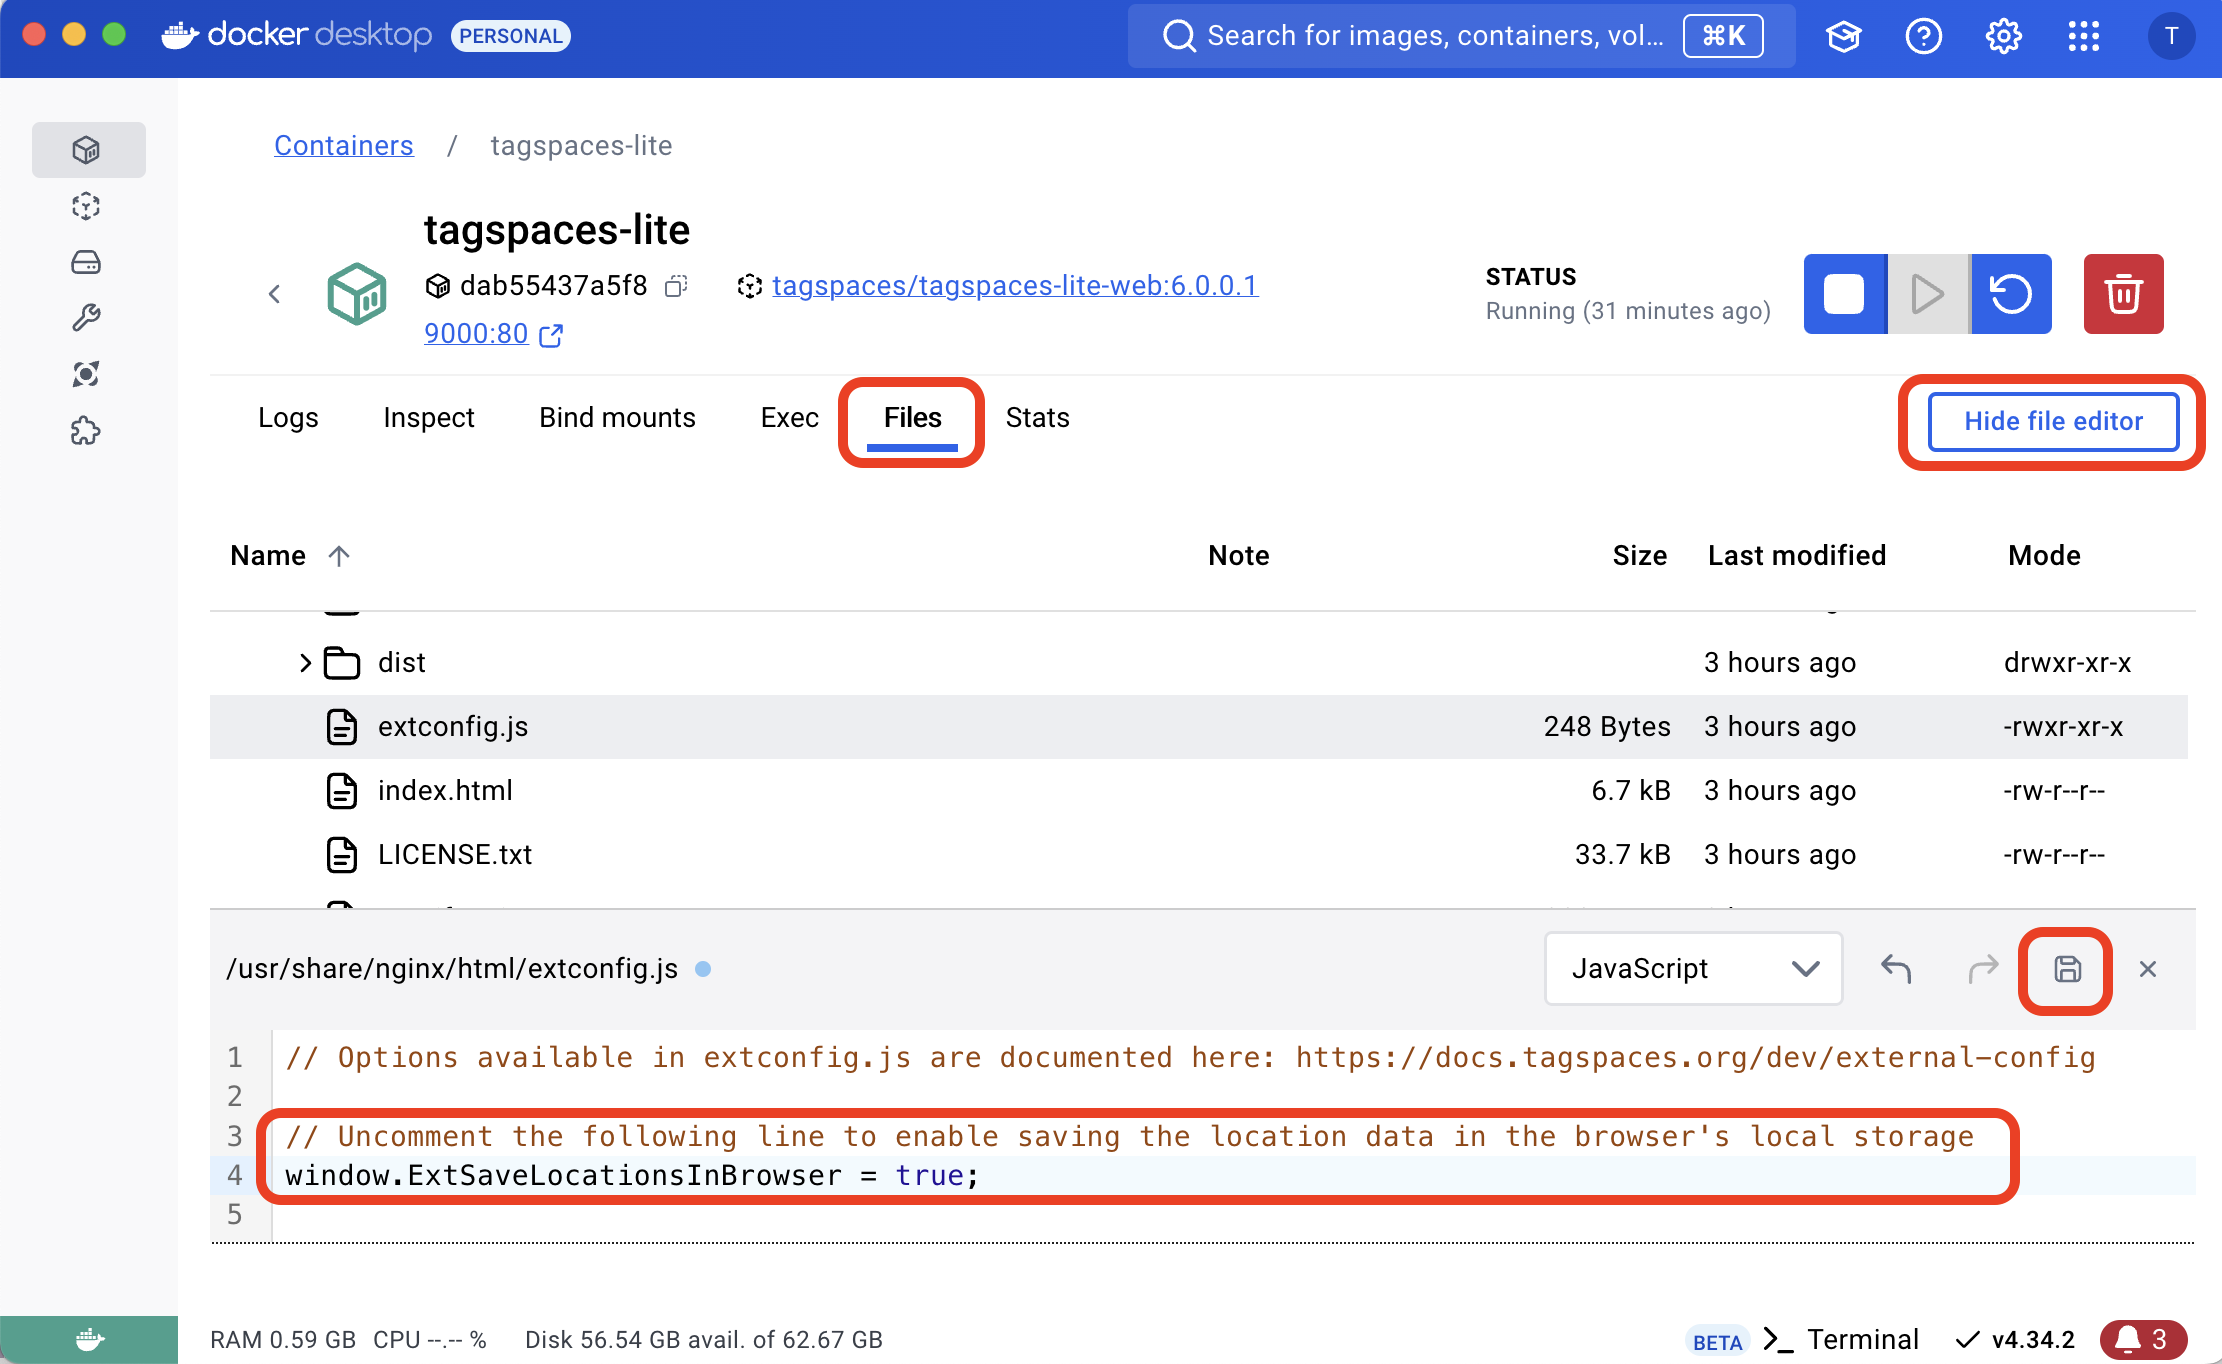
Reload the application in your browser and now on your location data will persisted in the local storage of your browser.
If everything went well you should see the extconfig under this URL: http://localhost:9000/extconfig.js in your browser.

After exchanging the docker image with a newer version, please make sure to enable this setting before loading the updated version in your browser, otherwise you will loose the stored location data in the browser.
Clear local storage of the browser
After enabling this feature and saving location data with access keys for S3 buckets in a browser that is not exclusively used by you (for example, in an internet café or on a colleague’s computer), make sure to clear the browser’s local storage before you leave. Otherwise, anyone who uses the browser after you may gain access to these buckets.
Step to clear the local storage for the TagSpaces web app in the Chrome browser.
- Open develop's mode (e.g. with the F12 key)
- Navigate to tab Application
- Click the Clear site data button
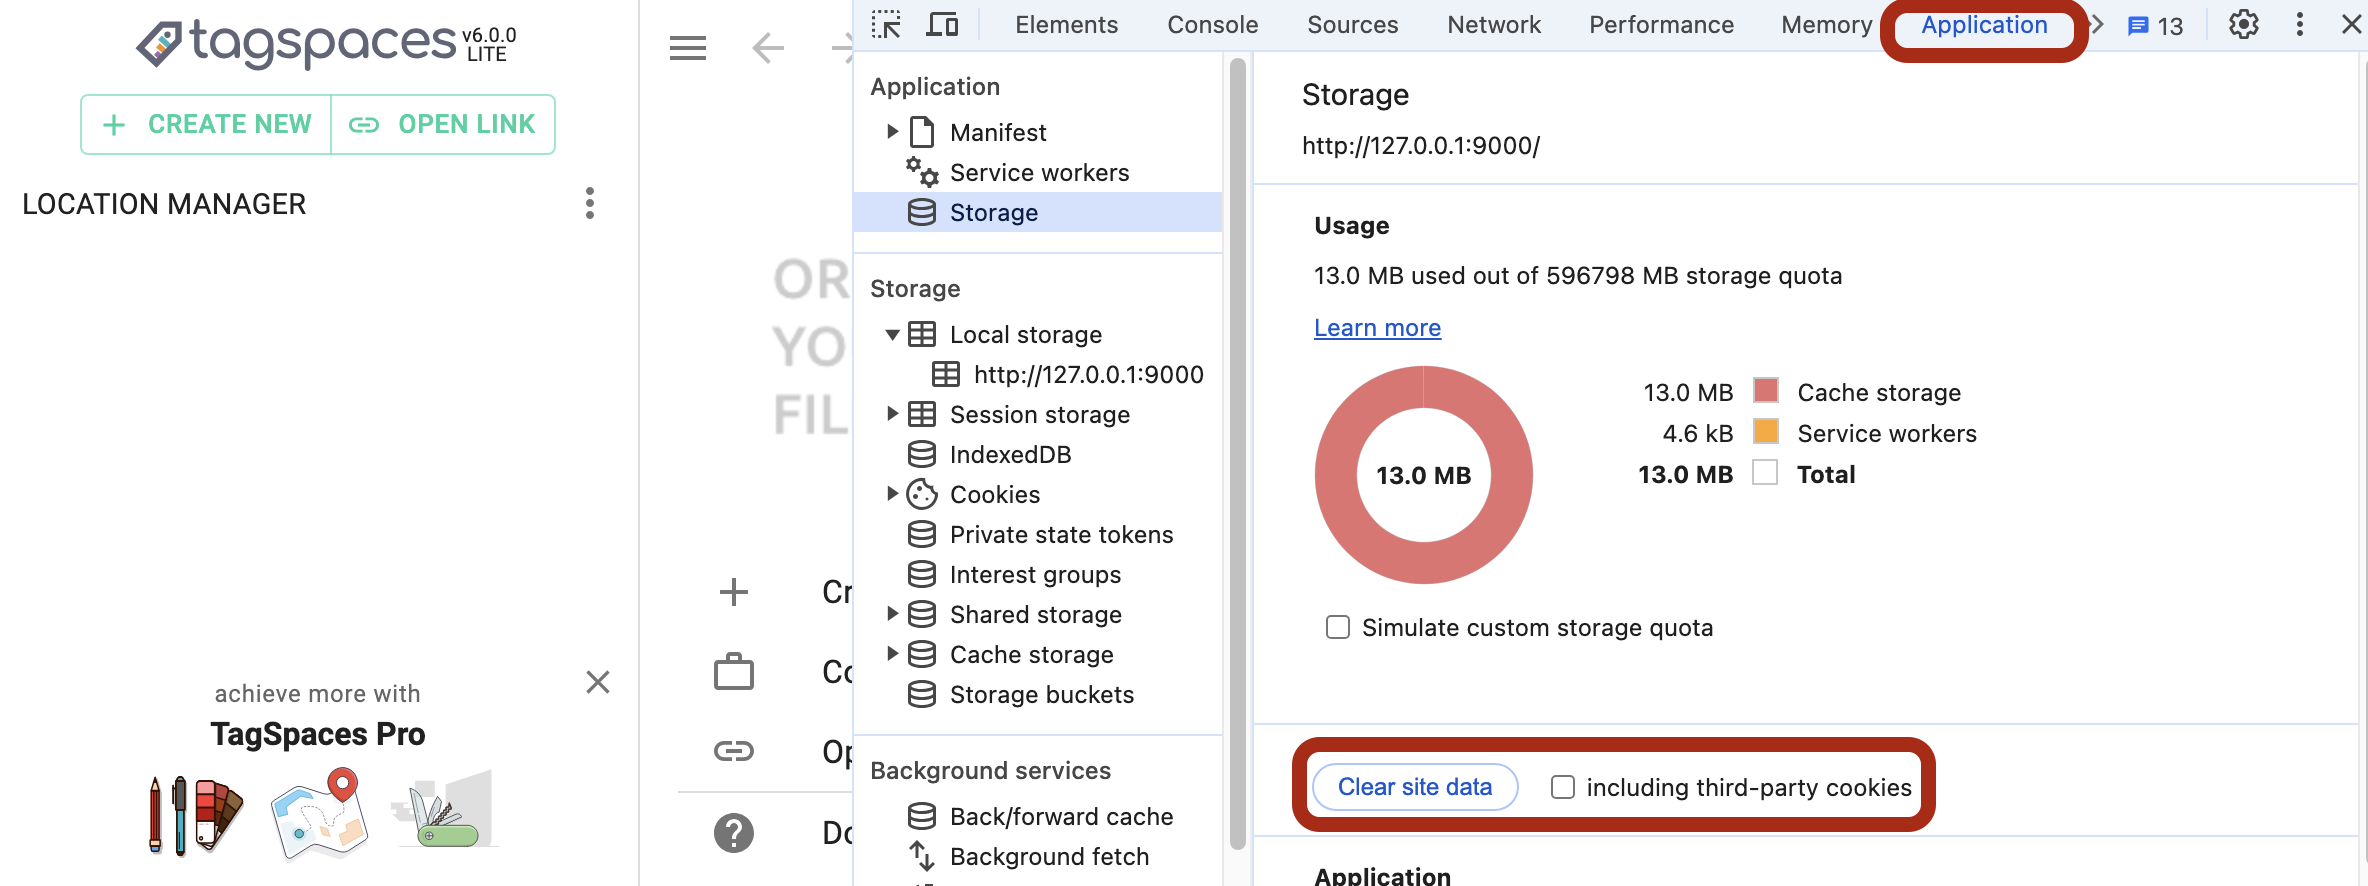
In other browsers the steps are similar.
Connect various S3 object storages as locations
Both versions of TagSpaces Web can connect to S3-compatible object storage. Here are some tutorials for connecting TagSpaces with popular services:
- AWS S3 - Cloud service
- Wasabi - Cloud service
- S3Proxy - Self-hosted
- Minio - Self-hosted
- Cloudflare R2 - Cloud service
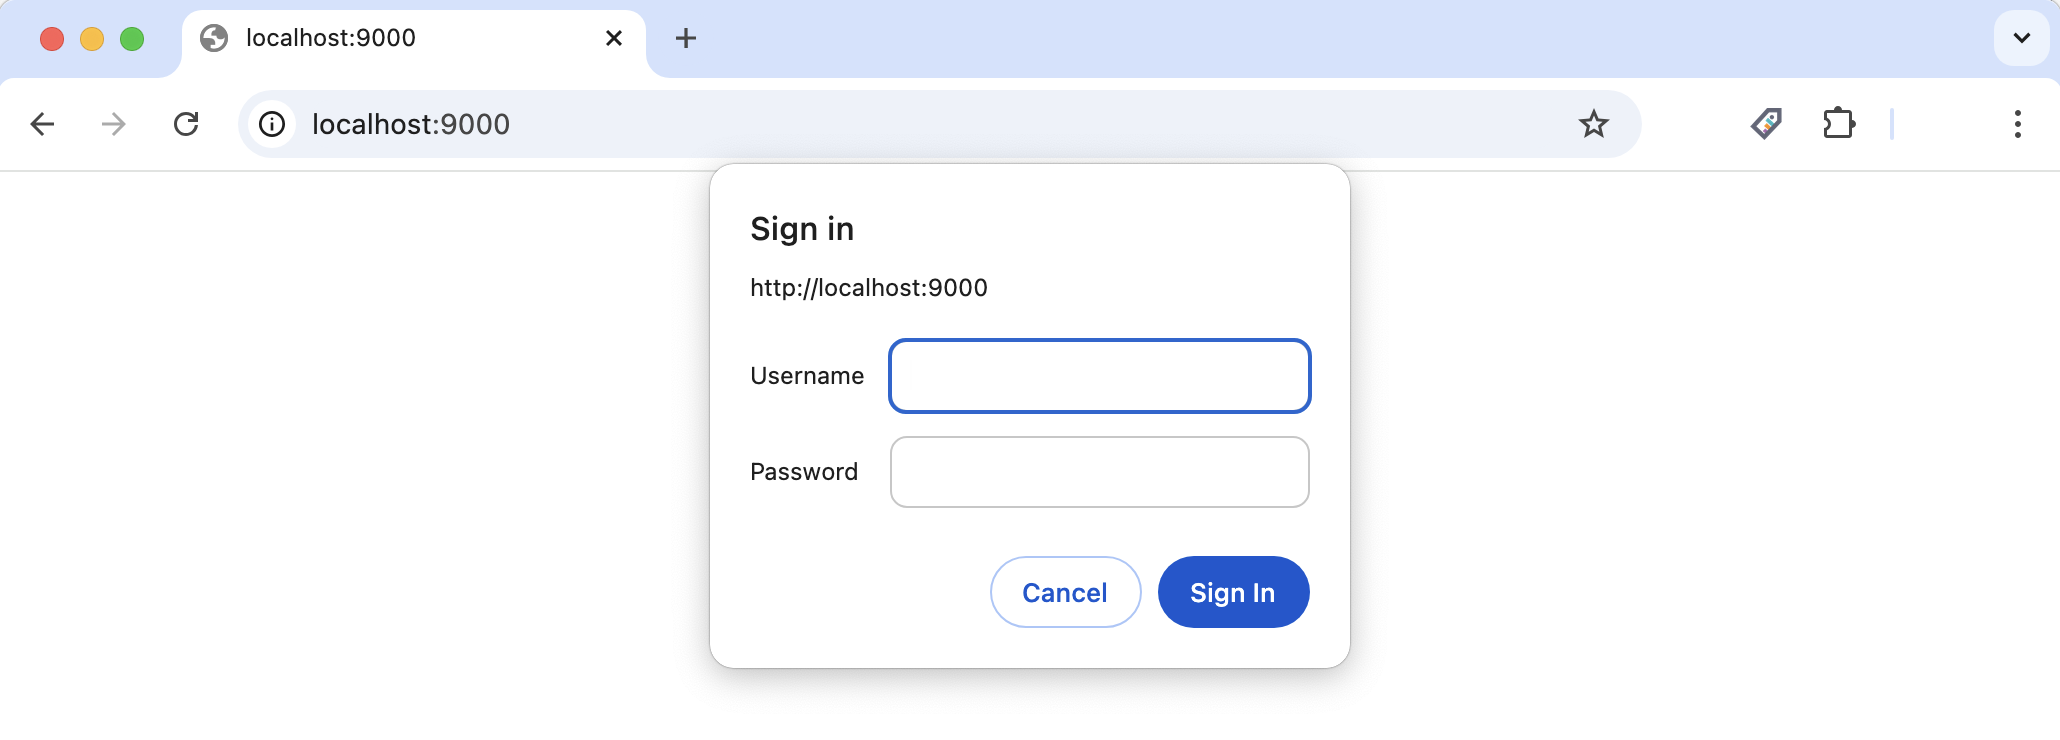
Adding basic authentication
To prevent unauthorized access, you can add basic authentication. Below are steps to configure this using the Nginx documentation.
Make sure the extconfig.js file is inaccessible to unauthorized users, especially if it contains access keys for S3 object storage.
Create a password file
Ensure apache2-utils (Debian/Ubuntu) or httpd-tools (RHEL/CentOS/Oracle Linux) is installed, then create a password file:
sudo htpasswd -c .htpasswd user1
Create additional user-password pairs. Omit the -c flag because the file already exists.
sudo htpasswd .htpasswd user2
Copy the password file to the container
sudo docker cp .htpasswd tagspaces-lite:/etc/nginx/
Modify the nginx configuration file
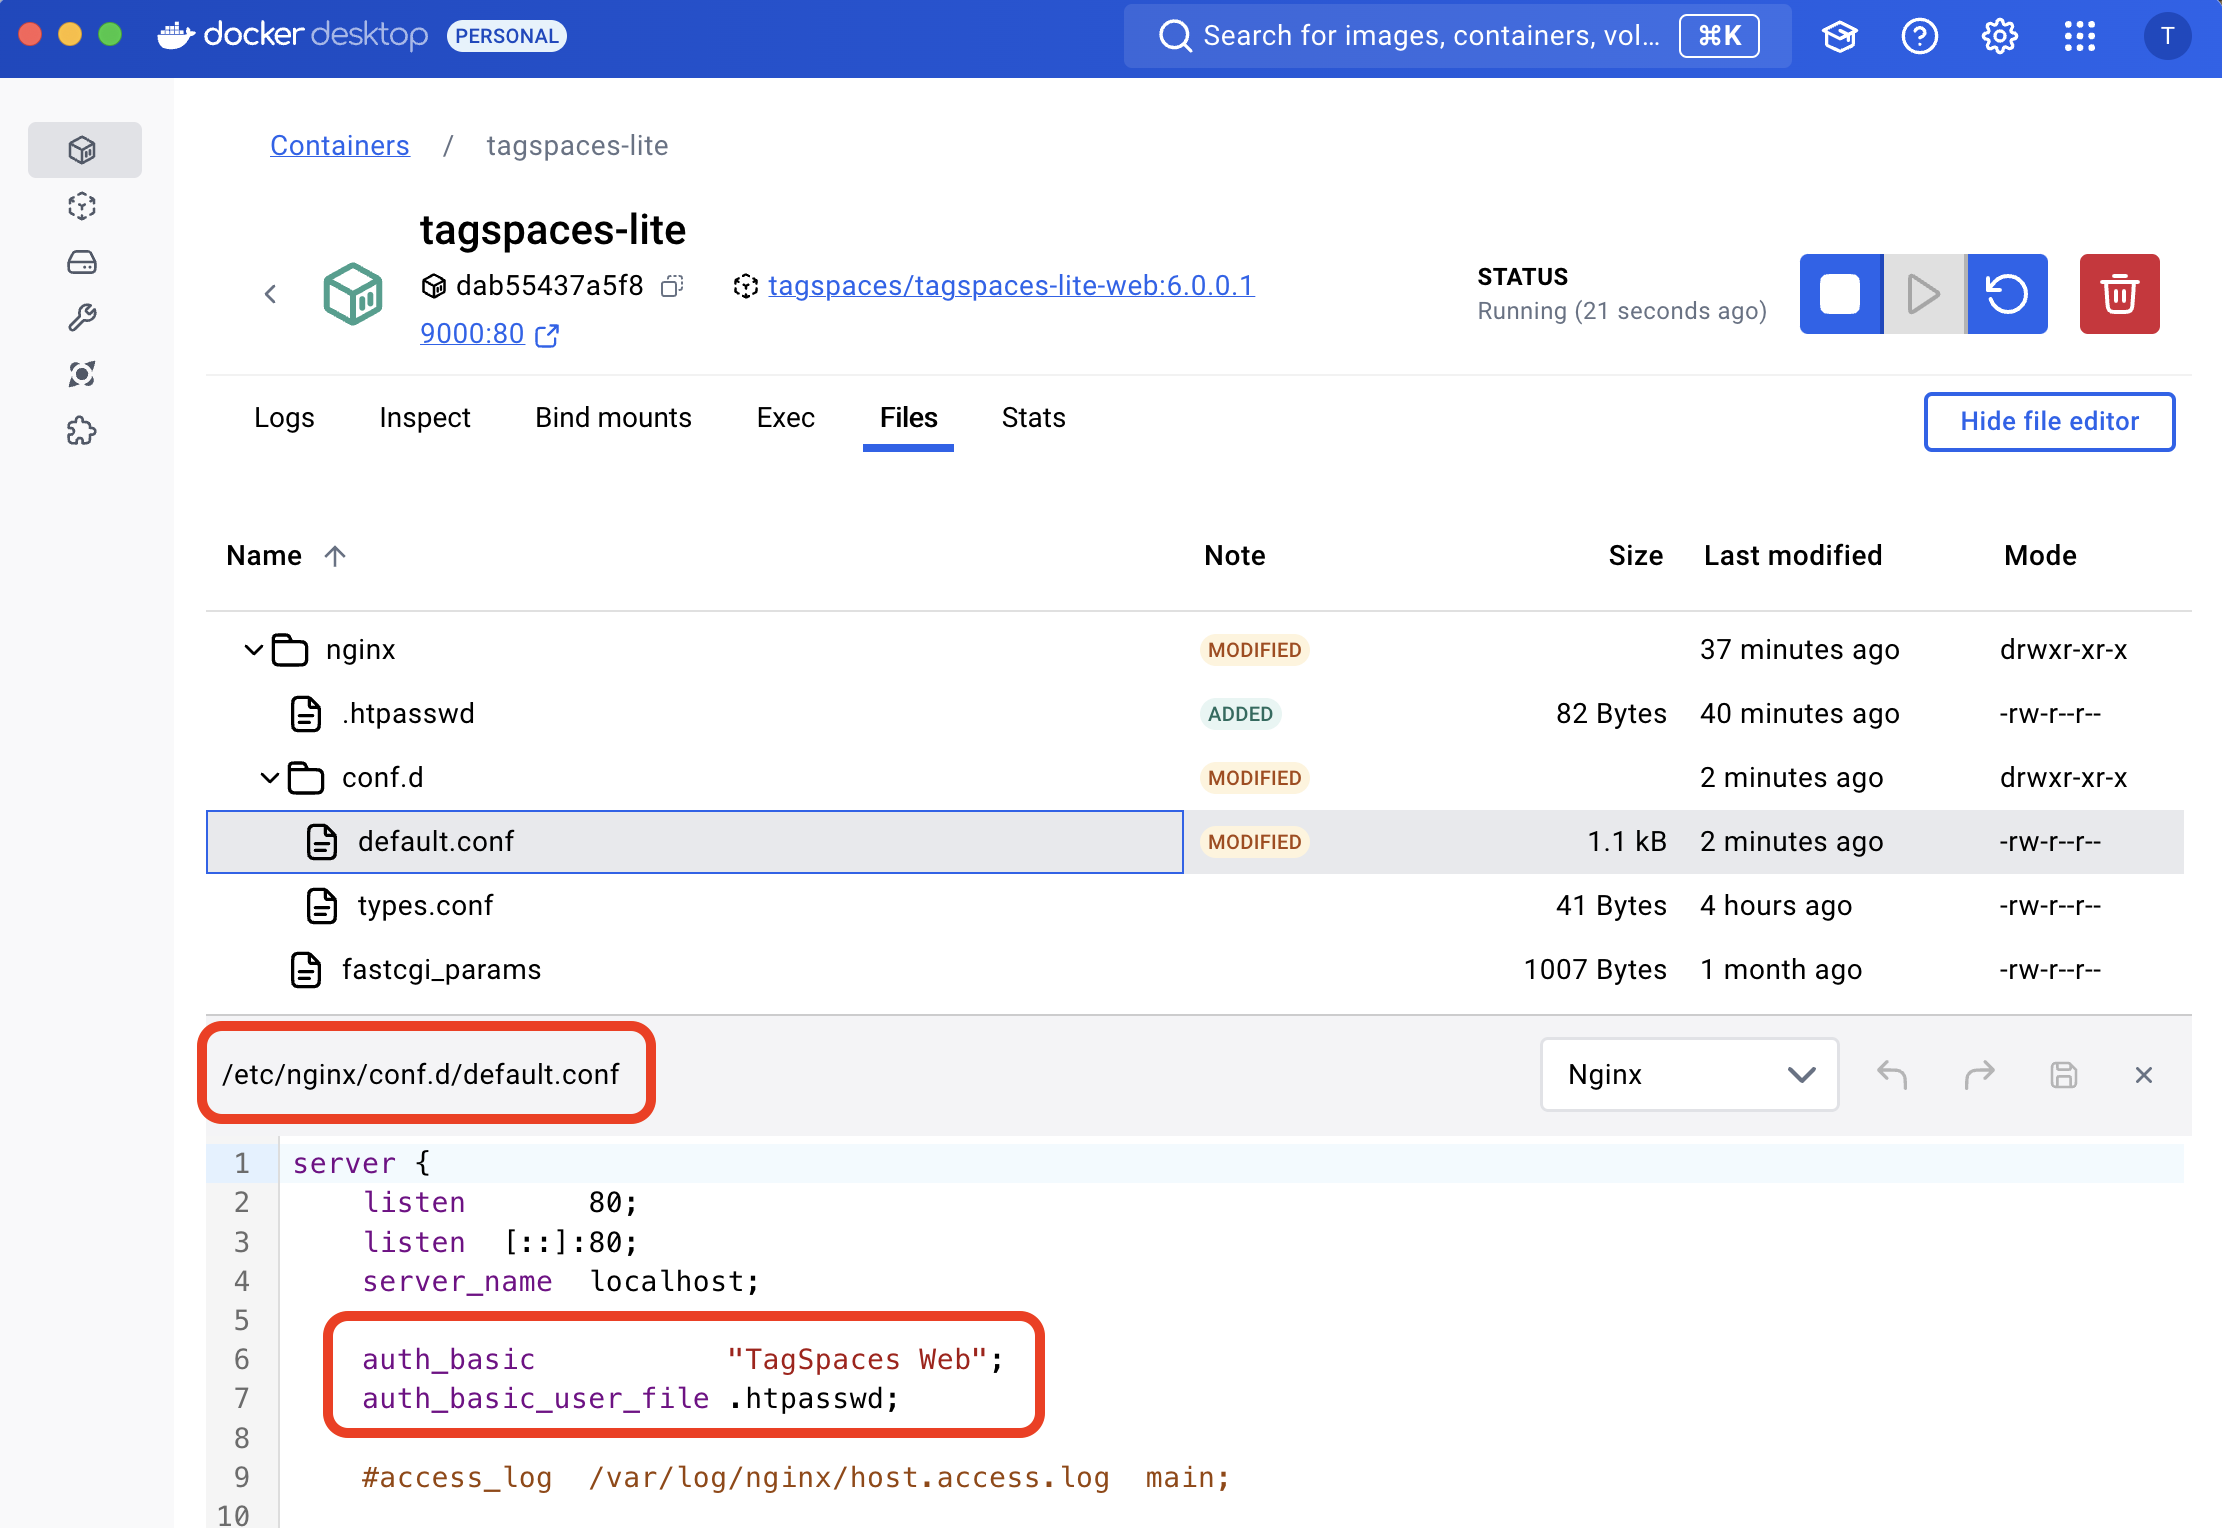
Add the following lines to the server section of the nginx configuration file in the Docker container:
auth_basic "TagSpaces Web";
auth_basic_user_file /etc/nginx/.htpasswd;
The configuration file is located at /etc/nginx/conf.d/default.conf.
Restart the container
After saving the changes and restarting the container, an authentication dialog will appear in the browser. Log in with the credentials created earlier.
Add custom TagSpaces configuration
TagSpaces can be partially configured using an external configuration file called extconfig.js, placed in the root folder of the application.
To add this file to the container, use the following command:
sudo docker cp ./extconfig.js tagspaces-lite:/usr/share/nginx/html/
The configuration file can include your locations or a custom tag library.
Further Options
Installing an SSL certificate from Let's Encrypt
SSL certificates are needed for both your TagSpaces installation and the object storage service (e.g., Minio, Zenko). A helpful tutorial for Ubuntu and Apache can be found here.
Installing a self-signed SSL certificate
TBD