Connecting Claude Code to TagSpaces
This tutorial walks you through wiring Claude Code — Anthropic's command-line AI agent — into a TagSpaces-managed folder, so you can build an AI-powered second brain that handles all your file types: Markdown notes, PDFs, emails, screenshots, voice memo transcripts, web clips, and more.
The pattern below is the file-manager-first counterpart to the popular "Claude Code + Obsidian" recipe, with one key advantage: TagSpaces makes every file in the folder — not only Markdown — a first-class, taggable, searchable knowledge artifact.
This tutorial assumes you're comfortable with the terminal. If you've never used a command line before, start with the First Steps tutorial and come back when you have TagSpaces running with at least one location.
What you'll build
By the end of this tutorial, your setup will look like this:
- A single folder on your computer (e.g.
~/second-brain/) holding a mix of Markdown notes, PDFs, web clips, and other files - That folder is managed by TagSpaces — you can browse, tag, search, and preview anything in it
- The same folder is opened by Claude Code in a terminal, with full filesystem access
- A
CLAUDE.mdandmemory.mdat the folder root teach the agent how your second brain is organized - The TagSpaces Web Clipper saves new captures from the browser straight into the folder
- The
tscmdCLI lets the agent tag, describe, index, and search files programmatically - Optionally, Ollama gives you local AI chat per folder for tasks you don't want to send to a cloud API
Prerequisites
- TagSpaces Lite or Pro installed (any recent version; this tutorial uses ≥ 6.11 features such as the FolderViz Links Graph and
tscmd search) - TagSpaces Web Clipper browser extension for Chrome, Firefox, or Edge
- Claude Code installed and signed in (a Claude Pro or API account is needed to run it)
- Node.js 22+ (for installing
tscmd) - An empty folder you can dedicate to your second brain — referred to throughout as
~/second-brain/. It makes sense to pick a location that's already backed up.
Optional but recommended: Ollama for the local-AI chat per folder.
Step 1 — Create the second-brain folder
Open a terminal and create the folder along with the suggested top-level structure:
mkdir -p ~/second-brain/{raw,wiki,inbox,projects}
cd ~/second-brain
The four subfolders map onto Andrej Karpathy's three-layer knowledge-base pattern, with one addition:
| Folder | Purpose |
|---|---|
raw/ | Raw sources — clipped articles, PDFs, screenshots, transcripts. Read-only material the agent ingests but rewrites only as the wiki layer. |
wiki/ | Compiled knowledge — Markdown notes the agent maintains, with cross-links between them. Karpathy's "wiki" layer. |
inbox/ | Capture buffer — where the Web Clipper drops new content before you triage it into raw/ or projects/. |
projects/ | Active work — one subfolder per project, holding plans, drafts, and Claude Code's session memory for that project. |
You don't have to use exactly these names. The point is to give the agent a predictable shape — Claude Code does much better when your folder structure is consistent and documented in CLAUDE.md.
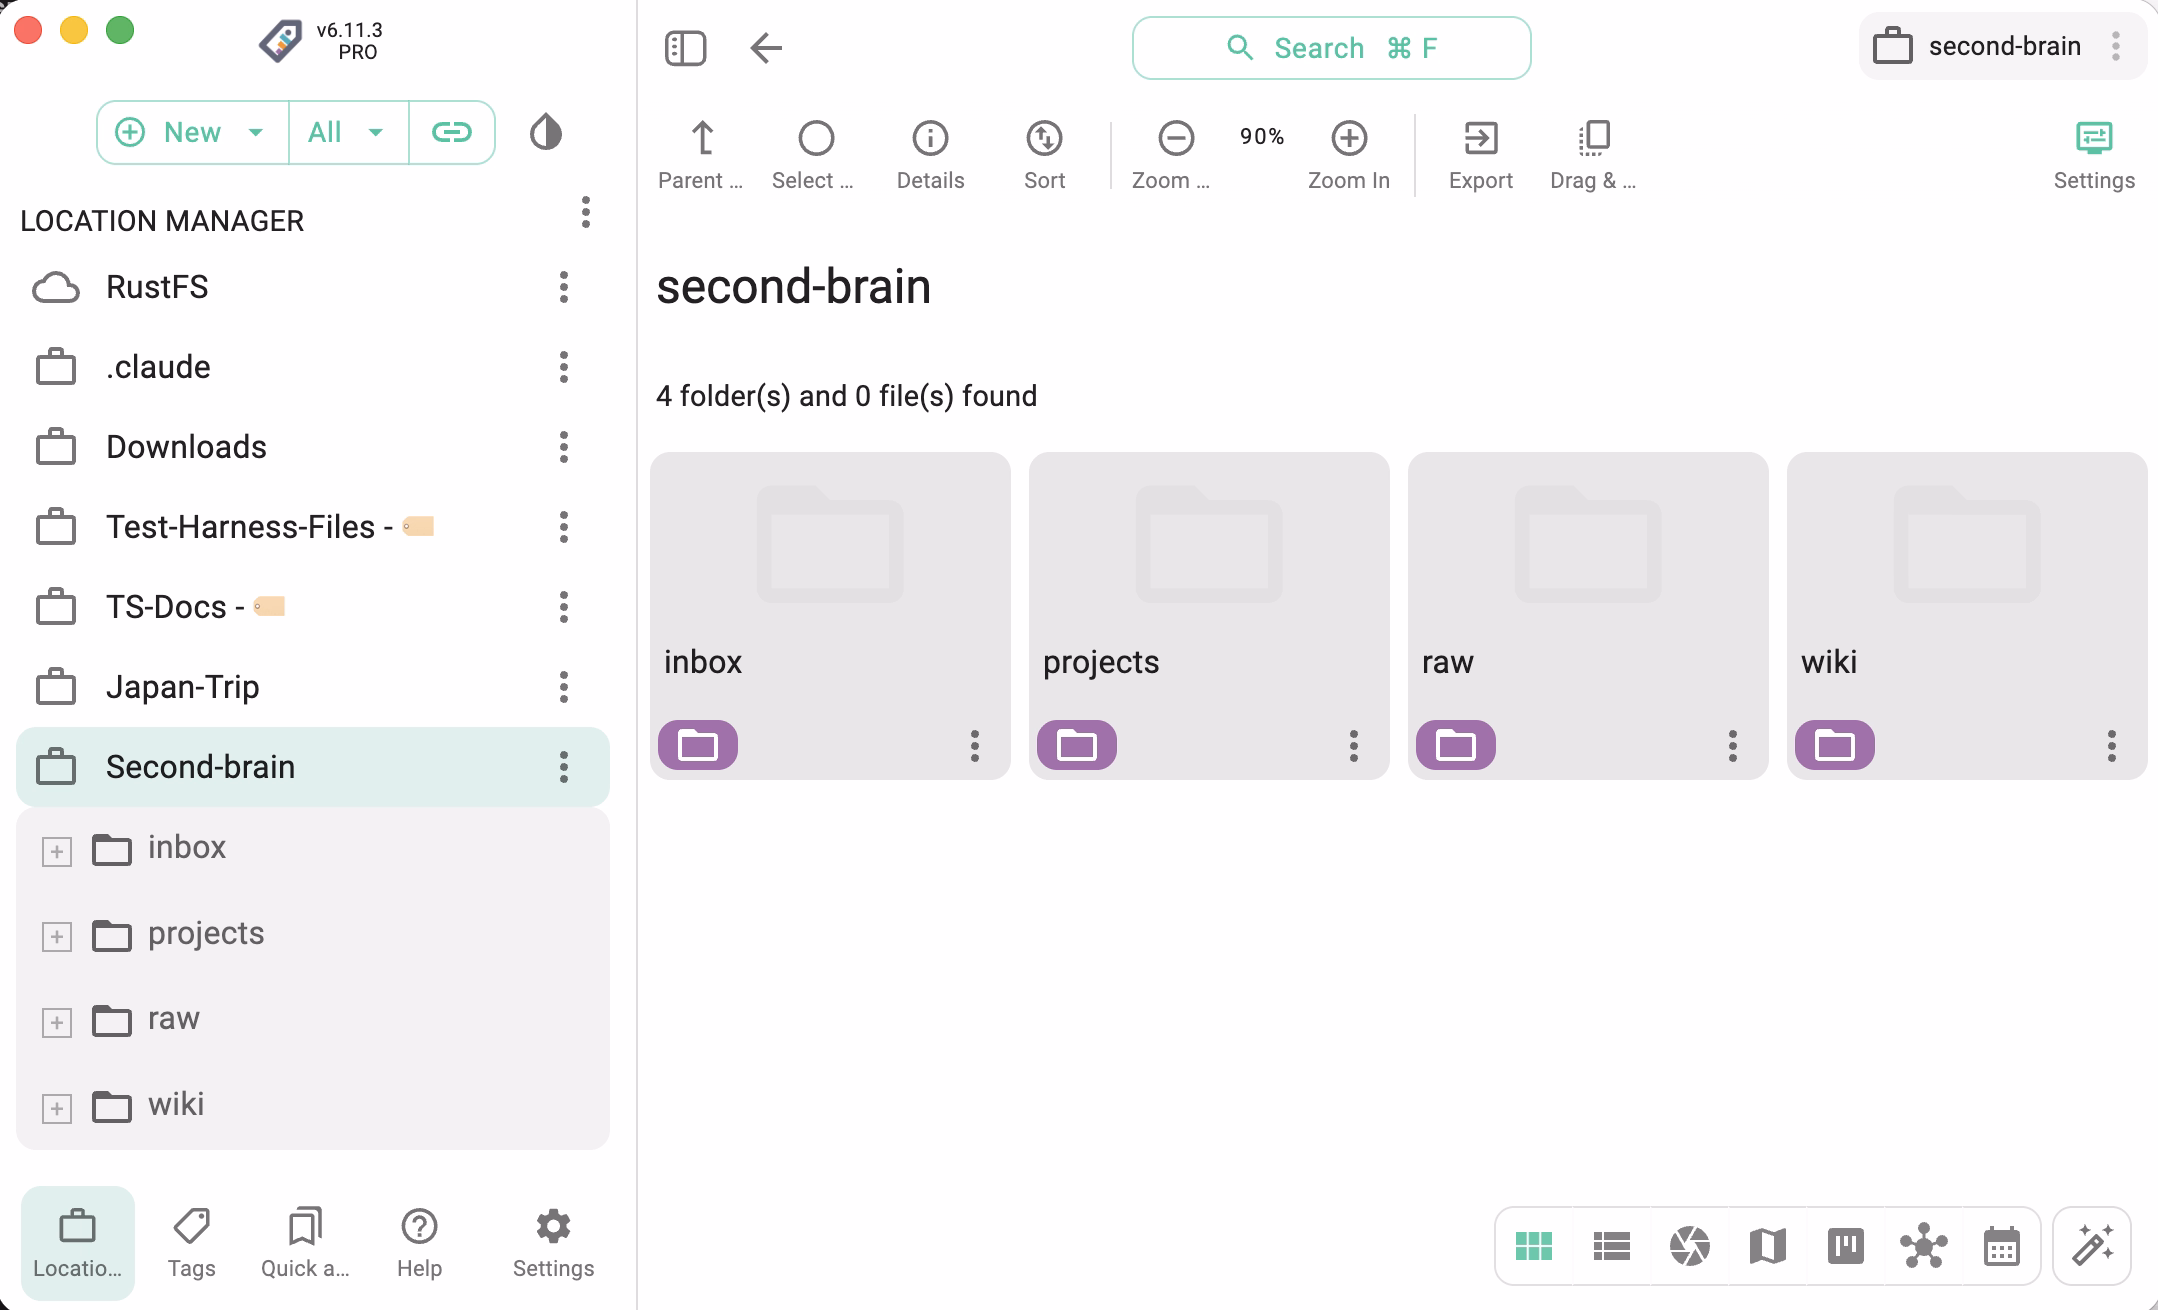
In TagSpaces, click New → New Location and point it at ~/second-brain/. You should now see all four subfolders in the location list.
Set up tags up front
Open the Tag Library in TagSpaces (left sidebar) and create a small set of color-coded tags you'll use across all file types. A workable starter set:
cite— sources you've quoted or want to citeread— already processedunread— captured but not triageddecision— a decision was recorded heredraft— work in progressfinal— published / shipped
These will work the same on a Markdown note, a PDF, an .eml email, and a clipped web page — that's the point of TagSpaces. See the tagging guide for the full reference.
Step 2 — Add CLAUDE.md and memory.md
Claude Code automatically reads CLAUDE.md and memory.md from the working directory at every startup. They are how you teach the agent the conventions of your second brain.
Create ~/second-brain/CLAUDE.md and paste the following starter — adjust to fit your setup:
# Second-Brain Instructions

This folder is a TagSpaces-managed second brain. Files of every type — Markdown notes, PDFs, emails, screenshots, web clips — are first-class, taggable knowledge artifacts.

## Folder layout

- `raw/` — read-only source material (PDFs, clipped articles, transcripts). Do not modify these files. Cite them from `wiki/` notes.
- `wiki/` — Markdown notes you compile and maintain. Use relative links between notes (e.g. `[concept](../wiki/concept.md)`).
- `inbox/` — newly captured items waiting to be triaged. Help me move them into `raw/` or `projects/` and tag them appropriately.
- `projects/<name>/` — active work, with one subfolder per project. Each contains its own `memory.md`.

## Tag conventions

I use these tags consistently across all file types:

- `cite` — quoted or worth citing
- `read` / `unread` — triage state
- `decision` — captures a decision
- `draft` / `final` — writing state

When you tag files, prefer existing tags over inventing new ones. If you do introduce a new tag, mention it explicitly so I can add it to the Tag Library.

## Tooling

- `tscmd` is installed and on the PATH. Use it to tag, describe, index, and search files. See `tscmd --help` or the [docs](https://docs.tagspaces.org/dev/command-line-tools/) for the full command reference.
- For tagging existing files programmatically: `tscmd tag <path> -t <tag1> <tag2>`
- For full-text + tag search: `tscmd search <root> -q "<query>"` with `+tag`, `-tag`, `|tag`, free-text. Always run `tscmd indexer <root>` first if no index exists.
- TagSpaces stores tags either in filenames (e.g. `report[cite read].pdf`) or in `.ts/` sidecar JSON files. Both are readable from any tool.

## How I work with you

- When you summarize, prefer Markdown output saved to `wiki/` over inline answers.
- When citing a file, use the relative path from the second-brain root.
- Don't auto-commit to git; ask first.
If you want that Claude reads also local AI history, add this line to your CLAUDE.md:
- Ollama-powered chat history per folder lives in `<folder>/.ts/ai/tsc.json` — feel free to read past chats for context, but don't write there yourself.
Then create ~/second-brain/memory.md — start it minimal and let Claude Code fill it in over time:
# Memory

_(Claude Code writes session notes, ongoing context, and recent decisions here.)_
Keep CLAUDE.md short and stable — it's read on every startup, so verbosity costs tokens. Push project-specific instructions into projects/<name>/CLAUDE.md. Claude Code merges nested CLAUDE.md files automatically when you change directory.
Step 3 — Point Claude Code at the folder
In a terminal, change into the second-brain folder and start Claude Code:
cd ~/second-brain
claude
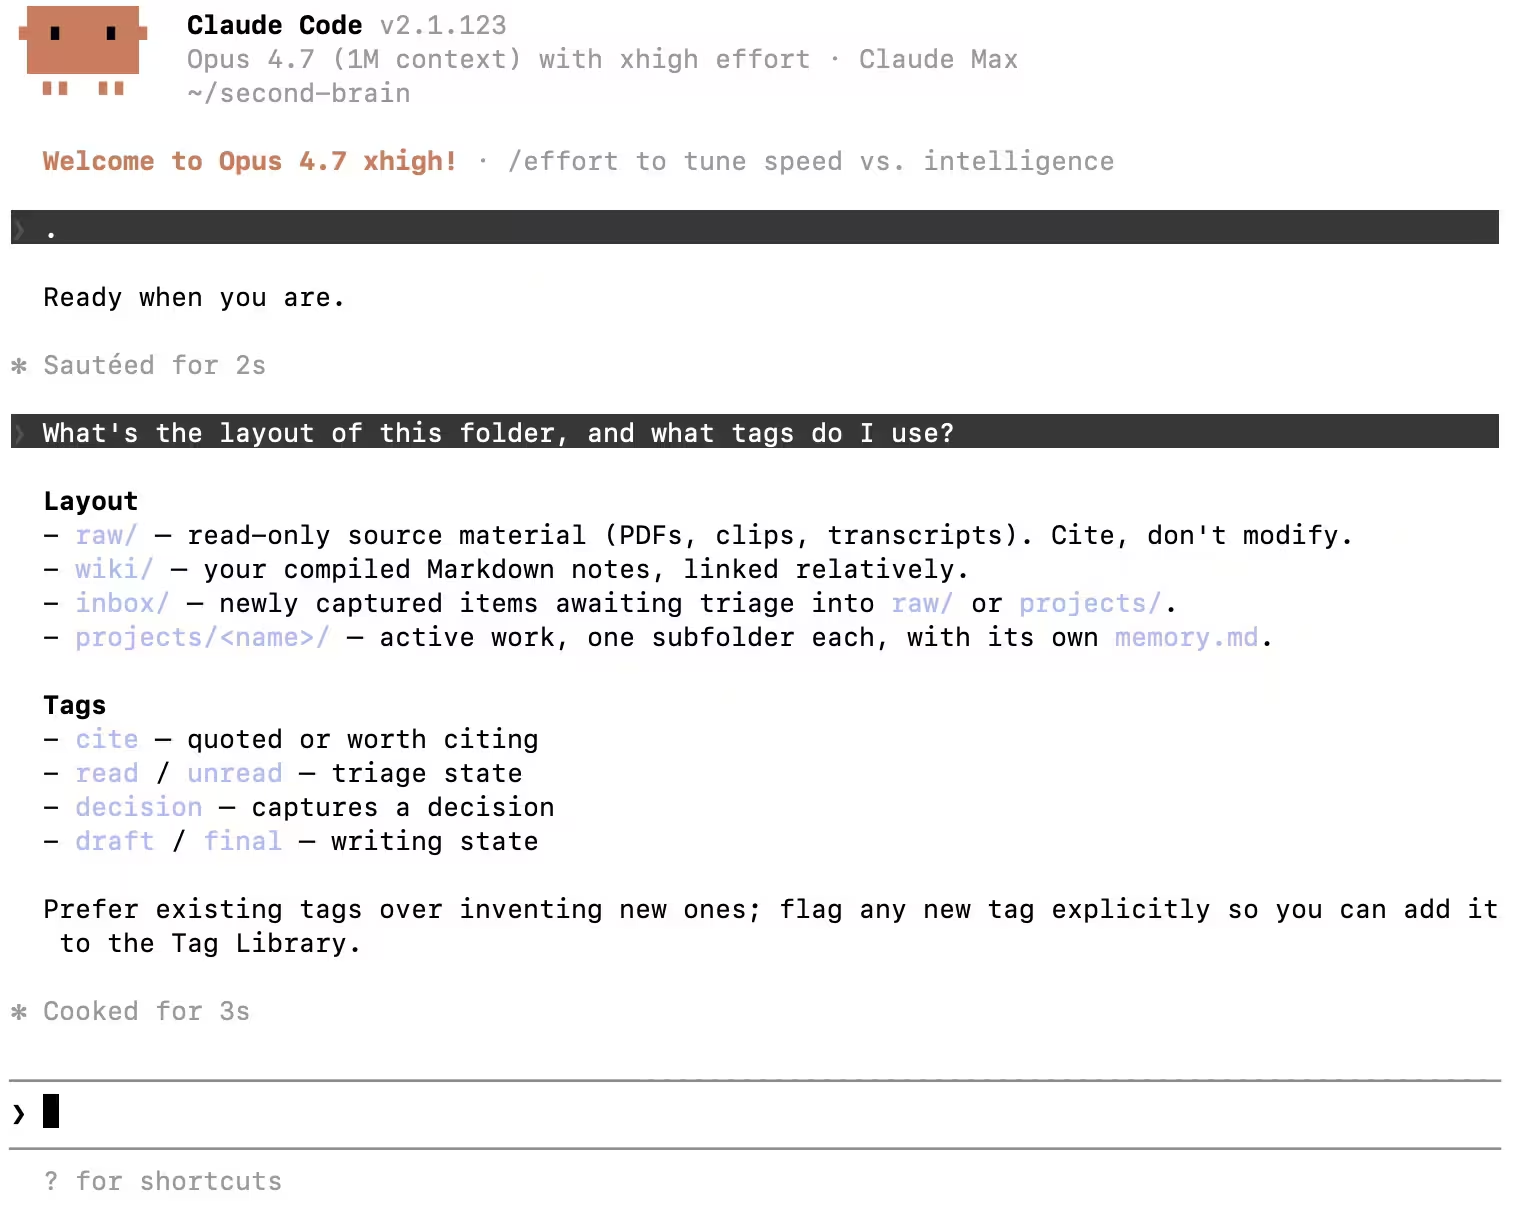
On first start, Claude Code reads CLAUDE.md and memory.md and announces what it found. Verify the connection with a hello query:
> What's the layout of this folder, and what tags do I use?
You should see Claude Code summarize the four subfolders and the tag list directly from your CLAUDE.md. If it asks generic questions instead, your CLAUDE.md was not picked up — confirm it's at the folder root and you started claude from inside ~/second-brain/.
Step 4 — Capture web content with the TagSpaces Web Clipper
This is the ingestion layer. Whenever you want to drop a source into your second brain, the Web Clipper saves it directly to disk — no cloud, no account.
Install the extension
Pick your browser:
The full reference is in the Web Clipper documentation.
Where the captures land
The Web Clipper saves files through your browser's download mechanism — the extension itself has no per-folder save setting, so you decide on each save where the file goes. There are two practical approaches:
- Pick the folder per save. In Chrome / Edge / Brave: open the browser settings → Downloads → enable "Ask where to save each file before downloading". The browser will prompt you on every clip; point it at
~/second-brain/inbox/. The Web Clipper documentation has the full setup at Specify Download Folder for Web Clippings, including a screenshot of the Chrome setting. - Save to the default download folder, then move. Simpler, but adds a manual step: clip with the default settings, then drag the resulting file from
~/Downloads/into~/second-brain/inbox/from inside TagSpaces. Some people like this because the move acts as a triage step.
Either way, captures end up in inbox/, ready for you (or Claude Code) to triage into raw/.
Capture modes
The clipper covers a useful range of formats — pick the one that matches how you'll want to use the artifact later:
| Mode | What it saves | Best for |
|---|---|---|
| HTML | Editable page extracted to .html | Articles you might want to re-render or annotate later |
| Markdown | Same extraction as HTML, but converted to .md | Plain-text notes you'll read or feed to an LLM; YAML frontmatter is added by default |
| Complete page (MHTML / PDF) | Whole page + assets — .mhtml on Chromium, .pdf on Firefox | Long-term archiving — survives site takedowns and paywall changes |
| Selection | Only the highlighted text and images, as .html | Quotes you want to cite without dragging the whole page |
| Screenshot (visible area) | The current viewport as .png | Dashboards, paywalled previews, social posts |
| Full-page screenshot | The entire page stitched into one tall .png | Archiving a page's design / layout in full, including content below the fold |
| Bookmark | A .url file with the page address | Pages you want to revisit but don't need archived |
For an AI second brain, Markdown is often the most useful mode — it's the format Claude Code already prefers, and the YAML frontmatter the clipper writes (source URL, clipping date, tags) gives the agent the citation metadata for free.
Tag on capture
Before saving, the clipper popup lets you set a title and tags. Use this to mark intent at capture time — e.g. tag a research article unread cite climate. The tags are written into the filename (or sidecar) using the same TagSpaces convention, so they're immediately visible in TagSpaces and queryable by tscmd search.

Try it
Clip a research article into inbox/ with the tags unread cite. Switch back to TagSpaces — the file appears in the inbox/ folder with the tags applied and a thumbnail preview. You're now ready to involve Claude Code.
Step 5 — Use tscmd from Claude Code
Claude Code can read and write files directly, but for tagging, indexing, and search across your library it should call tscmd. This keeps the agent's actions consistent with how TagSpaces itself stores metadata.
Install tscmd
npm install -g @tagspaces/shell
tscmd --help
The full command reference is in the Command Line Tools documentation. The four commands you'll use most:
# Build (or refresh) the search index over the whole second brain
tscmd indexer ~/second-brain

# Tag a file
tscmd tag ~/second-brain/inbox/research-article.html -t cite climate read

# Set a description (Claude Code will use this for AI summaries)
tscmd describe ~/second-brain/raw/2024-climate-report.pdf -d "EU Q1 2024 climate risk assessment, 32 pages"

# Search across tags + full text
tscmd search ~/second-brain -q "climate +cite -draft"
The query language for tscmd search supports:
- Bare words → free-text search across content and metadata
+tag→ must have this tag-tag→ must not have this tag|tag→ match any tag in this group (OR logic)--type images|documents|notes→ restrict to a file-type group
Wiring it into Claude Code
In your Claude Code session, ask the agent to triage the inbox:
> Use tscmd to find all unread items in inbox/, then for each one read it, write a one-paragraph summary into wiki/, tag the original with `read`, and link the wiki note to the source with a relative path.
A reasonable agent will run something close to:
tscmd search ~/second-brain/inbox -q "+unread"
# (reads each match, writes a summary file in wiki/, then:)
tscmd tag <each-source> -t read
tscmd indexer ~/second-brain  # refresh the index
You now have a feedback loop: capture → triage → compile → query.
Step 6 — A daily workflow
Putting it all together, a typical day looks like:
- Clip. While reading, hit the Web Clipper and save 2–3 pieces into
inbox/withunread citetags. - Triage. Open Claude Code: "Triage today's inbox — for each
unreaditem, summarize it intowiki/, link the source, tag itread." - Ask. Later, ask: "Across
wiki/andraw/, what does the literature say about <topic>? Cite sources by relative path." Claude Code callstscmd searchand reads the matches before answering. - Refine. When a
wiki/note gets long, ask the agent to split it into several linked notes — relative links + the FolderViz Links Graph will show the new structure. - Browse. Open TagSpaces, switch to the FolderViz perspective on
wiki/, and inspect the Links Graph to see how concepts connect.
After a few weeks, your second brain compounds: new questions get answered against everything you've previously captured, not from scratch.
Troubleshooting
Claude Code doesn't seem to know about my folder layout. Check that CLAUDE.md is at the root of the folder you started claude from, and that the file is named exactly CLAUDE.md (case matters on Linux).
tscmd search returns nothing. Run tscmd indexer ~/second-brain first — search needs an index. Re-run the indexer after large batches of new captures.
Tags applied via Web Clipper don't show up in TagSpaces. Make sure the clipper's save target is inside a TagSpaces location. Tags written to filenames appear immediately; tags in sidecar files require the location to have sidecar tagging enabled (see tagging guide).
Ollama chat is greyed out. Ollama must be running (ollama serve) and reachable at http://localhost:11434. See the AI guide for the full setup.
Further reading
- Build your AI-powered second brain — the use-case page that motivates this tutorial
- Command Line Tools (
tscmd) reference - Web Clipper documentation
- Using AI Models in TagSpaces (Ollama)
- Tagging in TagSpaces
- Andrej Karpathy on LLM-compiled knowledge bases — the conceptual foundation for the
raw/+wiki/split